Playing .psg tunes (or even .asc/.pt3/… tunes) on the MSX (part 1)

This article is somewhat technical. If you just want to listen to a chip tune on WebMSX, maybe go for part 2 instead.

In previous articles I explored the YM2151 and the VGM file format. In this article, we’ll go back a generation and listen to some tunes written for the DSG (doorbell sound generator) PSG (programmable sound generator, i.e., the General Instruments AY-3-8910, or compatibly, Yamaha’s YM2149). PSG files (and particularly ASC files) are mainly used for ZX Spectrum chip tunes (I think), but the MSX has the same sound chip so why not play some chip tunes on the MSX?

Well, before we spend time working on something just slightly above PC beeper music… are there even any decent PSG tunes? Well, I’ve found at least one that like, “Popsa 2”, as is included in the below mix (scroll down a bit) on YouTube for example, and some of the commenters on this video seem to like “Illusion”.

Unfortunately, it doesn’t work in WebMSX (after 20 seconds or so). But it works in all three (NTSC) openMSX machines I bothered to test with, and it also works on my real MSX1 (Hitachi MB-H2). To get it to run in WebMSX, you have to “Set ROM format” -> “KonamiSCC”, but even then it’ll crash after a few minutes (vs. 20 seconds for e.g. ASCII8). For some reason it doesn’t let me choose “Normal”. I’m quite sure it would work with that setting if it were available. :p I’ll look into the matter at some point, probably. Looks like WebMSX will require a patch to work. Patch is submitted and will probably make it into the next version.

This machine produces NTSC color artifacts like there is no tomorrow.

Caution: writing to certain PSG registers is unsafe on certain MSX machines. I don’t think my code writes to these registers, but I didn’t make 100% sure. (However, openMSX gives you a warning when it notices unsafe writes, and I didn’t get a warning.)

“Popsa 2” was made in a program called ASC Sound Master. The “.asc” file can be downloaded here: https://zxart.ee/eng/authors/d/dreamer/popsa-2/. These .asc files are pretty small. They can be converted to PSG using ZXTune (https://bitbucket.org/zxtune/zxtune/) (and from PSG they can easily be converted to e.g. VGM, see bottom of this post), but the resulting files are too large to fit on a regular MSX1 cartridge.

ZXTune compilation and conversion:

git clone https://bitbucket.org/zxtune/zxtune.git
cd zxtune
make platform=linux system.zlib=1 -C apps/zxtune123/ -j4

bin/linux/release/zxtune123 --convert mode=psg,filename=foo.psg -- Dreamer\ -\ POPSA-2\ \(1994\).asc

The original .asc file is 3720 bytes. The resulting .psg is 129028 bytes. If you convert that to VGM, the resulting size is 187342 bytes.

The PSG file format

The PSG file format is very similar in concept to the VGM file format, except that only one chip is supported, the PSG. It seems it’s primarily used for ZX Spectrum chip tunes. As only one chip is supported, you don’t need the “command byte” that indicates what chip is to be written to. So you only have pairs of “register address” and “register value to write”.

There’s also a header in the first 16 bytes. The first three bytes are “PSG”, dunno about the rest.

The PSG only has 16 (IIRC) registers, and some of those aren’t even relevant for sound. In other words, the registers 0x10 to 0xff don’t exist and the designers of this file format used that opportunity to fit in a “wait” command at 0xff (one raster scan, so 1/50s or 1/60s depending on whether the system is PAL or NTSC). There’s also a command that waits multiple raster intervals, 0xfe, and a command that ends the tune, 0xfd. Ignoring the header, here are the first few bytes of the Popsa 2 PSG file:

ff
00 41
01 05
02 0b
03 01
04 e0
05 00
06 1f
07 31
08 0f
09 0f
0a 0a
ff
02 e0
03 00
07 38
09 0d
0a 0c
ff
...

All this means: wait 1 raster interval, then write to registers 00 through 0a with values 41, 05, 0b, 01, …, respectively, wait 1 raster interval, write to registers 02, 03, 07, 09, 0a, with values e0, 00, 38, 0d, 0c, respectively, wait 1 raster interval. (As you can see the 0xff command doesn’t take any parameters.)

Now that we know mostly how this file format works, it’s time to think about how to fit roughly 126 KB of data into my 48 KB cartridge. We could easily use an off-the-shelf compression library, but where’s the fun in that? That’s like… modern programming, ew.

We’ll invent another command for PSG, 0xfc, which takes a two-byte parameter that tells it to jump back somewhere (for a while, and then returns to its original location). We also need to write a program that identifies repetitive sections in the music (of which there are plenty). The former is pretty easy, so let’s talk about the latter program first.

  1. Compute MD5 sums of a 100-byte window for every byte in the file. So we end up with 129028-100=128928 MD5 sums. Easy and fast on modern hardware. See code snippet below.
  2. Check if we even have repeated chunks, e.g. by executing: md5sum chunks/* | awk ‘{print $1}’ | sort -n | uniq -c
  3. We may want to check a couple other window sizes to see if we can get better results. A lower window size means we’ll find more repetition, but we need 3 bytes to encode a jump in our PSG file.
  4. Re-assemble PSG file using a quick-and-dirty and probably somewhat buggy script. (See below.)

The resulting data length is 42158 bytes for the Popsa 2 song.

For task (1) we first convert the PSG file into hex, and later into tokens:

xxd -p Dreamer\ -\ POPSA-2\ \(1994\).psg | sed -r -e 's/(..)/\1 /g' | tr -d '\n' > Dreamer\ -\ POPSA-2\ \(1994\).psg.hex
# Then remove 16-byte header using a standard text editor
cat Dreamer\ -\ POPSA-2\ \(1994\).psg.hex | perl -e '$_ = <STDIN>; while (s/(..) //) { $cmd = $1; if ($cmd eq "ff" or $cmd eq "fd") { print("$cmd\n") } else { s/(..) //; $param = $1; print("$cmd $param\n") } }' > tokens

Then divide the tokens into chunks using the below script, divide_tokens_into_chunks.sh:

#!/bin/bash

N=100 # sliding window length
mkdir -p chunks_N$N
line_count=$(cat tokens | wc -l)
for ((i=0; i<$((line_count-N)); i++)); do
    tail -n +$i tokens | head -n $N > chunks_N$N/chunk_$i
done
rm chunks_N$N/chunk_0 # same as chunk_1

You know, looking back at this code for the first time in a while, I see there’s a nice off-by-1 error and a nice rm command to fix half of the problem. But the great thing about this being a hobby is that I don’t need to care. :)

Next, we have a Perl script that creates our PSG file. It needs some help though, so we do this first:

find chunks_N100/ | xargs md5sum > chunks_N100_md5sums

(We can’t do md5sum chunks_N100/* because that expands to a tad too many arguments in our case. xargs automatically cuts down the number of arguments to a more reasonable value.) This is the main program. Usage: ./compress_aggressive_but_convert_to_psg.pl < chunks_N100_md5sums > foo.psg

#!/usr/bin/perl

# dependencies:
# chunks_N$N/ (directory)
# chunks_N$10_md5sums (file) # example generation: find chunks_N10/ | xargs md5sum > chunks_N10_md5sums

use strict;
use warnings;
use feature "switch";

my $N = 100;

my $md5s = {};
my @chunks;

my $md5;
my $file;

my $debug_logged = 0;
my $lines = [];
my $current_output_byte_number = 0;
for (my $chunk_number = 0; <>; $chunk_number++) {
    /([a-z0-9]+)\s+([a-zA-Z0-9_\/]+)/;
    $md5 = $1;
    $file = $2;
    if (exists $md5s->{$md5}) {
        # can't call chunks that already contain a call because that call would take us beyond the N token window that we can see from where we are
        # that means it's likely we'd generate wrong code
        # so we'll just move on and maybe we'll find a nicer block

        my $target_chunk_number = $md5s->{$md5}->{chunk_number};
        my $concatted_chunks = join('', @chunks[max(0, $target_chunk_number-$N)..min($#chunks, $target_chunk_number+$N)]);
        if (($concatted_chunks =~ /; call/) or # NOTE "call wait_for_raster" is allowed
            ($chunk_number - $target_chunk_number < $N)) {
            # 1) can't convert due to existing call; nothing to be done here, or
            # 2) we can't call something right behind us
            # DANGER let's head back to the non-exists path
            goto NON_EXIST_PATH;
        } else {
            if (!$md5s->{$md5}->{converted_to_call}) {
                convert_to_callable_sub($target_chunk_number);
                $md5s->{$md5}->{converted_to_call} = 1;
            }
            my $output_byte_number_high = int($md5s->{$md5}->{output_byte_number} / 256);
            my $output_byte_number_low = $md5s->{$md5}->{output_byte_number} % 256;
            $chunks[$chunk_number] = sprintf("fc %02x %02x ; call " . $md5s->{$md5}->{output_byte_number} . " ($md5)\n", $output_byte_number_high, $output_byte_number_low);
            $current_output_byte_number += 3;

            # skip next N-1 rows
            for (0..$N-1) {
                my $foo = <>;
                $chunk_number++;
                $chunks[$chunk_number] = "";
            }
        }
    } else {
        $md5s->{$md5} = {};
        $md5s->{$md5}->{chunk_number} = $chunk_number;
        $md5s->{$md5}->{converted_to_call} = 0;
NON_EXIST_PATH:
        open my $fh, '<', $file or die "Can't open \"$file\": $!";
        my $token = <$fh>;
        close $fh;
        my $asm = convert_to_asm($token);
        $md5s->{$md5}->{output_byte_number} = $current_output_byte_number;
        $current_output_byte_number += (scalar(split(" ", $asm)));
        $chunks[$chunk_number] = $asm;
    }
}

print foreach @chunks;

print "infloop:
    jr infloop\n";

# no changes needed
sub convert_to_callable_sub($) {
    my $block_number = shift;
}

# don't actually do anything here
sub convert_to_asm($) {
    my $string = shift;
    return "$string";
}

sub min($$) {
    my ($a, $b) = @_;
    return $a if ($a < $b);
    return $b;
}
sub max($$) {
    my ($a, $b) = @_;
    return $a if ($a > $b);
    return $b;
}

The output of this program is in hex. Now we just need some assembly code to read the data and put it into the PSG registers. Here’s the core part:

ld hl,psg_begin
main_loop:
    ld a,(hl)
    cp 0xff
    jr z,wait
    cp 0xfe
    jr z,wait_n_times
    cp 0xfd
    jr z,end
    cp 0xfc
    jr z,jump
    jr register_write
inc_loop:
    inc hl
    jr loop

wait:
    call wait_for_raster
    jr inc_loop

register_write:
    ld a,(hl)
    out (0xa0),a
    inc hl
    ld a,(hl)
    out (0xa1),a
    jr inc_loop

wait_for_raster:
    in a,(0x99)
    and 128
    cp 128
    jr nz,wait_for_raster
    ret

psg_begin:
    include "foo.psg"
ds 010000h-$ ; fill rest with 0s

Understanding the above should help understanding the full implementation. (The above doesn’t include the code for the 0xfe, 0xfd, and 0xfc commands.) Note that we can’t use the above wait_for_raster on NTSC machines because the tune assumes 50 Hz. So we’ll instead emulate the 50 Hz interval using a busy loop.

For 0xfd (end of song), we just enter an infinite loop. For 0xfe, we just call wait_for_raster multiple times. For 0xfc, we need to store where we left off, then set hl to the address in the parameter, then execute exactly 100 main loop runs, then set hl back to its previous address and continue as normal.

Here’s the code, which also includes some VRAM writes to visualize the music a little bit. Does it look good? Eh, I dunno. It was an experiment. I changed the registers to be displayed because some registers don’t see updates very often. The overall visuals are a bit noisy, but there is one section that looks good in my opinion, and it’s also the section that I like best in the tune, right at the end. You can clearly see one of the registers changing right in sync with the doorbell sound. (It looks even more in sync in openMSX.)

N: equ 100

org 4000H
db "AB"
dw entry_point
db 00,00,00,00,00,00,00,00,00,00,00,00

SetVdpWrite: macro high low ; from http://map.grauw.nl/articles/vdp_tut.php
    ld a,low
    out (0x99),a
    ld a,high
    add 0x40
    out (0x99),a
endm

vpoke: macro value
    ld a,value
    out (0x98),a
endm

entry_point:
    ; copy cart rom (c000-f000) to ram
    in a,(0a8h)
    and 11000000b ; we want to know which slot is RAM, and AFAIK RAM should be mapped in at 0xc000-0xffff.
    ld c,a ; save value for later
    in a,(0a8h)
    and 00001100b ; we are executing from cartridge ROM at 0x4000~0x7fff, so the 2-bit value for this region is known correct. we just have to make the slots above this one the same value.
    ld b,a ; save a
    rla ; << 1 (now have 000xx000b)
    rla ; << 1 (now have 00xx0000b)
    or b ; | saved b (now have 00xxxx00b)
    rla ; << 1 (now have 0xxxx000b)
    rla ; << 1 (now have xxxx0000b)
    or b ; | saved b (now have xxxxxx00b)
;     ld a,01010100b ; set pages 0: rom 1: rom 2: cart 3: cart
    out (0a8h),a
copy_c000_f000:
    ld hl,0c000h ; start at c000
copy_c000_f000_loop:
    ld a,(hl) ; read from ROM address (hl)
    ld d,a
    in a,(0a8h)
    ld b,a ; store original value
    and 00111111b ; only keep settings for lower three slots
    or c ; add in setting for top slot (saved earlier)
;     ld a,011010100b
    out (0a8h),a ; set port
    ld (hl),d ; store value read from ROM address (hl) to RAM address (also hl of course)
    ld a,b ; load a with original value
    out (0a8h),a ; set port back
    inc hl
    ld a,h
    cp 0f0h
    jp z,other_init ; done with this copy
    jp copy_c000_f000_loop

; entry_point:
;     ld a,0xd4
;     out (0xa8),a ; set slots
other_init:
    ; set ports to bios:cart:cart:ram
    in a,(0a8h)
    and 00111111b ; only keep settings for lower three slots
    or c ; add in setting for top slot (saved earlier)
    out (0a8h),a ; set port
    ; set colors
    ld a,011110000b ; set data to be written into register (white on black)
    out (099h),a
    ld a,010000111b ; set register number (7)
    out (099h),a
    SetVdpWrite 0x20 0x05
    vpoke 0x0f ; set white on black for some part of the screen
    vpoke 0x0f ; set white on black for some other part of the screen
video_init:
    ; put chars /0123456789 into 0x1800-0x1AFF
    SetVdpWrite 0x18 0x00
    ld b,64 ; 64 chars
video_loop_1:
    vpoke 0x2f
    djnz video_loop_1
    ld b,64 ; 64 chars
video_loop_2:
    vpoke 0x2f
    djnz video_loop_2
    ld b,64 ; 64 chars
video_loop_3:
    vpoke 0x33
    djnz video_loop_3
    ld b,64 ; 64 chars
video_loop_4:
    vpoke 0x33
    djnz video_loop_4
    ld b,64 ; 64 chars
video_loop_5:
    vpoke 0x36
    djnz video_loop_5
    ld b,64 ; 64 chars
video_loop_6:
    vpoke 0x36
    djnz video_loop_6
    ld b,64 ; 64 chars
video_loop_7:
    vpoke 0x31
    djnz video_loop_7
    ld b,64 ; 64 chars
video_loop_8:
    vpoke 0x31
    djnz video_loop_8
    ld b,64 ; 64 chars
video_loop_9:
    vpoke 0x35
    djnz video_loop_9
    ld b,64 ; 64 chars
video_loop_10:
    vpoke 0x35
    djnz video_loop_10
    ld b,64 ; 64 chars
video_loop_11:
    vpoke 0x37
    djnz video_loop_11
    ld b,64 ; 64 chars
video_loop_12:
    vpoke 0x37
    djnz video_loop_12
    ld b,64 ; 64 chars
    
    ld b,0 ; flag to indicate whether we are jumping around at the moment (0 means we aren't) (NOTE: nested jumping isn't supported)
    ld c,0xa0 ; first PSG port
    ld hl,psg_begin
    jr main_loop

loop:
    ld a,b
    cp 0
    jr z,main_loop ; b isn't set so just head back to the loop
    pop af
    dec a
    cp -1
    jr z,restore_hl
    push af ; don't need this on the stack if we go to restore_hl, so place it after the jump
    jr main_loop
restore_hl:
    ld b,0 ; unset flag
    pop hl
    inc hl
    ; and continue executing into loop
main_loop:
    ld a,(hl)
    cp 0xff
    jr z,wait
    cp 0xfe
    jr z,wait_n_times
    cp 0xfd
    jr z,end
    cp 0xfc
    jr z,jump
    jr register_write
inc_loop:
    inc hl
    jr loop

wait:
    call wait_for_raster_50hz_emu
    jr inc_loop

wait_n_times: ; safe to assume that param isn't 0
    push bc
    inc hl
    ld b,(hl)
wait_n_times_loop:
    call wait_for_raster_50hz_emu
    djnz wait_n_times_loop
    pop bc
    jr inc_loop

end:
    jr end ; infinite loop

jump:
    inc hl
    ld d,(hl)
    inc hl
    ld e,(hl)
    push hl
    ld b,1 ; signal that we're calling a previous segment
    ld a,N ; we want to execute N instructions before going back to where we left off
    push af
    ld hl,psg_begin
    add hl,de
    jr loop

register_write:
    ld a,(hl)
    out (c),a

    ; really we only need ld a,(hl) and out (0xa1),a, but let's poke around in the VRAM to make this program slightly less boring
    ; we'll modify the tile definitions of characters /, 0, ..., 9 (8 bytes each starting at 0x178) and just put in the same value we're writing to the PSG register
    or a ; clear carry flag to make rla behave
    ; a = a*8 for vram write address
    rla ; *2
    rla ; *2 (*2*2 == *4)
    rla ; *2 (*2*2*2 == *8)
    ld d,a ; vram write address
    inc hl
    ld a,(hl)
    ld e,a ; vram write value
    out (0xa1),a
    ld a,0x78
    add a,d ; vram address low byte is 0x78 + (psg register)*8

    ; color change code currently commented out because it's not very pleasant to look at
;     ; let's also change some colors when register 5 is written to, which doesn't appear to happen very often
;     ; for register 5 a is 5*8 + 0x78 = 0xa0
;     cp 0xa0
;     jr nz,skip_color_change
;     ld d,a
;     ld a,e
;     out (099h),a
;     ld a,010000111b ; set register number (7)
;     out (099h),a
;     ld a,d
skip_color_change:
    SetVdpWrite 1 a ; vram address high byte is 1 (full address: 0x178)
    vpoke e
    vpoke e
    vpoke e
    vpoke e
    vpoke e
    vpoke e
    vpoke e
    vpoke e

    jr inc_loop

wait_for_raster:
    in a,(0x99)
    and 128
    cp 128
    jr nz,wait_for_raster
    ret

wait_for_raster_50hz_emu:
    ; CPU clock is 3579545 Hz
    ; decrement and loop routine takes 36 instructions per loop run (wait_for_raster_50hz_emu_loop up to (not including) low_0)
    ; (https://www.overtakenbyevents.com/tstates/)
    ; want routine to finish in 1/50 or a second, so:
    ; 3579545/50/36=1988.636111111111, let's very scientifically, er, let's throw out that whole calculation and say 1650 because we have overhead and I have experimentally determined that to sound close enough to the original :p
    ; our overhead varies depending on code path. some rhythm problems are audible, but not _too_ terrible
    ld de,1650
wait_for_raster_50hz_emu_loop:
    dec de
    ld a,e
    cp 0
    jr z,low_0
    jr wait_for_raster_50hz_emu_loop
low_0:
    ld a,d
    cp 0
    jr z,high_low_0
    jr wait_for_raster_50hz_emu_loop
high_low_0:
    ret

psg_begin:
include "foo.psg"

ds 010000h-$

Compiles with z80asm. Other assemblers might need some tweaks.

Bonus: converting PSG files to VGM

This is implemented in straight-forward C.
Compilation: cc -o psg2vgm psg2vgm.c
Execution: ./psg2vgm Dreamer\ -\ POPSA-2\ \(1994\).psg | xxd -r -p > foo.vgm

#include <stdio.h>
#include <stdlib.h>

int try_fgetc(FILE *file)
{
    int param;
    if ((param = fgetc(file)) == EOF) {
        fprintf(stderr, "Unexpected EOF");
        exit(1);
    }
    return param;
}

int main(int argc, char **argv)
{
    FILE *file = fopen(argv[1], "r");
    int c, param;
    int i;

    // header with 3579545/2 = 1789772 Hz clock rate for AY8910, fake value for length (should be long enough for anyone)
    printf("56 67 6d 20 f0 f0 f0 f0 50 01 00 00 00 00 00 00 00 00 00 00 36 09 01 00 00 dd 00 00 24 00 00 00 00 dd 00 00 00 00 00 00 00 00 00 00 00 00 00 00 00 00 00 00 cc 00 00 00 00 00 00 00 00 00 00 00 00 00 00 00 00 00 00 00 00 00 00 00 00 00 00 00 00 00 00 00 00 00 00 00 00 00 00 00 00 00 00 00 00 00 00 00 00 00 00 00 00 00 00 00 00 00 00 00 00 00 00 00 4c 4f 1b 00 00 00 00 00 00 00 00 00 00 00 00 00 00 00 00 00 00 00 00 00 00 00 00 00 00 00 00 00 00 00 00 00 00 00 00 00 00 00 00 00 00 00 00 00 00 00 00 00 00 00 00 00 00 00 00 00 00 00 00 00 00 00 00 00 00 00 00 00 00 00 00 00 00 00 00 00 00 00 00 00 00 00 00 00 00 00 00 00 00 00 00 00 00 00 00 00 00 00 00 00 00 00 00 00 00 00 00 00 00 00 00 00 00 00 00 00 00 00 00 00 00 00 00 00 00 00 00 00 00 00 00 00 00 00 00 00");
    
    for (i = 0; i < 16; i++) { // bulldoze over header
        try_fgetc(file);
    }

    while ((c = fgetc(file)) != EOF) {
        switch (c) {
            case 0xff:
                printf("%02x ", 0x63); // wait 882 samples (50th of a second), a shortcut for 0x61 0x72 0x03
                break;
            case 0xfe:
                param = try_fgetc(file);
                for (i = 0; i < param; i++) {
                    printf("%02x ", 0x63); // wait 882 samples (50th of a second), a shortcut for 0x61 0x72 0x03
                }
                break;
            case 0xfd:
                printf("%02x ", 0x66); // end of sound data
                break;
            default:
                param = try_fgetc(file);
                printf("%02x %02x %02x ", 0xa0, c, param);
        }
    }

    printf("\n");
}

Adapting vgmplay-msx to work from a MSX1 cartridge without MSX-DOS

Summary

I have a Yamaha MSX1 (YS-503) with 64 32 KB of RAM and an SFG-01, which has a YM2151 on it. I do not have a floppy drive, but I have a way to easily “make cartridges” that are up to 48 KB in size. This blog post explores the source code of vgmplay-msx and ports portions of the program to work off a cartridge. Here’s how the result looks in openMSX:

Here are ROM files that work in OpenMSX, one with the SFG-01 inserted into slot 2, and the other with the SFG-01 inserted into slot 3, both playing the first ~20 seconds of track 2 on https://vgmrips.net/packs/pack/fantasy-zone-ii-dx-sega-system-16c, “10 Years After ~ Cama-Ternya [Demo]”.

vgmplay-msx deep dive

VGM files have a 128 or 256-byte header followed by the actual song data. The song data entirely consists of 1-byte commands possibly followed by a couple bytes of arguments to the command. The only commands we are interested in are “YM2151 register write” and the “wait” commands, of which there are a few. (And maybe the end of song/loop commands.) Everything else is irrelevant for our setup and what we want to do.

We only have 48 KB of ROM space, which means that it’s a bit of a tight fit for the program and the song data. The stock vgmplay.com file is about 32 KB, but it includes code (src/drivers/) for a lot of chips. We only need src/drivers/SFG.asm. There are also vast regions of 0s. We also don’t need any code to make song data fit into more than 64 KB of RAM (src/MappedReader.asm). We don’t need support for compressed .vgm files. And we don’t need any MSX-DOS-specific code, nor do we need code to handle reading from the floppy drive. Song data tends to be relatively large too: the song I used in Raspberry Pi Pico implementation of the YM3012 DAC (mono) was around 1 minute and is 68 KB in size. We’ll have to either truncate it, or find something shorter or simpler.

vgmplay-msx is written in a rather unusual assembly dialect. The assembler supports scoping, and there appears to be a bit of a “class” hierarchy. For example, MappedReader (src/MappedReader.asm) extends Reader (lib/neonlib/src/Reader.asm).

After putting the MSXDOS22.ROM into .openMSX/share/systemroms and booting from MSXDOS22.dsk, and adding the Yamaha SFG-01 extension (Hardware -> Extensions), and executing ‘make’ in the vgmplay-msx source directory, I was able to execute ‘vgmplay foo.vgm’ in MSX-DOS and hear the VGM file being played back in openMSX. After reading the code for a little bit, I opened and connected the debugger. In System -> Symbol manager, we can read the symbols generated by the assembler, vgmplay.sym, which are quite convenient.

Note: openMSX debugger fails to show the correct disassembly when there is a label in the middle of an instruction. Below, 427F 26 db #26 and 4280 79 ld a,c are actually a single instruction, which you can manually decode using something like this:

$ echo -n -e '\x26\x79' > foobar
$ z80dasm foobar
; z80dasm 1.1.5
; command line: z80dasm foobar
        org     00100h
        ld h,079h
Here, in Reader_Read_IY we read a byte from the VGM music data. We then create an address by reading one byte from 79xx (where xx is the read byte) and one byte from 80xx (again, xx is the previously read byte) and jump to it. This is the main jump table.

The jump table is defined in src/Player.asm, and for efficiency reasons is separated into two in Player_InitCommandsJumpTable in the same file.

; Shuffles the commands jump table so that the LSB and MSB are separated.
; This allows faster table value lookups.
Player_InitCommandsJumpTable: PROC
...

The byte we read was a 0x54, which indicates that we are going to write to the YM2151. This is where we have jumped:

We are going to read a word (two bytes). The first byte holds the address of the YM2151 register to write to, the second byte the data. It looks like the next instruction has been butchered by the openMSX debugger again. C3F069 is actually “JP 69F0”.
Reader_ReadWord_IY simply calls Reader_Read_IY twice. (The first screenshot also used Reader_Read_IY to fetch the command byte.) The address goes into the E register, the data into the D register.

We have now jumped to 69F0. The source file is src/drivers/SFG.asm.

There are a few things to unpack here.

First of all, we look into the address value and may jump to MaskIRQEN or MaskCT if the address is exactly 0x14 or 0x1b, respectively. Our E is set to E8, so that doesn’t apply here, so we fall right through into SFG_instance.WriteRegister. I am going to guess that the MaskIRQEN and MaskCT sections modify some bits in the address register to perhaps turn off a feature in the YM2151 that would trigger output on the interrupt or one of the CT pins, but I don’t know for sure. Here’s a pinout of the YM2151 BTW:

There are IRQ and CT pins, and IIRC they are output pins.

Next, let’s edit the symbol file to work around the debugger’s inability to disassemble instructions that have labels in the middle… Search for ‘6a02’ and ‘6a07’ in the symbol file, remove the symbol file from the debugger, and add it back in again. Then our WriteRegister function becomes a little clearer:

We read from and write to the A8 I/O port. This screenshot is from after executing the OUT instruction, which modifies the slot selection; the modifed slots are highlighted in red in the upper-right corner.

The SFG’s YM2151 registers are memory-mapped(!) at the following addresses:

SFG_YM2151_STATUS: equ 3FF1H
SFG_YM2151_ADDRESS: equ 3FF0H
SFG_YM2151_DATA: equ 3FF1H
SFG_ID_ADDRESS: equ 80H
SFG_CLOCK: equ 3579545

If you know quite a bit about how the MSX works, you may know that the MSX in general doesn’t use memory-mapped I/O, and you may also know that 0000-3FFF is where the system ROM is usually located (mapped; it can be unmapped and something else can be mapped instead). In the screenshot above, you can see that there’s an “in b,(c)” instruction at 69FF, where C holds #A8. This is the I/O register that allows you to remap stuff. See this link if you want to know more about how this register works: http://map.grauw.nl/resources/msx_io_ports.php#ppi. (BTW, this page is probably authored by the same person who wrote vgmplay-msx.) So “in b,(c)” saves the contents of the #A8 into B.

In order to perform memory-mapped I/O, we have to unmap any ROM or RAM currently mapped in. And when we’re done, we obviously have to map it back in. (Oh, good that we saved the #A8 contents into B.) ROM and RAM mappings vary between MSX models, which means the OUT part of the code is probably generated dynamically somewhere in the init code. (Hence the labels in the middle of our instructions.) The next instructions (6A05 and 6A06) save the contents of the subslot register (FFFF) into E (so we can change it back later) and set the subslot register to 0. (Note that at this point our register address has already been moved into register A, while data is still in register D.)

After the OUT is done, we just write our address to SFG_YM2151_ADDRESS and our data to SFG_YM2151_STATUS (which is an alias of SFG_YM2151_DATA, the address is 100% the same). The “cp (hl)” instruction in the middle is just to wait a short moment according to the comment in the source code: “; R800 wait: ~4 bus cycles”. When we’re done, we set the slot and subslot registers back to what they were.

So that’s how we perform a register write. We also need to know how to wait a specific number of cycles. VGM files are full of wait commands, and if the amount of waiting we do is too imprecise, that will definitely be audible. The wait commands in VGM files assume an output sample rate of 44100 Hz, which is different from the actual sample rate on real hardware. The number specifies the number of samples to just leave the YM2151 alone to do its thing. In reality, the YM2151 in the SFG-01 outputs at 3579545/2/32 = 55930.390… Hz. The Z80 runs at 3579545 Hz. So we get 64 Z80 cycles per sample, but because the VGM file wait cycles assume a different sample rate, just adding NOPs would end up being rather imprecise. What’s more, some VGMs are for machines where the YM2151 is clocked at 4000000 Hz, which results in an output rate of 4000000/2/32 = 62500 Hz.

So let’s… jump back to our jump table to see what happens when a wait instruction is encountered!

	dw Player_WaitNSamples        ; 61H
	dw Player_Wait735Samples      ; 62H
	dw Player_Wait882Samples      ; 63H
...
	dw Player_Wait1Samples        ; 70H
	dw Player_Wait2Samples        ; 71H
	dw Player_Wait3Samples        ; 72H
	dw Player_Wait4Samples        ; 73H
	dw Player_Wait5Samples        ; 74H
	dw Player_Wait6Samples        ; 75H
	dw Player_Wait7Samples        ; 76H
	dw Player_Wait8Samples        ; 77H
	dw Player_Wait9Samples        ; 78H
	dw Player_Wait10Samples       ; 79H
	dw Player_Wait11Samples       ; 7AH
	dw Player_Wait12Samples       ; 7BH
	dw Player_Wait13Samples       ; 7CH
	dw Player_Wait14Samples       ; 7DH
	dw Player_Wait15Samples       ; 7EH
	dw Player_Wait16Samples       ; 7FH
	dw Player_Skip1               ; 80H
	dw Player_Wait1Samples        ; 81H
	dw Player_Wait2Samples        ; 82H
	dw Player_Wait3Samples        ; 83H
	dw Player_Wait4Samples        ; 84H
	dw Player_Wait5Samples        ; 85H
	dw Player_Wait6Samples        ; 86H
	dw Player_Wait7Samples        ; 87H
	dw Player_Wait8Samples        ; 88H
	dw Player_Wait9Samples        ; 89H
	dw Player_Wait10Samples       ; 8AH
	dw Player_Wait11Samples       ; 8BH
	dw Player_Wait12Samples       ; 8CH
	dw Player_Wait13Samples       ; 8DH
	dw Player_Wait14Samples       ; 8EH
	dw Player_Wait15Samples       ; 8FH

As we can see, there are a lot of commands that perform waits. For Player_Wait1Samples, we jump to 492F:

The “exx” instruction switches between the directly usable registers and the shadow registers. (“EXX exchanges BC, DE, and HL with shadow registers BC’, DE’, and HL’.”) Wow, the Z80 has so many registers. All we do here is add 1 to hl’. In a special case, we pop AF from the stack, but we have no choice but to ignore that for now. And basically, Player_Wait2Samples, Player_Wait3Samples, …, Player_Wait16Samples, Player_Wait735Samples, Player_Wait882Samples, all work the same. Player_WaitNSamples grabs its argument, and apart from that also works the same as the others. Here’s a screenshot of the stack, and it’s always the same for all Player_Wait* sections:

That is, we are going to jump back to 4279, and we have already seen the code at 4279. Scroll up to see it again. It’s our main loop body, where we grab a command and use the jump table to jump somewhere. (What I hadn’t noticed or mentioned above was that it begins with a “push ix” command, which seemingly puts 4279 back on the top of the stack each time.)

Well, this is a good time to think about that “ret nc pop af ret” bit again, right? If the carry flag is set, we do not return. Instead, we grab 4279 off the stack and shove it into the AF register. Then we return, and this time we should return to 4313, according to the above stack screenshot. The carry flag is set if shadow HL overflows. Currently, it’s FF71. Hmm, just a few F9 presses maybe.

Intermission, sort of

But let’s take a step back and think about what we have seen so far. Perhaps the MSX is just way too slow to play VGMs in real time with perfect timing, and it just makes sense to skip all wait commands and just sync whenever the carry flag is set?

There’s a lot of timing code, and it’s all a bit complicated because the code seems very un-assembly-like. (But as this piece of software supports many different configurations, the somewhat object-oriented patterns may maybe make sense.) Looking back at the projects homepage, it appears that on the MSX2, the timing is 300 Hz, so perhaps that means the waits are ignored as they are encountered, but everything is put in sync (up to?) 300 times a second. It looks like on the MSX1 the timing is either 50 or 60 Hz.

The timing resolution is 50 or 60 Hz on MSX1 machines with a TMS9918 VDP, 300 Hz on machines with a V9938 or V9958 VDP, 1130 Hz if a MoonSound or OPL3 is present, and 4000 Hz on MSX turboR.

https://www.grauw.nl/projects/vgmplay-msx/

While the site says that vgmplay-msx works on MSX1 machines, I’m not entirely sure what kind of hardware configuration in e.g. openMSX would allow us to do that, because vgmplay-msx needs 128 KB of RAM, and MSX-DOS2. As far as I know you also can’t give an existing MSX2 machine an MSX1-class TMS9928A VDP, because the MSX2 logo requires the V9938. (Maybe you could try to give it an MSX1 BIOS too, but I think I’m outta here.)

(End of intermission)

So what we’re going to do is: recompile without LineTimer support by commenting out in src/timers/TimerFactory.asm:

TimerFactory_Create:
; 	call TimerFactory_CreateTurboRTimer ; this line and
; 	call nc,TimerFactory_CreateOPLTimer ; this line and
; 	call nc,TimerFactory_CreateLineTimer ; this line.
	call nc,TimerFactory_CreateVBlankTimer ; this line is left as-is
	ret

So anyway, we’re now running using the VBlankTimer and added breaks like this:

And after the ret we end up here:

Note that Application_instance.player.time is a variable, not something disassemblablablable.

So what we do here: we save our shadow HL (which has gone past FFFF; it’s currently 0AF9) to a variable called Application_instance.player.time. And after the next ret we’re here:

At some point, we get to “Application_instance.player.timerFactory.vBlankTimer.Update”. Wait, what language is this again?

Over here we loop between 42A1 and 42A5 until the JIFFY value contains something different.

Here’s the code with more symbols:

Update: PROC
	ld b,(ix + VBlankTimer.lastJiffy)
Wait:
	ld a,(JIFFY)
	cp b
	jr z,Wait

Wait, what’s JIFFY? It’s actually a system variable:

Address: FC9Eh
Name: JIFFY
Length: 2

Contains value of the software clock, each interrupt of the VDP it is increased by 1. The contents can be read or changed by the function ‘TIME’ or instruction ‘TIME’

https://www.msx.org/wiki/System_variables_and_work_area

After the tight loop is finished, we update lastJiffy with the new JIFFY. Then we set a value for our shadow HL. We either initialize DE with 0x2DF or 0x372 depending on whether we’re on 60 Hz or 50 Hz. (Update: I don’t think this routine works on the MSX1!) Then, we jump to a callback that was set way back when our Timer was first created (i.e., during program initialization), in src/Player.asm:

Player_Construct:
	ld (ix + Player.vgm),e
	ld (ix + Player.vgm + 1),d
	call Player_SetLoops
	ld hl,Player_commandsJumpTable
	call Scanner_Construct
	push ix
	ld e,ixl
	ld d,ixh
	ld hl,DEBUG ? Player.UpdateDebug : Player.Update
	add hl,de
	call Player_GetTimerFactory
	call TimerFactory_Create
	call nc,System_ThrowException
	ld e,ixl
	ld d,ixh
	pop ix
	ld (ix + Player.timer),e
	ld (ix + Player.timer + 1),d
	jr Player_ConnectPCMWrite

Actually executing the code we see that we end up in Application_instance.player.Update:

Application_instance.player.time causes the disassembly to look wonky. 4305-4307 loads Application_instance.player.time, currently set to 0292, into the HL register. The next valid instruction is 4308. Also, Application_instance.vgmFactory._size is an alias of Scanner.Process (which is the code we have seen a number of times, where we grab a byte and use the jump table)

We are about to do “sbc hl,de”. The HL register has 0292, DE contains 02DF or 0372, depending on whether the system is 60 Hz or 50 Hz. Note: I don’t think the routine to figure out whether the system is 50 or 60 Hz works on MSX1s.

Address: FFE8h
Name: RG09SAV
Length: 1

System saves the byte written to the register R#09 here, Used by VDP(10). (MSX2~)

https://www.msx.org/wiki/System_variables_and_work_area#VDP_Registers

Anyway, I don’t really know where the carry flag that SBC is supposed to take into account comes into play (it’s not set in the code visible in the above screenshot). But anyway, 0292 – 02DF = FFB3. And this is the value we will add numbers to again in the Wait* procedures. Or let’s use our brains just one more time:

  • There are 0x02DF samples per 60 Hz VSYNC (or 0x0372 samples per 50 Hz VSYNC)
  • We already “overshot” our previous target by 0x0292 samples in the previous run
  • We have 0x02DF-0x0292=0x4D samples left until we should wait for VSYNC again
    • Note: 0x10000-0xFFB3=0x4D

We have now seen enough to take just the parts we need.

What parts do we need?

  • Jump table
    • We’ll edit it to remove support for anything but the YM2151 though
    • We’ll also need the remaining jump locations of course (loop, end of song, wait, etc.)
    • (Also code to make jump table more efficient)
  • SFG register writing code
    • (If possible, also init code to figure out correct slot selection register values.)
  • Timing code
    • VSYNC-based timer only
  • The song data will be directly on the cartridge, so

Let’s do it

For convenience/compatibility with the existing code we will be using the same assembler, Glass, though I don’t think we’ll be using any of its unique features. We won’t be using constructors or a heap, even, but we will use the stack in the same way the existing code is using it.

Cartridge contents are mapped to 4000-7FFF, or if no cartridge was detected at 4000-, then 8000-BFFF. (The MSX BIOS maps in the candidate addresses (starting with 4000-7FFF) and checks for the presence of a header at the beginning of this address space to see check if a cartridge is inserted.) Thus, programs must start like this (I added some useless code in the entry_point that makes it easier to test that this thing is working):

org 4000h ; hex number syntax may differ from assembler to assembler
db "AB" ; all cartridges have this
dw entry_point ; 16-bit absolute pointer
db 00,00,00,00,00,00 ; can be anything probably

entry_point:
    nop
    jp entry_point

Compilation example if saved as foo.asm:

$ z80asm -o foo.rom foo.asm
$ dd if=/dev/zero of=foo.rom bs=16384 seek=1 count=0 # actually creates a sparse file but that's fine for all intents and purposes
$ hexdump -C foo.rom 
00000000  41 42 aa 0f 00 00 00 00  00 00 00 18 fd 00 00 00  |AB..............|
00000010  00 00 00 00 00 00 00 00  00 00 00 00 00 00 00 00  |................|
*
00001000
The disassembler is (rightly) confused again at 3FFF, but we can see our code and we are indeed executing a NOP and then jumping right back to that NOP, ad infinitum.

However, we only got our cartridge mapped up to 7FFF, but if we want its whole 48 KB mapped, we need to set port #A8. #A8 of course holds an 8-bit number, but you should interpret it as four 2-bit numbers. “00 00 00 00” (0x00) would mean that everything is on slot 0. “01 01 01 01” (0x55) would mean that everything is on slot 1. You can choose any combination your hardware likes.

All MSXs have Main-ROM in primary slot 0 or in secondary slot 0-0 (see variable EXPTBL below for more details). Cartridge slot that is on top of computer is typically slot 1. If there is another expansion port then this is often slot 2. Although the internal RAM should preferably be in slot 3, this is often not the case for MSX1s.

https://www.msx.org/wiki/Slots

The cartridge slot is “typically slot 1”. I don’t know if there are any computers that have a different number, but it’s easy to determine the number in software: we’re running off 4000-7FFF, so the slot is already set correctly here. We just need to set the page we want to the same number.

Now, if we want to set 4000-FFFF to the cartridge, we won’t have any RAM. And therefore, no stack. vgmplay uses the stack (as seen earlier). vgmplay also uses the BIOS (mapped into 0000-3FFF) because we need the VSYNC interrupt handler, and this interrupt handler writes to a system variable called JIFFY, which is located at FC9E, as mentioned above. We could decide to leave the last slot for RAM, limiting the amount of song data we can play to less than 32 KB. But the amount of RAM we need isn’t exactly very much. In addition, as we have seen, some parts of the vgmplay code are self-modifying.

So what we’ll do instead is: copy the entire cartridge to RAM. Then we’ll be able to use self-modifying code, and we’ll be able to have a stack too. Sounds easy? Well, let’s say we have our copying routine at ROM address 4100. What happens if we try to copy the ROM at 4000-7FFF to RAM? We’ll execute instructions at 4100, and these instructions say to switch 4000-7FFF to RAM, which we do, and then what? We’ll have pulled the carpet from under our feet! One way to avoid this problem is by having two (or more) copies of the copying code.

So first we could copy 8000-BFFF to RAM, which doesn’t require any precautions. For the page starting at C000, we probably shouldn’t copy past F000, which is where the stack and some system variables appear to be located. (Not that the stack holds anything.) But otherwise no precautions are required. Then, we jump to (e.g.) 8100, where we have another copy of our copy routine, and copy 4000-7FFF. (We’ll choose a different location for the second copy because we’d expect the song data to start before 8100. Perhaps F200 or so.) If we copy byte-by-byte (or word-by-word), switching between ROM and RAM every time, we can use a single register to hold the read value and won’t need any buffer memory (which would complicate things a bit). (It finishes in less than 1 second per 16 KB, so no issues here as this is init code.)

One more annoyance is that since we do not have a stack, it doesn’t make a lot of sense to ‘call’ the copy code. Jumping to the code isn’t exactly fun either because we’d have to know where to jump back, and the register dance becomes a little annoying. So we’ll just copy and paste the code. Here’s the first-draft code to copy 4000-F000 from ROM to RAM. This code assumes that the BIOS ROM is in slot 0, the cartridge ROM in slot 1, all RAM in slot 3, and that there are no subslots. This assumption doesn’t hold on many systems. This code can be compiled using z80asm using the following command line:

z80asm -o foo.rom foo.asm
org 4000h
db "AB"
dw entry_point
db 00,00,00,00,00,00

entry_point:
    ld a,01010100b ; set rom - cart - cart - cart
    out (0a8h),a

    ; copy 8000-bfff
    copy_8000_bfff:
    ld hl,08000h ; start at 8000
copy_8000_bfff_loop:
    ld a,(hl) ; read from ROM address (hl)
    ld d,a
    in a,(0a8h)
    ld b,a ; store original value
    or 000110000b ; set bits 5-4 to 11 (RAM) (actual value depends on machine)
    out (0a8h),a ; set port
    ld (hl),d ; store value read from ROM address (hl) to RAM address (also hl of course)
    ld a,b ; load a with original value
    out (0a8h),a ; set port back
    inc hl
    ld a,h
    cp 0c0h
    jp z,copy_c000_f000 ; done with this copy
    jp copy_8000_bfff_loop
    
copy_c000_f000:
    ld hl,0c000h ; start at c000
copy_c000_f000_loop:
    ld a,(hl) ; read from ROM address (hl)
    ld d,a
    in a,(0a8h)
    ld b,a ; store original value
    or 011000000b ; set bits 5-4 to 11 (RAM) (actual value depends on machine)
    out (0a8h),a ; set port
    ld (hl),d ; store value read from ROM address (hl) to RAM address (also hl of course)
    ld a,b ; load a with original value
    out (0a8h),a ; set port back
    inc hl
    ld a,h
    cp 0f0h
    jp z,copy_4000_7fff ; done with this copy
    jp copy_c000_f000_loop

done_copying:
    ld a,011111100b ; switch to 4000-ffff to RAM
    out (0a8h),a
nop:
    nop
    jr nop ; infinite loop

seek 0b000h ; b000+4000 = f000
org 0f000h

copy_4000_7fff:
    ld hl,04000h ; start at c000
copy_4000_7fff_loop:
    ld a,(hl) ; read from ROM address (hl)
    ld d,a
    in a,(0a8h)
    ld b,a ; store original value
    or 000001100b ; set bits 5-4 to 11 (RAM) (actual value depends on machine)
    out (0a8h),a ; set port
    ld (hl),d ; store value read from ROM address (hl) to RAM address (also hl of course)
    ld a,b ; load a with original value
    out (0a8h),a ; set port back
    inc hl
    ld a,h
    cp 080h
    jp z,done_copying ; done with this copy
    jp copy_4000_7fff_loop

This is pretty almost all that we need to code ourselves, everything else will be copy and pasted from vgmplay-msx! Note: the above doesn’t actually assemble in Glass because Glass requires that reserved words like “org” are indented, and “seek” isn’t supported. The final code will therefore look a bit different.

Putting all the necessary bits together (and throwing out everything else)

I got it to work on an emulated version of my Hitachi H2. (My apologies to the original author of vgmplay. I completely butchered their code.) And right when I start looking at the slot map of the computer I actually intended to run this one (Yamaha YIS-503), I noticed that the silly machine only has 32 KB of RAM, har har har. And (this was expected though not quite to this extent) the slot map is different, so the #a8 port settings will have to adjusted. With 64 KB we could load the whole 48 KB ROM into RAM, but with 32 KB, arranged the way it is, we’ll boot from 8000 and ignore 4000-7FFF. (We could rewrite the self-modifying code to refer to variables in RAM space instead, but unfortunately I’m running out of steam on this project. I’d planned two days and it’s about three days already! :p)

It ended up working on this machine too, of course. Except, I think that openMSX might be putting the SFG-01 into a different slot (2), rather than slot 3 as sort of indicated in the above screenshot. Due to the limited amount of RAM, our music gets truncated even earlier than before. Feel free @ anyone wanting to fix this. TBH, I just want to be able to hear if the music sounds okay or not. (Edit 2023/04/08: I checked on a real YIS-503 and the SFG-01 was indeed in slot 3, so the above screenshot is correct.)

Code is at https://github.com/qiqitori/vgmplay-msx-cartridge.

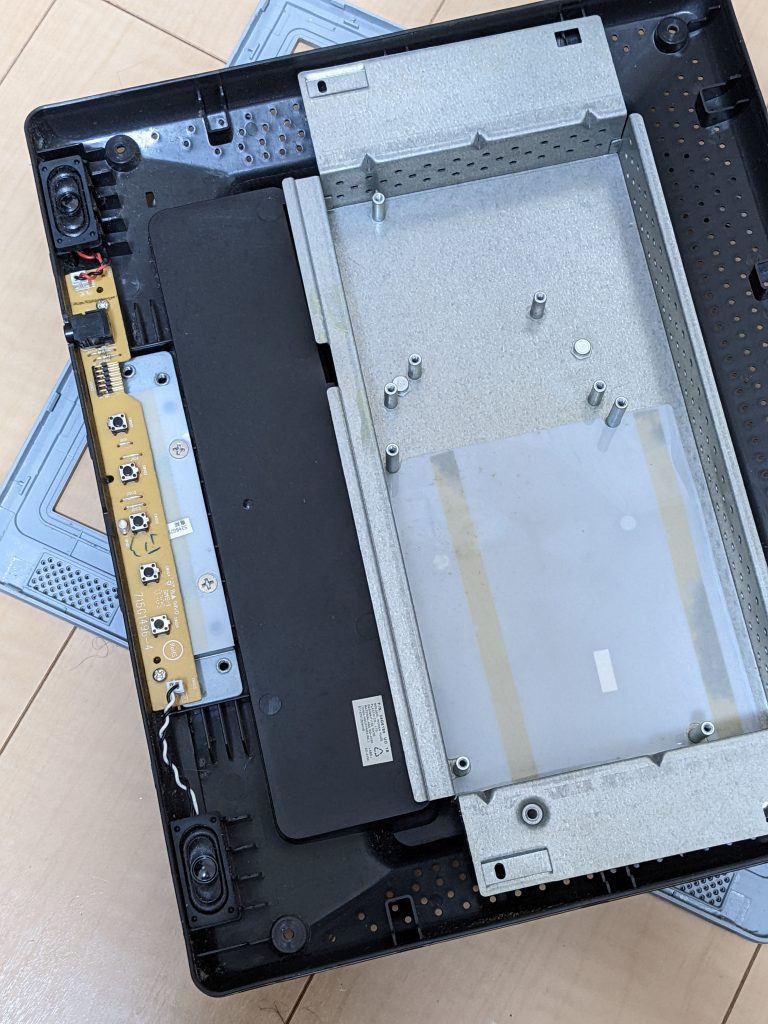
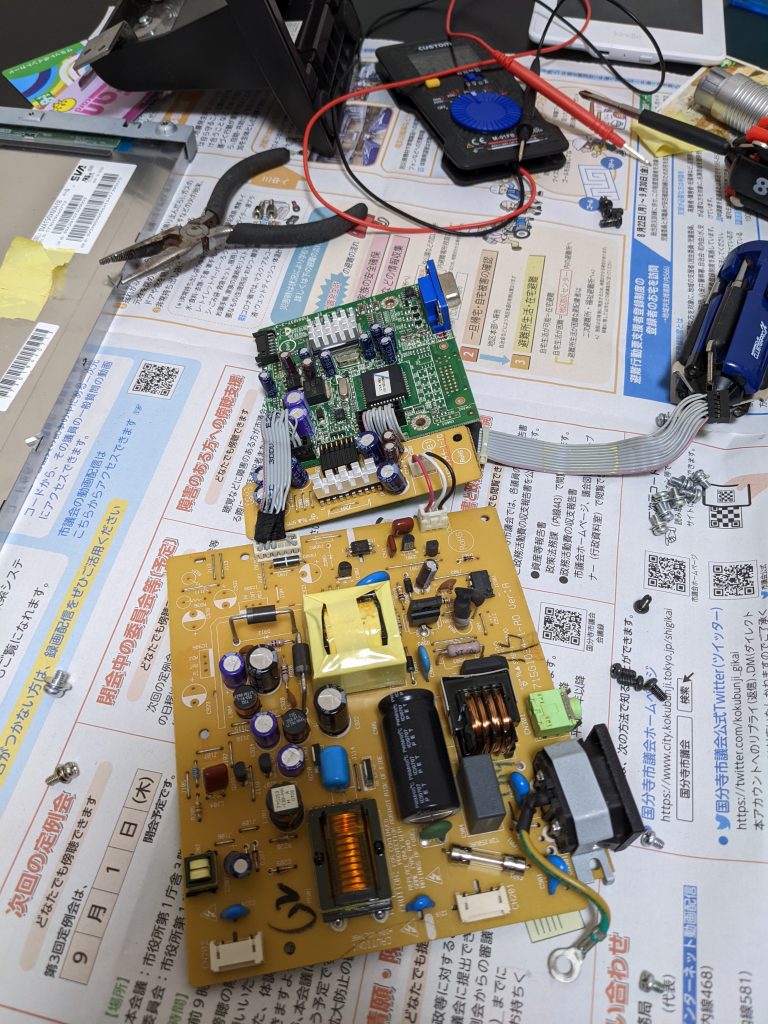
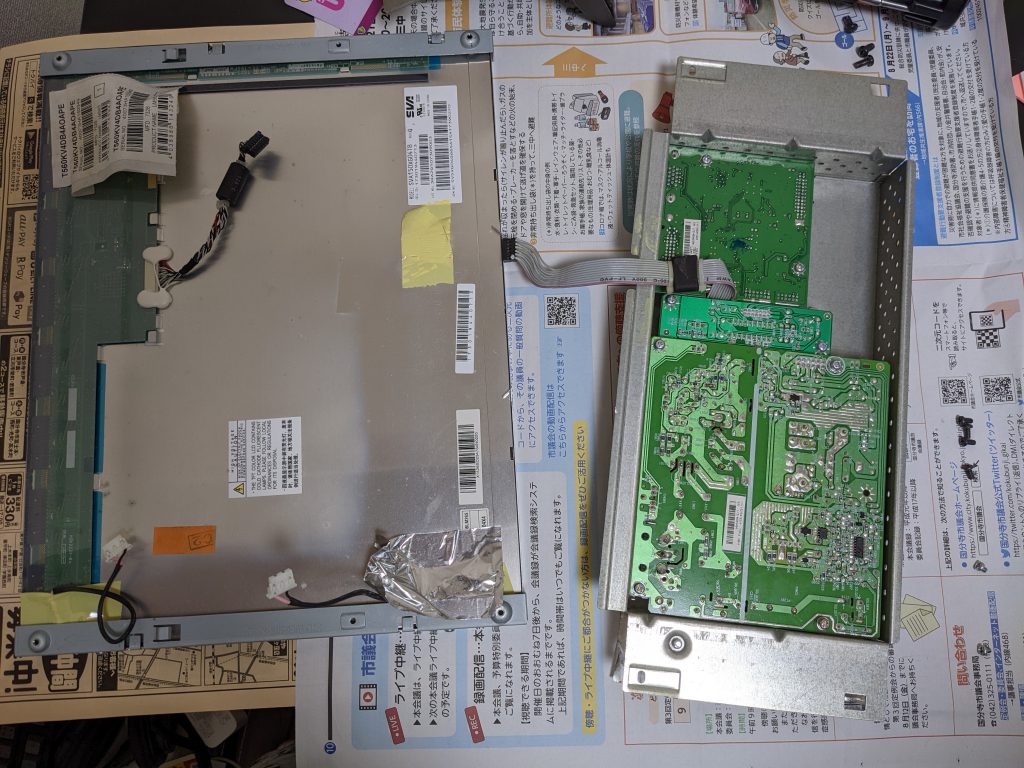
Old AOC 15″ LM565 LCD repair

I’m not even sure this warrants a blog post. The only thing that was wrong with it was a loose ribbon cable connecting one of the two analog boards to the logic board.

Symptoms: LED and backlights power on, but no logo, no menu. If you connect a VGA cable, the monitor is identified correctly and can be enabled, but no picture.

So… just in case anyone needs board pictures, here they are:

Buttons and sound output
Boards, front side
Boards, back side, and LCD panel

Yay, 1024×768. It was an upgrade from 800×600 back when I got it…

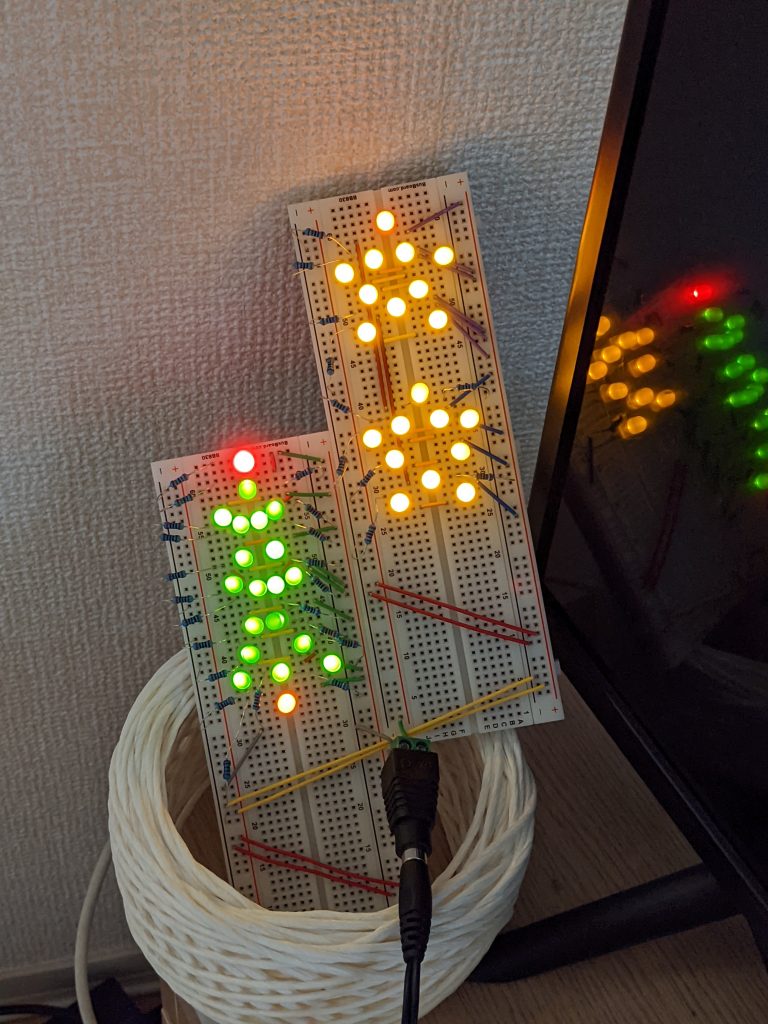
Christmas illumination using breadboards

Just a thing I quickly made a short while ago. There’s nothing special going on. The board on the left has one resistor per LED, on the board on the right, two LEDs and one resistor are each wired as a series circuit.

Note: I don’t leave this running unattended — I’m reasonably sure the entire thing would fall to the floor in a medium~major earthquake and the risk of causing a short is relatively high. Not that the short would necessarily cause a fire, but better safe than sorry.

Merry Christmas

Arduino “warning: internal error: out of range error”

There are probably a million other reasons you could get this error, but I didn’t see anyone document the case I got it: I wrote some raw assembly (i.e., hexadecimal machine code) and got the instruction length wrong. I.e., something like this:

__asm volatile(
    ".byte 0x00 \n"
);

Well, AVR instructions are 16 bits, so clearly the one-byte thing above wouldn’t encode a valid instruction and would ruin alignment, so it would have to look at this:

__asm volatile(
    ".byte 0x00 \n"
    ".byte 0x00 \n"
);

卓上型食洗機を買った!

この度、念願の食洗機を購入したぜ!

アマゾンやその他ショッピングサイトやユーチューブなどでレビューを色々読んで、AINX (アイネクス) の AX-S3W にしました。(Amazon: https://www.amazon.co.jp/dp/B07ZNDHJ7Y / 実際に購入した楽天のサイト (ちょっとだけ安かったので: https://item.rakuten.co.jp/a-price/4582519730020/)

  • siroca 2WAY の食洗機にしなかった理由は、皆さんのレビューでは乾燥機能はあまり評価がよくなかったから。オートオープンは良さそうですが、少しだけ乾燥してからオートオープンとかは出来なそうでした。UV も良さそうですが、まぁ本当に要る?と自分に問いかけたら、そこまで要らないかな、と思いました。
  • アイリスオーヤマも乾燥機能は低評価でした。
  • Aqua も乾燥機能はやや低評価でした。
  • 東芝も乾燥機能は低評価でした。
  • パナソニックはタンク式ではないので無理でした。
  • Thanko にしなかったのも乾燥機能の低評価でした。また、給水ホースが繋げません。現在は手動で水を入れており今の住まいでは給水ホースの出番はなさそうですが、いつか引っ越したらまた変わるかもしれないので、自分の頭の中ではマイナスでした。
  • Maxzen, iimono117, moosoo は皆同じだと思います。もしかしたら、Maxzen は乾燥機能が温風ではなくただの送風かもしれない?また、少なくともアマゾンでは moosoo は現在品切れ中のようです。moosoo にすべきか、かなり迷いました。乾燥機能は一番しっかりしていて、洗浄温度も高くて洗い残しの心配はなさそうです。ただし、moosoo にしなかったのは、すすぎの温度も乾燥の温度も高くて、プラスチック製の容器は心配だったから。お急ぎモードではやや低かったような気がしますが、時間が短いです。また、「野菜洗い」というコースが良さそうですが、実はAINXの「水洗い」コースは海外のサイトで「野菜洗い」用と書かれていたので、AINXも野菜洗いができるかと思います。(ただし、野菜洗いは試したことがありません。ちょっと汚れのひどいほうれん草とかじゃがいもなら良いかも?)また、乾燥のみのコースがないそうです。
  • Kwasyo は機能が良さそうだけれども、日本市場への参入はかなり最近なのでサポート体制など、少し心配でした。ただし、海外のアマゾンでは複数のモデルが売られているようなのでそこまで心配は要らないかもしれません?→ https://www.amazon.com/Kwasyo-Portable-Countertop-Dishwasher-High-temperature/dp/B08V5PNMW5

AINX は、乾燥機能は最初の10分間は温風になるので、送風だけよりはマシかと思いました。
実際に使ってみると、くぼみに水たまりはできて、乾燥完了後も水が残りますが、くぼみを下向きにしたり、すすぎ後、ひっくり返したりすると完全に乾きます。また、数日間続く「ブリーズモード」(毎時15分間送風乾燥を行う機能)も衛生的で良いなぁと思いました。
また、moosoo より形が格好良く、光はきれいだと思いました。(すぐに消えますが)
また、海外のアマゾンでも (“Novete” という名前になりますが) 売られています: https://www.amazon.com/dp/B089YD3Z91/
海外のアマゾンのレビューも良かったですし、ユーチューブにも海外のユーチューバーさんが良いレビューを残しています: https://www.youtube.com/watch?v=9F1c1pxvicw
結局中国の名前の知らない会社がデザインして製造した物のようです。色々な地域で実績があると、私の頭の中ではそれなりに信用性が上がると思います。
続いて、洗浄力です。普通の食洗機は二回洗い式です。一回目(「プレウォッシュ)は少量の洗剤と少量の水で大きなゴミを落として、水を排水してから、「メインウォッシュ」を行います。そのため、普通の食洗機には洗剤を入れるところが2つ付いていることが多いです。ただし、少なくとも AINX には一つしか付いていません。プレウォッシュはなくて、最初から本番です。
汚れが落ちないわけではありませんが、たまに、油こい料理の場合、特に上カゴ(カトラリー入れ)や下かごのプラスチック製容器が少しだけベタベタすることがありましたが、Finish のタブレットをやめてキュキュットのクリア除菌(オレンジオイル配合)の粉系の洗剤に変えたら(量や汚れ具合によって多めに入れて、)そういうことは全くなくなりました。
Finish でも、ストロングにするのもある程度効果的だったと思います。キュキュットではストロングを使うことはありません。
AINX は今年(2021年)UV 搭載のモデルをリリースするようなので、ブリーズモードの併用ができたら更に衛生的になりそうです。

ところで、オフハウスで「ちょうどいい」と思って2500円で買ったスタンディングデスクに食洗機を乗せて使っています。振動とかは特にないです。(https://direct.sanwa.co.jp/ItemPage/100-DESKF009 これによく似たものです)
下に置いたバケツで排水しています。13Lのものですが毎回使用後、水を捨てています。スタンディングデスクは高さがあるので、排水ホースがずれる心配はあまりありません。スタンディングデスクは広いので下にゴミ箱も収入しています。
給水は付属の容器でやっています。実は洗面台はすぐそこなので付属の容器で3回給水しても、そこそこ楽です。コック付きの容量がちょうどの折り畳みバケツを使っている人も多いようです。

Outputting QR codes on the terminal

In these dark ages, a lot of software (mostly chat apps) only work on smartphones. While it’s easy to connect a USB-OTG hub to most smartphones (even my dirt-cheap Android smartphone supports this (now three years old)), having two keyboards on your desk can be kind of annoying.

While there are a bunch of possible solutions to this problem, many of these solutions do not fix the problem when you’re not on your home setup. Which is why I often just use QR codes to send URLs to my phone, and there are a lot of QR code generator sites out there.

QR code generator sites are useful because they work everywhere, but many are slow and clunky. Perhaps acceptable in a pinch, but… what if you could just generate QR codes on the terminal?

Well, some cursory googling revealed this library: https://github.com/qpliu/qrencode-go, which doesn’t have any external (non-standard library) dependencies, is short enough to skim over for malicious code, and comes with an easily adapted example. (I am reasonably confident that there is no malicious code at ad8353b4581fa11fc01a50ebf56db3833462fc13.)

Note: I very rarely use Go. Here is what I did to compile this:

$ git clone https://github.com/qpliu/qrencode-go
$ mkdir src
$ mv qrencode/ src/

$ cat > qrcodegenerator.go
package main
import (
"bytes"
"os"
"qrencode"
)
func main() {
var buf bytes.Buffer
for i, arg := range os.Args {
if i > 1 {
if err := buf.WriteByte(' '); err != nil {
panic(err)
}
}
if i > 0 {
if _, err := buf.WriteString(arg); err != nil {
panic(err)
}
}
}
grid, err := qrencode.Encode(buf.String(), qrencode.ECLevelQ)
if err != nil {
panic(err)
}
grid.TerminalOutput(os.Stdout)
}
$ GOPATH=$PWD go build qrcodegenerator.go
$ ./qrcodegenerator test
// QR CODE IS OUTPUT HERE

Note: the above code is adapted from example code in the README.md file and is therefore LGPL3.

Since Go binaries are static (that’s what I’ve heard at least), you can then move the executable anywhere you like (e.g. ~/bin) and generate QR codes anywhere. Note that they’re pretty huge, i.e. for ‘https://blog.qiqitori.com’ (26 bytes) the QR code’s width will be 62 characters. For e.g. ‘https://blog.qiqitori.com/2020/10/outputting-qr-codes-on-the-terminal/’ (this post) the width is 86 characters.

Skype for Business fortunes

Skype for Business:
    Accept any substitute.
    If it's broke, don't fix it.
    If it ain't broke, fix it.
    Form follows malfunction.
    The Cutting Edge of Obsolescence.
    The trailing edge of software technology.
    Armageddon never looked so good.
    Japan's secret weapon.
    You'll envy the dead.
    Making the world safe for competing communication tools.
    Let it get in YOUR way.
    The problem for your problem.
    If it starts working, we'll fix it.  Pronto.
    It could be worse, but it'll take time.
    Simplicity made complex.
    The greatest productivity aid since typhoid.
    Flakey and built to stay that way.
 
One thousand monkeys.  One thousand Windows 8 machines.  One thousand years.
    Skype for Business.
%
Skype for Business:
    It's not how slow you make it.  It's how you make it slow.
    The communication tool preferred by masochists 3 to 1.
    Built to take on the world... and lose!
    Don't try it 'til you've knocked it.
    Power tools for Power Fools.
    Putting new limits on productivity.
    The closer you look, the cruftier we look.
    Design by counterexample.
    A new level of software disintegration.
    No hardware is safe.
    Do your time.
    Rationalization, not realization.
    Old-world software cruftsmanship at its finest.
    Gratuitous incompatibility.
    Your mother.
    THE user interference management system.
    You can't argue with failure.
    You haven't died 'til you've used it.
 
The environment of today... tomorrow!
    Skype for Business.
%
Skype for Business:
    Something you can be ashamed of.
    30% more entropy than the leading communication tool.
    The first fully modular software disaster.
    Rome was destroyed in a day.
    Warn your friends about it.
    Climbing to new depths.  Sinking to new heights.
    An accident that couldn't wait to happen.
    Don't wait for the movie.
    Never use it after a big meal.
    Need we say less?
    Plumbing the depths of human incompetence.
    It'll make your day.
    Don't get frustrated without it.
    Power tools for power losers.
    A software disaster of Biblical proportions.
    Never had it.  Never will.
    The software with no visible means of support.
    More than just a generation behind.
 
Hindenburg.  Titanic.  Edsel.
    Skype for Business.
%
Skype for Business:
    The ultimate bottleneck.
    Flawed beyond belief.
    The only thing you have to fear.
    Somewhere between chaos and insanity.
    On autopilot to oblivion.
    The joke that kills.
    A disgrace you can be proud of.
    A mistake carried out to perfection.
    Belongs more to the problem set than the solution set.
    To err is Skype for Business.
    Ignorance is our most important resource.
    Complex nonsolutions to simple nonproblems.
    Built to fall apart.
    Nullifying centuries of progress.
    Falling to new depths of inefficiency.
    The last thing you need.
    The defacto substandard.
 
Elevating brain damage to an art form.
    Skype for Business.
%
Skype for Business:
    We will dump no core before its time.
    One good crash deserves another.
    A bad idea whose time has come.  And gone.
    We make excuses.
    It didn't even look good on paper.
    You laugh now, but you'll be laughing harder later!
    A new concept in abuser interfaces.
    How can something get so bad, so quickly?
    It could happen to you.
    The art of incompetence.
    You have nothing to lose but your lunch.
    When uselessness just isn't enough.
    More than a mere hindrance.  It's a whole new barrier!
    When you can't afford to be right.
    And you thought we couldn't make it worse.
 
If it works, it isn't Skype for Business.
%
Skype for Business:
    You'd better sit down.
    Don't laugh.  It could be YOUR thesis project.
    Why do it right when you can do it wrong?
    Live the nightmare.
    Our bugs run faster.
    When it absolutely, positively HAS to crash overnight.
    There ARE no rules.
    You'll wish we were kidding.
    Everything you never wanted in a communication tool.  And more.
    Dissatisfaction guaranteed.
    There's got to be a better way.
    The next best thing to keypunching.
    Leave the thrashing to us.
    We wrote the book on core dumps.
    Even your dog won't like it.
    More than enough rope.
    Garbage at your fingertips.
 
Incompatibility.  Shoddiness.  Uselessness.
    Skype for Business.

Adapted from https://lwn.net/Articles/26612/.

Standing on the shoulder of giants

Making new discoveries usually requires knowledge from previous discoveries. Discoveries are published as text in research papers. Scientists find these research papers using keywords they plug into a search engine or when other research papers cite them. Being able to search by keywords has obviously made scientific research much easier than before.

However, the research papers themselves are still written in natural languages, and unless the authors avoid using grammatical features like the words “it” or “them” to avoid repeating nouns over and over again, it’s difficult to extract meaning from them.

So perhaps people shouldn’t be writing research papers in (e.g.) English and instead use something that is easier for computers to parse. The research paper would contain claims, some numeric indicator for how certain these claims are (or from where they came), how these claims came about (e.g. experiment (with instructions for how and experiment was set up and why), logical reasoning (with the actual chain of reasoning), etc.). Then you could, for example, search for claims, instead of just keywords.

Instead of just using the keywords “ocean plastic waste”, you could search for “plastic waste in oceans negatively impacts ocean fauna”. Instead of typing in this query, you would choose every noun, verb and other qualifiers from a searchable menu. You would be able to display this menu in any language. The words in the menu would all mean a specific thing, and anybody would be able to look at the definitions and properties of every word. Eventually, the system could be programmed to (e.g.) look at two different claims and judge whether these claims might be related, based on common subjects or objects, and generate potential new claims all by itself. For example, claim 1: “Thunderstorms may under certain circumstances cause blackouts” and claim 2: “Certain atmospheric conditions cause thunderstorms” would logically mean that “certain atmospheric conditions cause blackouts”, which is true. The system probably shouldn’t let users use the word “certain” though.

How hard would it be to make such a system? Well, it’s best to start in a single niche and slowly expand the system. Here’s a very simple (completely static) example that is a bit different in that it just generates natural English or Japanese text based on what values are selected in the menus: https://blog.qiqitori.com/cve_generator/

Saving the selections would be a first step in the right direction. Currently, only one “allows attackers to:” is allowed, but you would probably want to 1) allow an arbitrary-length chain 2) something indicating the author’s degree of certainty (“may allow”), 3) add other verbs, other nouns, and 4) the reasoning behind a set of these claims (it gets complex here, but in the end you just have to select subjects, verbs, and objects, ifs, etc.).

Perhaps selecting things from a menu would get old quick (unless you just do it for the main claims). So the computer could try its best to analyze a sentence and ask the user to confirm that its interpretation is correct. The preceding sentence could be analyzed like this, but you’ll see that this could be tricky and just selecting something from a menu might be the better option after all: So [potential solution for previous follows:] the computer [the software] could try its best [could potentially (but probably wouldn’t manage to do this perfectly)] to analyze a sentence [analyze a given input sentence] and [afterwards] ask the user to [force the user] confirm that its [the software’s] interpretation [of the given input sentence] is correct [confirm … or force the user to edit the interpretation using a menu]. As you can see, there is a lot of context involved, which makes it hard to derive (e.g.) claims from natural text.

As you can see in the CVE generator, having the facts makes it somewhat easy for the system to generate text in any language for humans to read and think about