AI day in retroland. Prolog on the Commodore VIC-20! (Needs expanded RAM)

Today’s post is AI-heavy! AI as in OCR (“optical character recognition”). We will OCR (“optical character recognize”) a hex listing for a Prolog interpreter (which used to be thought of as an “AI language”) for the Commodore VIC-20! (As a bonus, some small parts of the tools I made to verify the OCR transcription were written by ChatGPT.)

As you may have heard before, OCRing stuff is error-prone. Ls and Is and 1s being mixed up makes natural language texts annoying to read, and program listings almost useless, because you’ll spend a long time trying to find the error. Why does this take a long time? Because our eyes (and attached circuitry) don’t notice tiny imperfections in a sea of details. However, we are quite good at noticing things that look completely different from the surrounds.

With hex OCR, we really only have to worry about 16 different classes (types of digit). This makes it relatively easy to verify if our OCR is correct (and perform fixes), because we can take our OCR’d digits and temporarily (while remembering their original position) display them all, sorted by class. Like this:
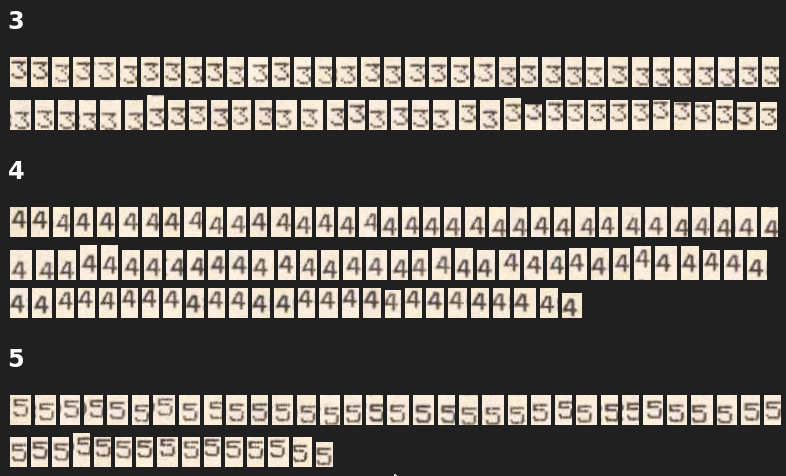
We can easily see that all these are indeed 3s, 4s, and 5s.

Or like this:

We can easily see that there’s a 0 in our list of 6s and a 9 in our list of 7s.

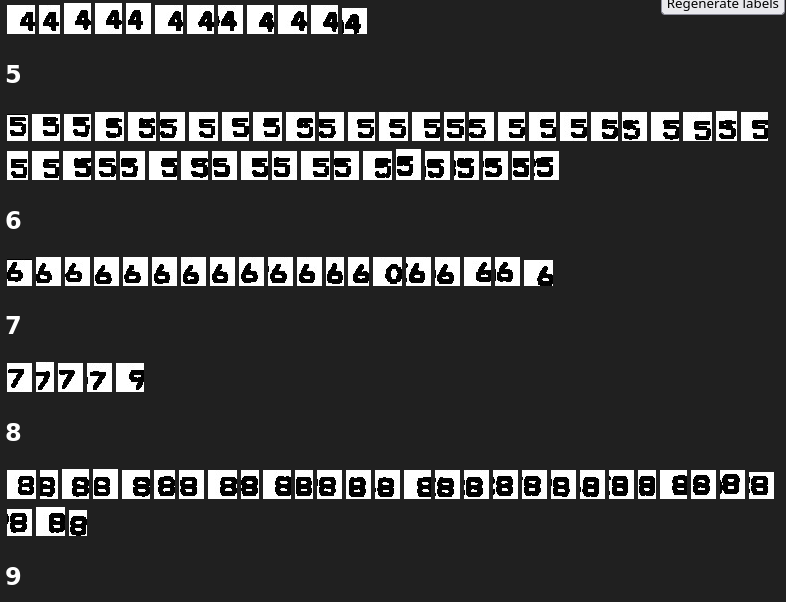
(Note: occasionally, OCR tools will turn a single character into two characters, or the other way round. That kind of problem will require manual edits.)

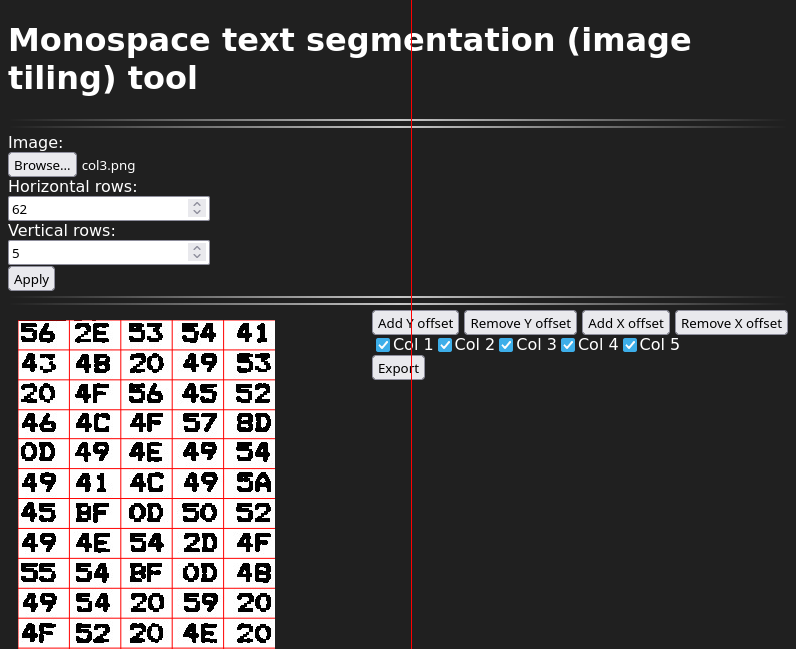
I created two tools, a segmentation tool, and the above verification tool, and described them a little more in this post: OCRing hex dumps (or other monospace text) and verifying the result. The tools themselves are at https://blog.qiqitori.com/ocr/monospace_segmentation_tool/ and https://blog.qiqitori.com/ocr/verification_tool/.

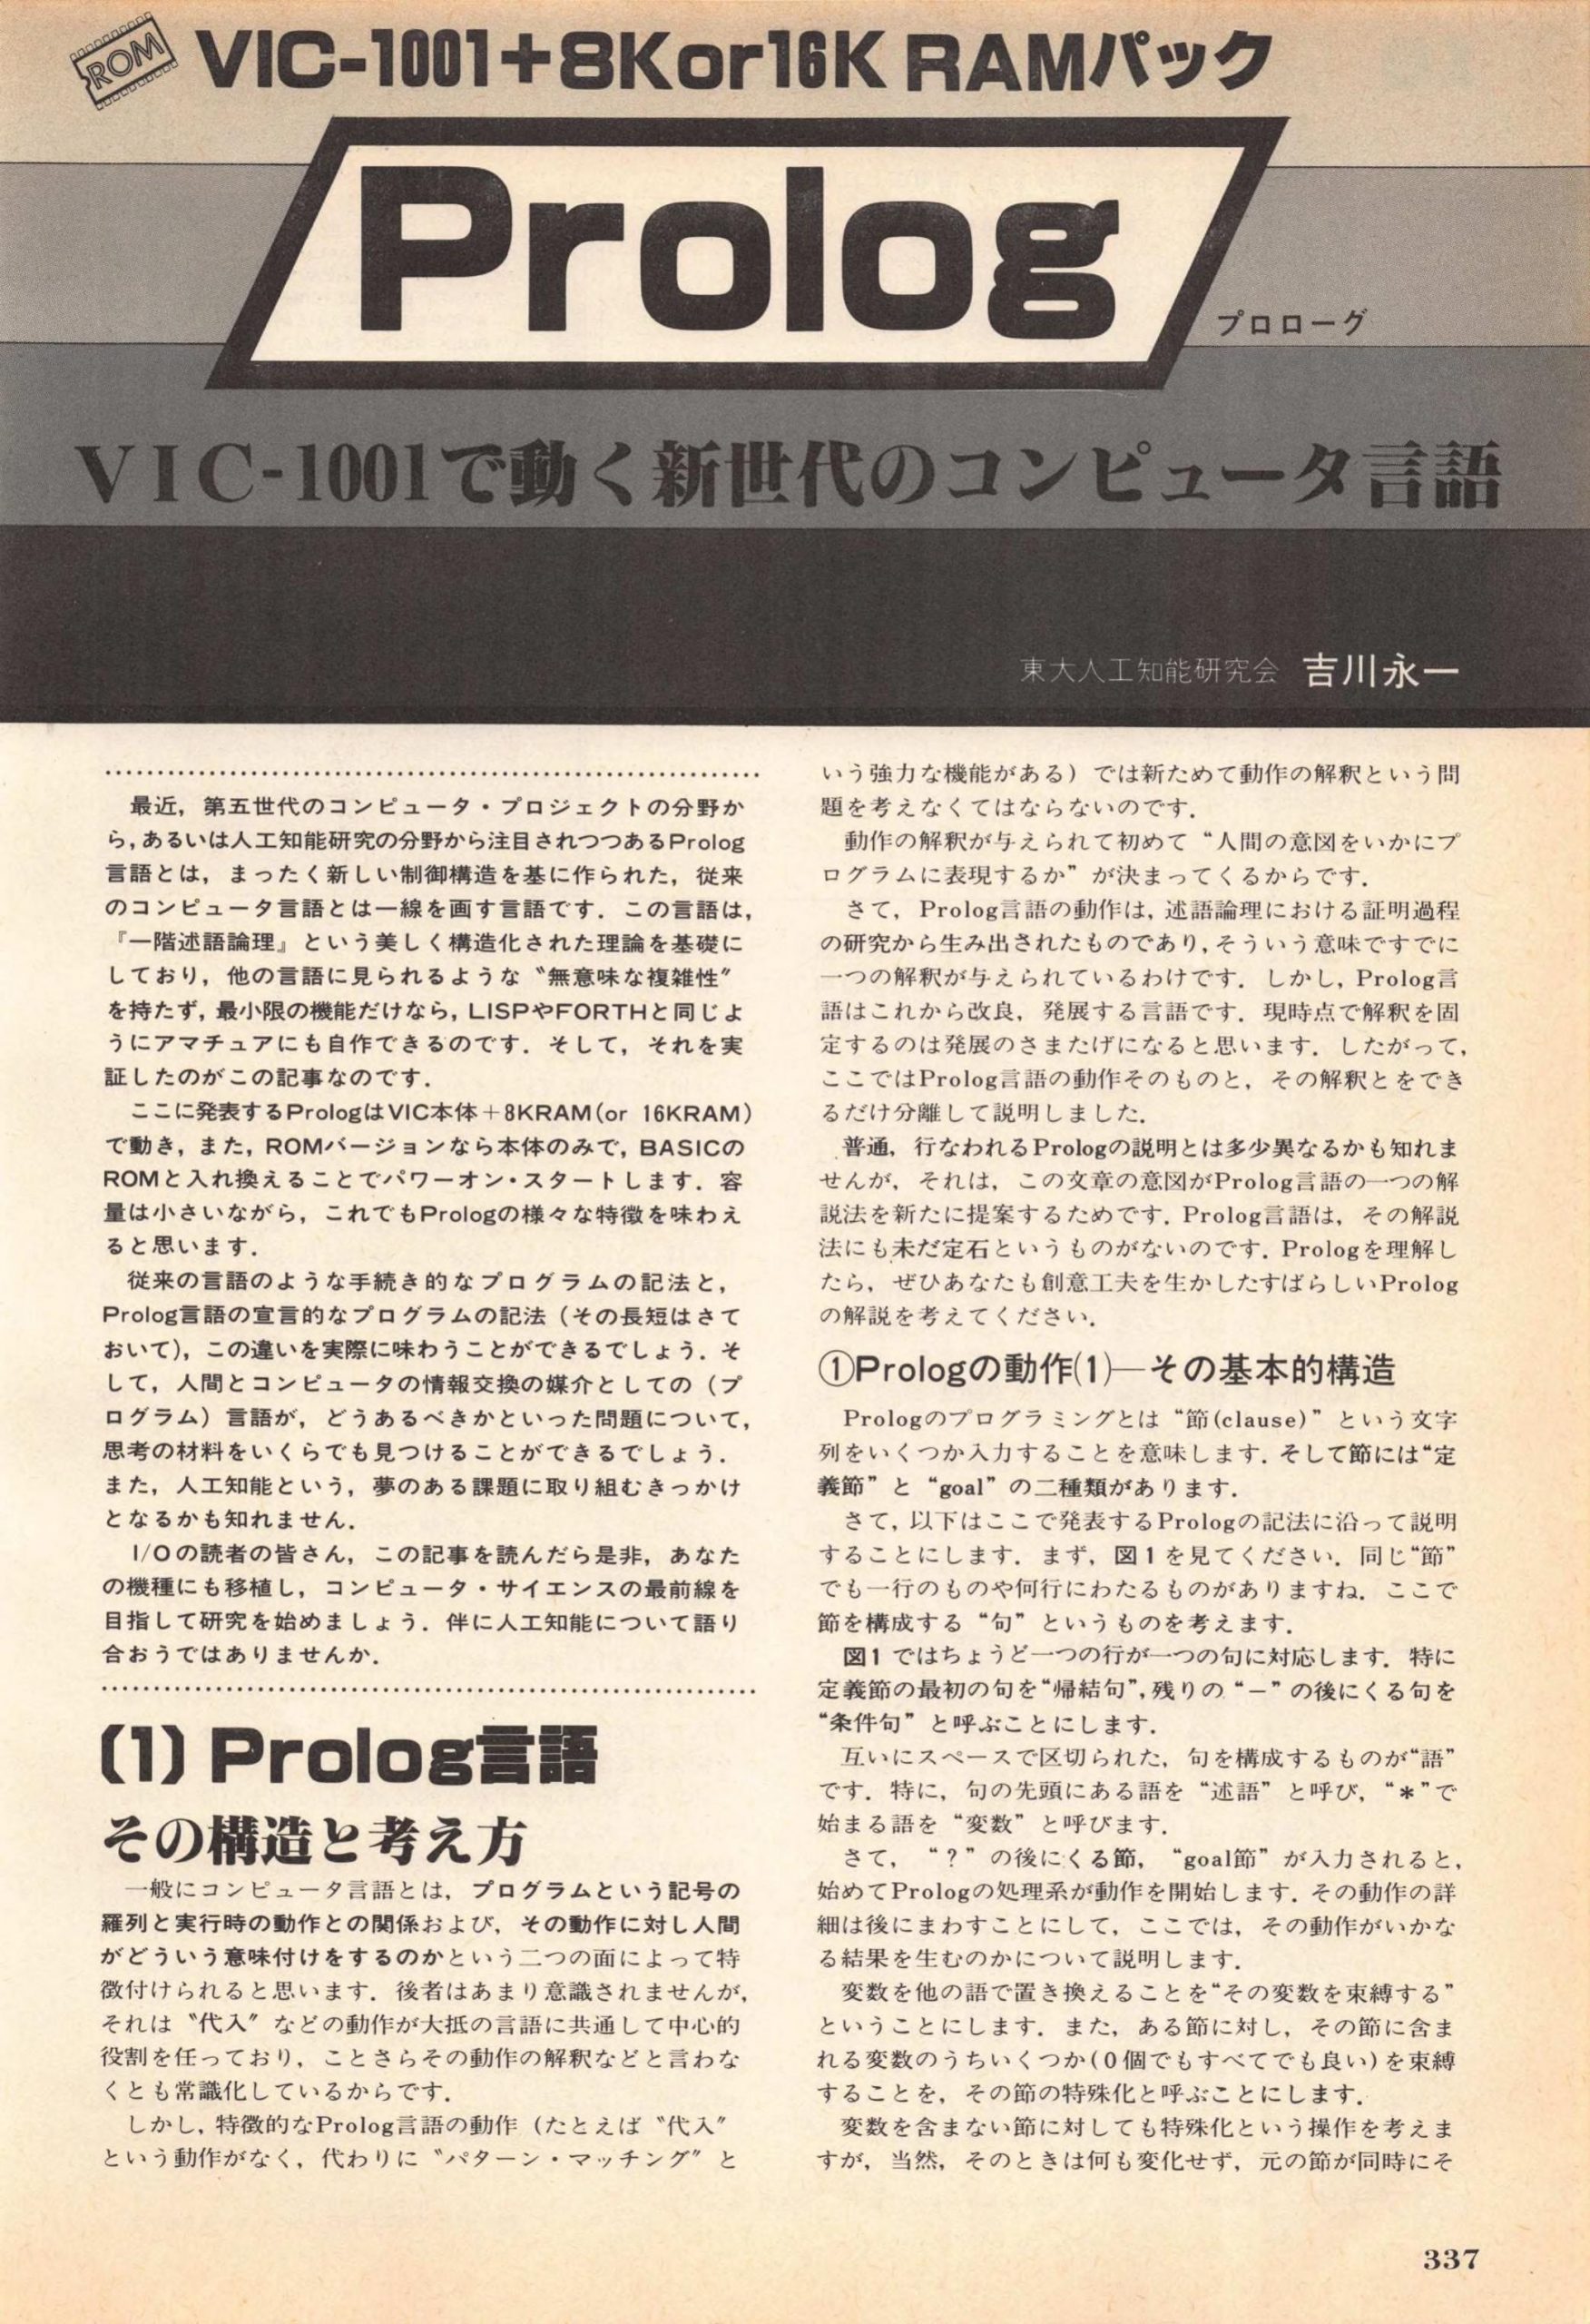
This is the scan in question: https://archive.org/details/Io19833/page/n342/mode/1up. Here’s the rather good-looking first page:

I/O アイ・オー 1983年3月号

For the original OCR, I used a program called ProgramListOCR. The program supports OCRing hex dumps. This program requires that you touch up input images in (e.g.) Gimp before loading them. It’s not difficult, and the program’s README describes what needs to be done. Unfortunately, this process removes a small amount of detail from the image, making it harder to distinguish between, e.g., Bs and 8s. And unfortunately, I believe the program only runs in Windows. Here’s a screenshot of the program running:

ProgramListOCR made 142 digit mistakes. The hex dump consisted of 7310 digits, so the overall error rate is 1.943%, or the accuracy is 98.057%.

How to download and run Prolog

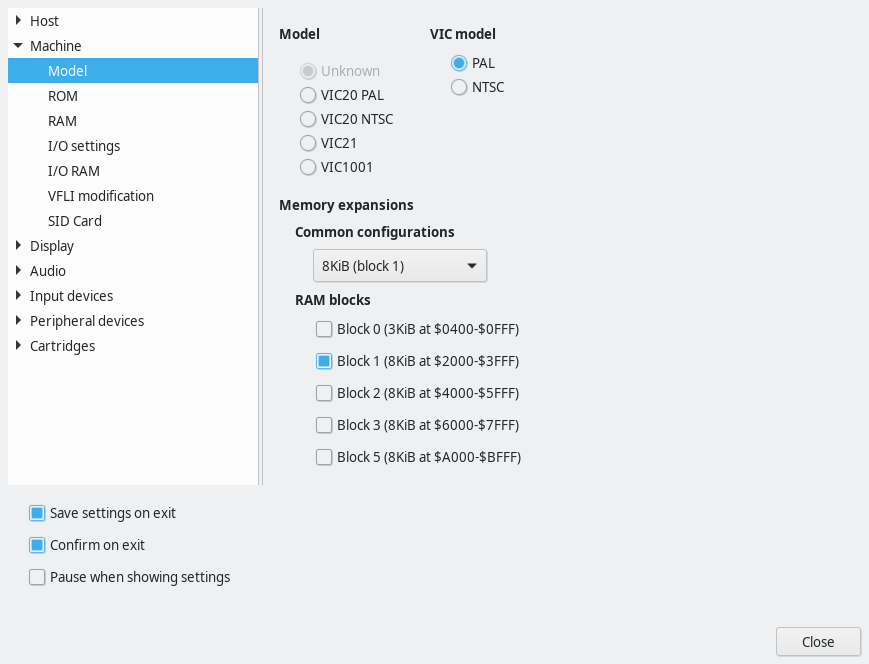
In order to run this on your VIC-20 emulator, you need to set it to have an 8K memory expansion. Then you need to load the binary data into RAM; starting address is 2204. In VICE, you can add the memory expansion in this config window:

Select at least “Block 1 (8KiB at $2000-$3FFF)”. PAL/NTSC etc. do not matter.

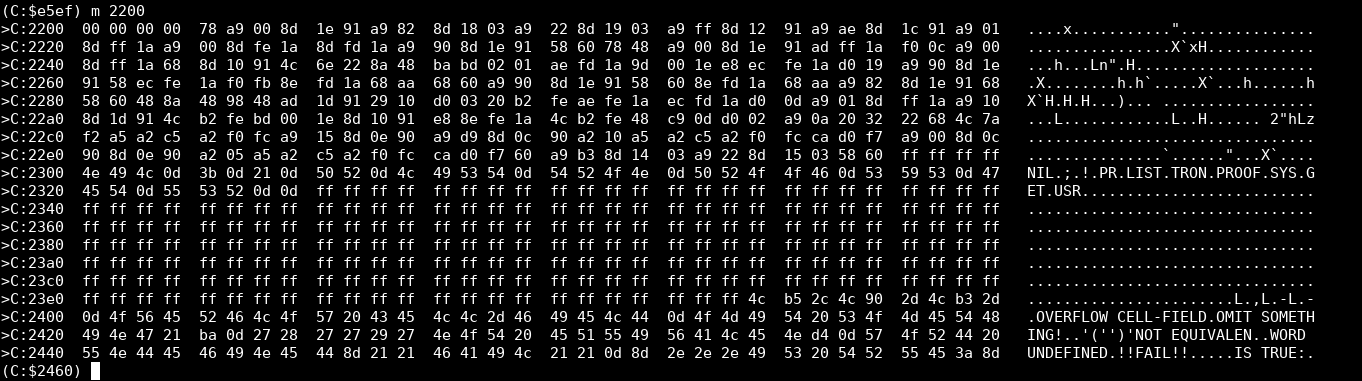
To load the binary data into address $2204 and beyond, start the monitor (Alt+H), and then I wish it’d work with ‘load “/path/to/prolog.bin” 0 2204’. But for some reason that doesn’t work; the first few bytes are garbled and the reset isn’t aligned correctly. If you have this issue, try the other file and ‘load “/path/to/prolog_prefixed_with_zeros.bin” 0 2202’. Execute “m 2200” in the monitor to see if VICE loaded your file into the correct address. The following is an example of a successful load:

2200-2203 don’t matter, 2204- should be 78 a9 00 8d, etc.

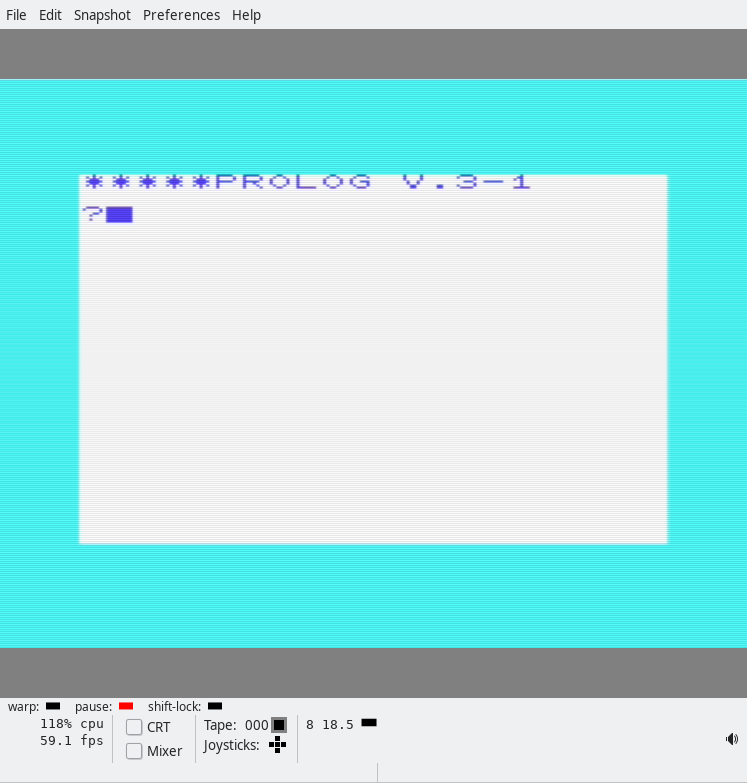
Then you close the monitor and type “SYS 11445” in the BASIC prompt, and you should get something like this:

Having fun with Prolog

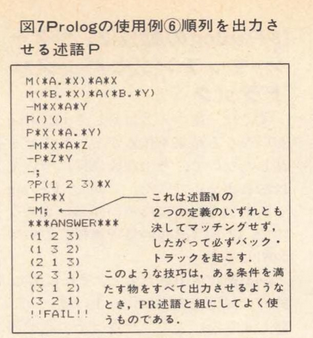
There are various sample programs in the magazine. Note that the Prolog interpreter sometimes gives you a question mark prompt, and sometimes a hyphen prompt. You have to delete these manually by pressing backspace (Delete), depending on what you want to do! Let’s start with this short program:
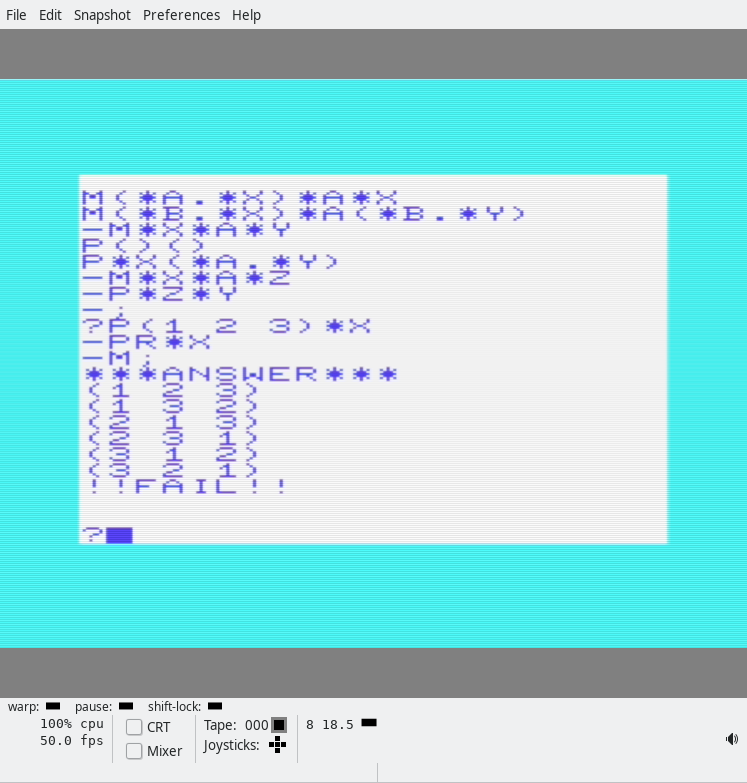
m(*a.*x)*a*x
m(*b.*x)*a(*b.*y)
-m*x*a*y
p()()
p*x(*a.*y)
-m*x*a*z
-p*z*y
-;
?p(1 2 3)*x
-pr*x
-m;
***answer***
(1 2 3)
(1 3 2)
(2 1 3)
(2 3 1)
(3 1 2)
(3 2 1)
!!fail!!

The next program (actually the first in the magazine, and easiest) is a program that tells you whether the density of blocks 1-4 is high or low, or unknown:
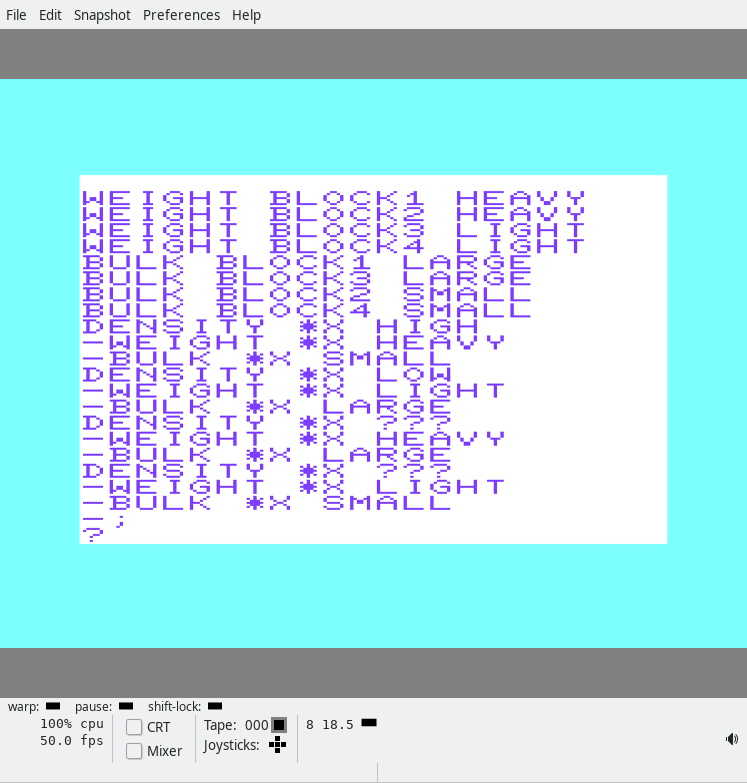
That’s the data and the functions, er, I mean predicates.
weight block1 heavy
weight block2 heavy
weight block3 light
weight block4 light
bulk block1 large
bulk block3 large
bulk block2 small
bulk block4 small
density *x high
-weight *x heavy
-bulk *x small
density *x low
-weight *x light
-bulk *x large
density *x ???
-weight *x heavy
-bulk *x large
density *x ???
-weight *x light
-bulk *x small
-;
?

I believe I speak for us all when I say, the syntax looks a bit weird? Anyway, the first few things are the data, er, I means facts. Then you get a function, er, predicate “signature”, and below the predicate signature you get the actual… predicate definition (the lines that start with a hyphen). (Predicates may also be called rules.) Want to finish up the current rules and start a new one with a different signature? Just backspace away the hyphen. When you’re all done, type a semicolon, and you’ll be back at the ‘?’ prompt. Now we can run queries!

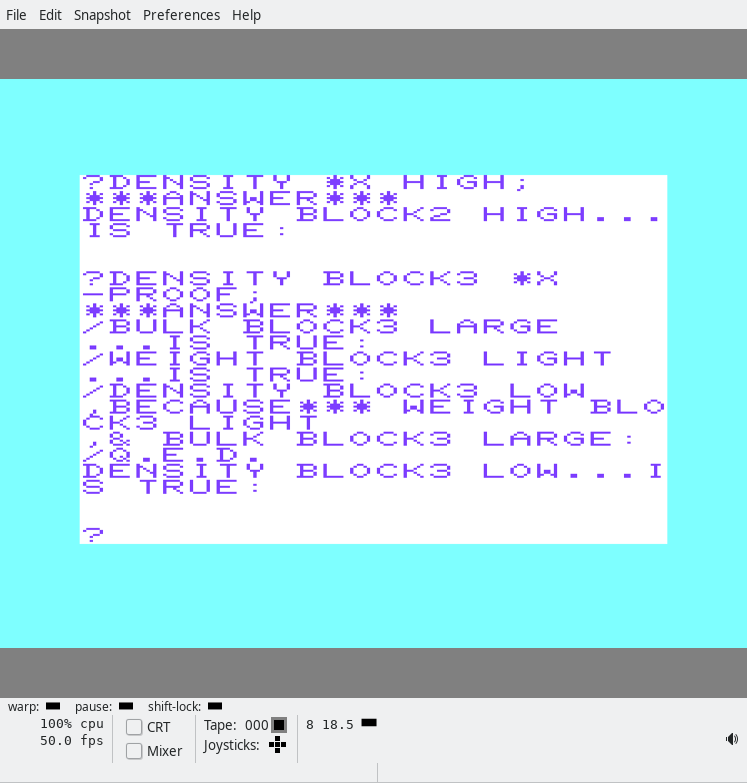
In the screenshot, we first ask which blocks have a high density. The answer is BLOCK2!

Then we ask it the density of BLOCK3 and ask it the reason using the PROOF

?DENSITY BLOCK3 *X
-PROOF;

And the answer is:

/DENSITY BLOCK3 LOW ,BECAUSE*** WEIGHT BLOCK3 LIGHT ,& BULK BLOCK3 LARGE:
/Q.E.D.
DENSITY BLOCK3 LOW...IS TRUE:

OCRing hex dumps (or other monospace text) and verifying the result

Summary: Segmentation tool and OCR verification tool. You can use these tools to either verify an existing OCR’d hex dump, or use them to run your own OCR. (Which isn’t hard! You can probably get ChatGPT to produce a probably working Python script using PyTorch to learn the digits, and easily get 97% (or so) accuracy. Maybe something along the lines of, “Write a Python script that uses PyTorch to train recognition of something like MNIST, except there are 16 classes, not 10. The recognition should use convolutional layers. Input images are PNG files. Labels are in a text file.” (I just tried and the result looks plausible.))

Why hex dumps anyway? Because in the 1980s computer magazines sometimes included printed hex dumps of programs. But that’s just how I got motivated to write these tools. More on that in this post.

If you are familiar with basic image recognition concepts, you may know that detecting hand-written digits is generally considered to be a very easy task, the “hello world” of AI image recognition even. (Didn’t know this? Maybe search for “MNIST dataset”)

If recognizing handwritten digits is considered so easy, recognizing printed digits should be even easier, no? The answer is “yes” and “no”, because I left out some information above. The MNIST dataset consists of images that contain exactly one digit. OCR, on the other hand, requires segmentation. In general, recognizing typed letters if you have them in a nicely cropped single image is quite easy. (Except for letters that look very similar or even identical, of course.) Is segmentation an easy task? Well, there are all kinds of layouts out there. If you want to know more about segmentation, Andrew Ng explained the basics in this and the following few videos: https://www.youtube.com/watch?v=CykIW9hFK24&list=PLLssT5z_DsK-h9vYZkQkYNWcItqhlRJLN&index=108. These videos are part of Andrew Ng’s Machine Learning course on coursera.org, but I can’t find the specific lecture that contained this bit. (tl;dr: basically, you have a pipeline with multiple stages: first you detect regions that vaguely look like text, then a stage that detects if you have a single character or more than one character, and finally a stage that can recognize single characters.)

Performing segmentation on hex dumps and other monospace text is quite easy. However, getting the segmentation wrong can ruin the OCR. Either hardly anything will be recognized, or things will be jumbled up. I played around with Tesseract and a couple other OCR systems but wasn’t able to get good results on hex dumps. Hex dumps have the additional benefit that there are only 16 symbols that need to be recognized. One tool that work pretty well was ProgramListOCR (https://github.com/eighttails/ProgramListOCR). I think it was over 95% accurate with my input images. If it could output the segmentation too, it would be even better, in my opinion.

In this blog post I’m going to describe the tools I linked to above (Segmentation tool and OCR verification tool) and how we can use these tools to get a perfect OCR scan of a hex dump. Because let’s face it… A 99% correct hex dump isn’t all that useful, unless you enjoy sending old CPUs off the rails, or playing spot the difference.

Text segmentation/image tiling tool

The segmentation tools sort of looks like this (at the time of this writing):

Top of page (let’s skip the middle)
Bottom

What you can do here is: select an image from a file, specify the number of columns and rows, adjust the rows and columns using the buttons on the right (and then clicking somewhere in the image to that row or column smaller or larger), export to tiles. The adjustment process is best done at high zoom levels (use Ctrl+scroll wheel to zoom). You can also choose to skip certain columns when exporting. You can use the keyboard to do most things. (Cursor keys: move around, space: use current tool at cursor position, T: toggle column export tool, x/X: add/remove X offset tool, y/Y: add/remove Y offset tool.) The tiles will be output into data URLs in the text area at the bottom of the page. You can convert the data URLs back into files using the given shell code snippet. Also reproduced here:

# put contents of clipboard into a file:
xclip -o > data.txt

# convert data URLs in data.txt to PNG files:
i=0; while read -r line; do output_file=$(printf "%05d.png" $i); echo "${line:22}" | base64 -d > "$output_file"; i=$((i+1)); done < data.txt

You can of course also tile into single characters. You’ll just have to fiddle a little more with the offset tools.

OCR verification tool

Here are two screenshots that may help to get some intuition on how to use this tool:

Top of page
Bottom

This tool (at the time of this writing) expects as input 1) images as data URLs, to be pasted into the textarea at the top of the page, and 2) the predicted labels corresponding to each image.

The tool then displays the input images sorted into their classes for easy verification by a human. ;) And this is pretty easy for humans, because there are just 16 classes and the human eye is very sensitive to objects that don’t look like the surrounding objects. Here’s another screenshot to demonstrate that it should be easy to find things that look out of place:

The 0 surrounded by 6es and 9 in the cluster of 7s should be pretty easy to spot. (It is also possible that there are Bs surrounded by 8s, but that’s a different topic.)

The web page allows you to drag the images around to put them in the correct category, and to then reconstruct the labels, taking the fixes into account.

Dragging and dropping 9s mis-identified as 7s.

Here’s a more real-world example, with unpolished input images. (If you invest a couple minutes to add/remove offsets in the segmentation tool, you should get slightly better images than this.)

This is one page (around 1/3) of the entire hex dump