Update 2025/05/17: It turns out that connecting Rigol scopes to the network can be very useful sometimes. Apparently you can connect your Rigol directly to PulseView by doing Connect to device → Rigol DS (rigol-ds).
Update 2025/05/21: I also have access to a Siglent SDS 1202X-E, and while (AFAIK) PulseView can’t be connected to this scope, I was able to perform a binary dump (it’s in the export options) and load it in Audacity and go from there (just as described below) just fine.
In this post, we export what we see on an oscilloscope to some odd raw format, load it in Audacity and fix it up a bit, load it into PulseView, and set up a logic analyzer decoder. This is not necessarily USB-PD-specific, you can use this to turn your oscilloscope into a logic analyzer and protocol decoder, albeit with very few channels.
(Note: most oscilloscopes have decoding built in for common things like I2C. But maybe PulseView’s interface is a little nicer, so this technique might help in those cases too.)
The Rigol DS1202Z-E doesn’t have USB-PD decoding built in. Too bad. Maybe it’s available in newer scopes?
USB-PD starts when a connection is made. In my case, I’d like to check up on the negotiation between a charger (source) and a Raspberry Pi 5 (sink). It’s likely that the Raspberry Pi 5’s USB-PD negotiation is defective, but that’s a topic for another post.
USB-PD works with a really low voltage level, which most logic analyzers probably don’t support directly. Oscilloscopes aren’t that picky, fortunately. All we have to do is set up a trigger on the right voltage, with a time base that will allow us to get as much data as possible (I went with 100 ms for now).
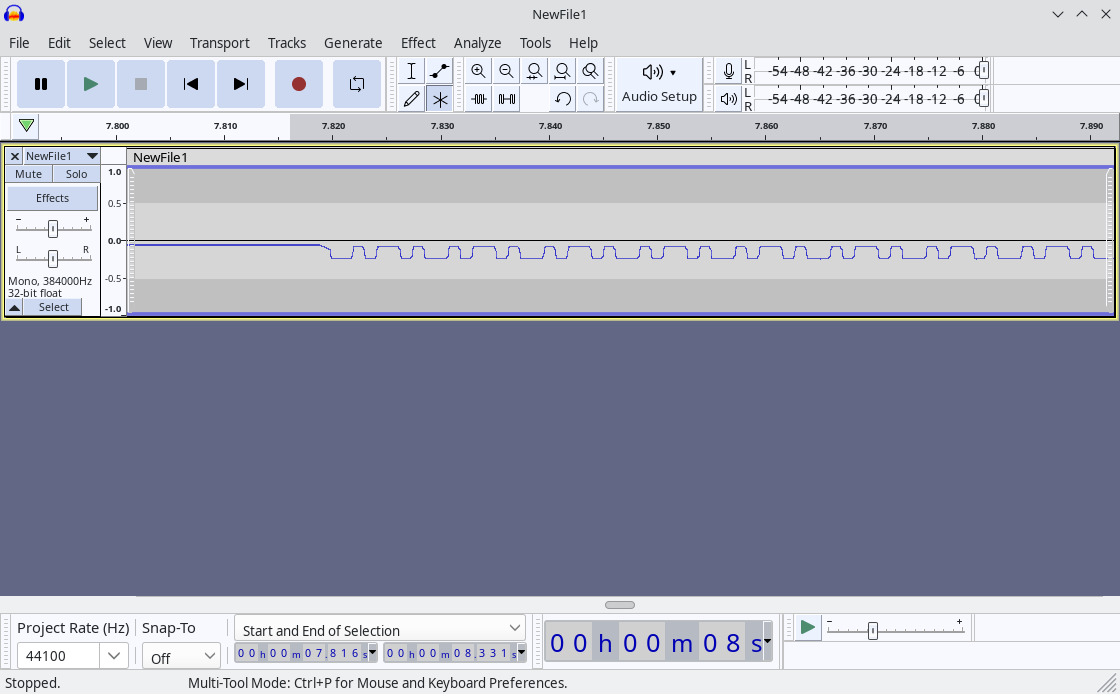
We need to store this data on a USB stick. The Rigol DS1202Z-E supports “CSV”, “TRC”, “WFM”, and probably a couple others. As you may have found out by now, getting it to save a CSV file with the entire memory takes a long time, so let’s not use that. Instead, we’ll use WFM. Done. How do we open this WFM file? We open it in Audacity! File → Import → Raw Data → NewFile1.wfm. Pick “Unsigned 8-bit PCM”, “Default endianness”, “1 channel (mono)”, start offset 0, amount to import 100%, sample rate: whatever you like. The actual sample rate is obviously incredibly high and audio sample rates are incredibly low, so I don’t think Audacity supports entering 200 MHz. (All right, I entered 200000000 Hz but it turned that into 384 KHz, I think. 200 KHz works BTW!) You should now be able to see in Audacity the wave form you saw on your oscilloscope, like this:
What you need to do beyond this point depends on what you want to do. Duh! Well, I want to decode USB-PD. So here’s what I did next:
Next, we cut off any sections we don’t need (select using mouse and press “Del” key).
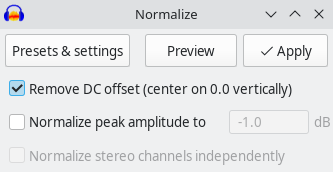
Next, we remove the DC offset (Effect → (Volume and Compression →) Normalize → Remove DC offset (center on 0.0 vertically), uncheck “Normalize peak amplitude”). (In newer versions the “Effect” menu is sorted by category, in older versions it isn’t.)
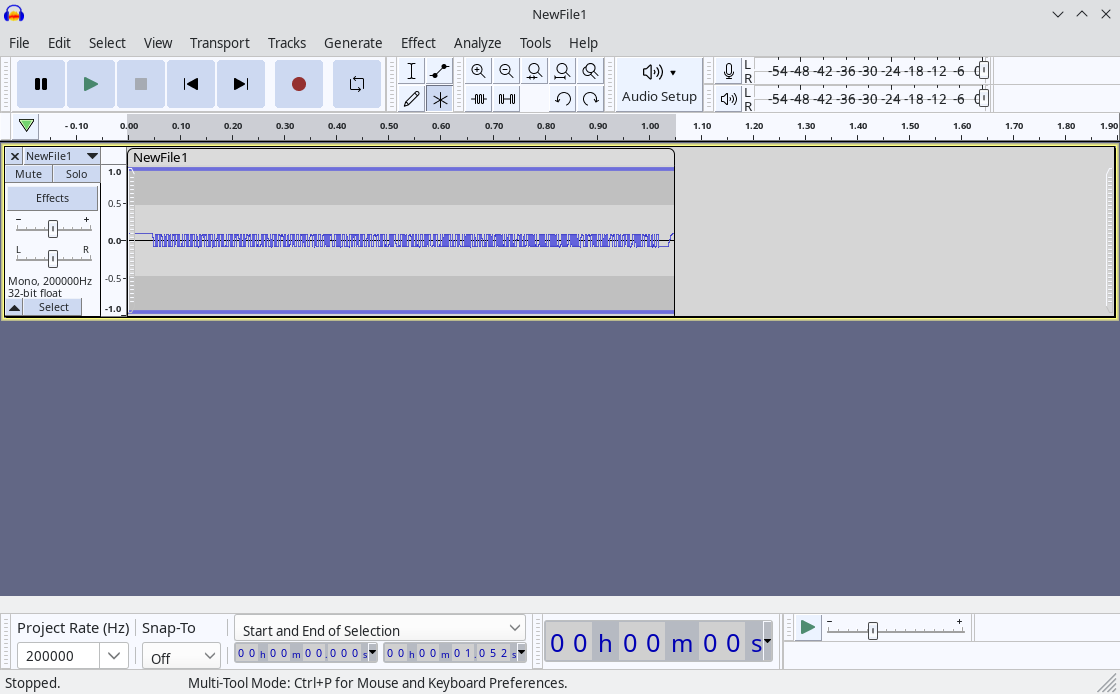
Next, maybe amplify the signal a bit, if you like. (Effect → (Volume and Compression →) Amplify
Next, go to File → Export → Export as WAV, select “Signed 16-bit PCM” and save as a .wav file.
Next, open this file in PulseView, but not as a WAV file, but as a raw file, like this:
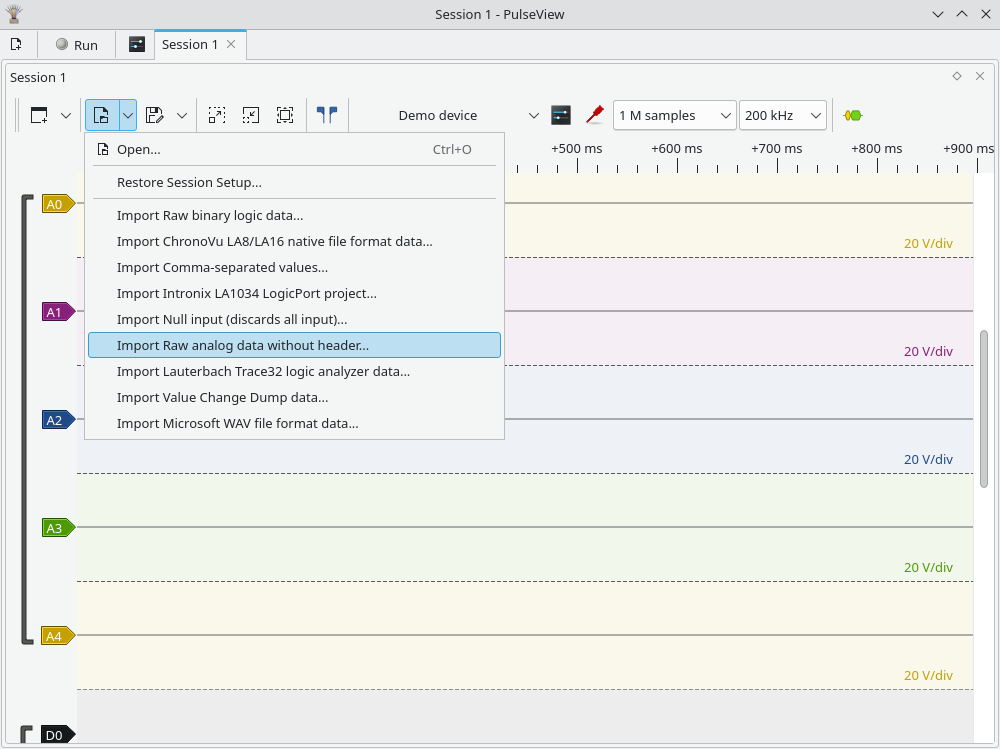
Note: files ending in .wav will not show up in the file selector, so choose Filter: All Files. Data format is S16_LE, number of channels is 1, sample rate is 200000000 in my case; this depends on your oscilloscope and its settings.
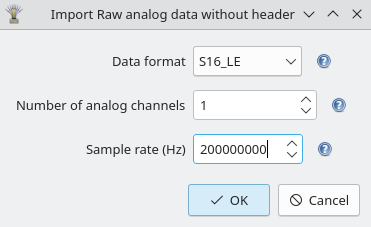
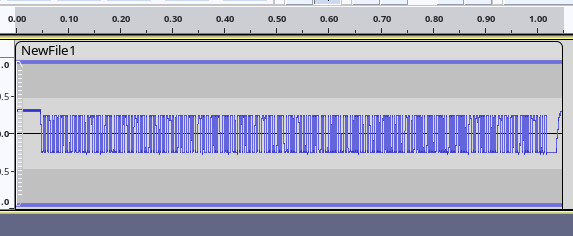
This is the result. Note that we have some junk at the beginning because of the WAV header. Feel free to get rid of it if it’s no good for your use case.
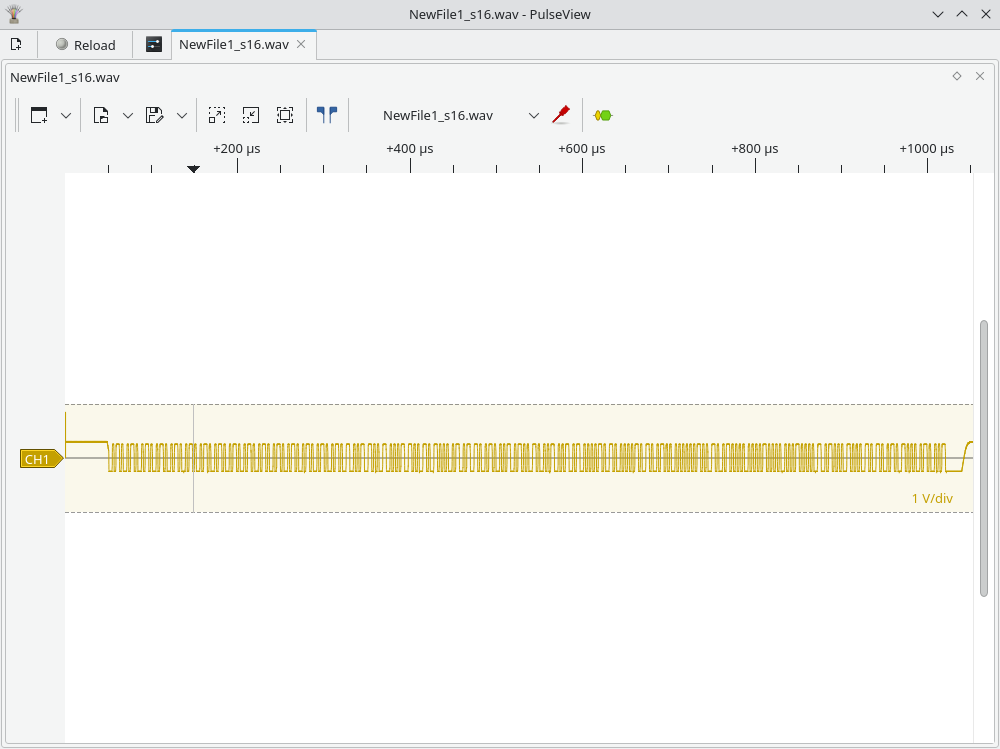
Next, click on the “CH1” arrow on the left side, set it to convert to logic, with the threshold at 0V.
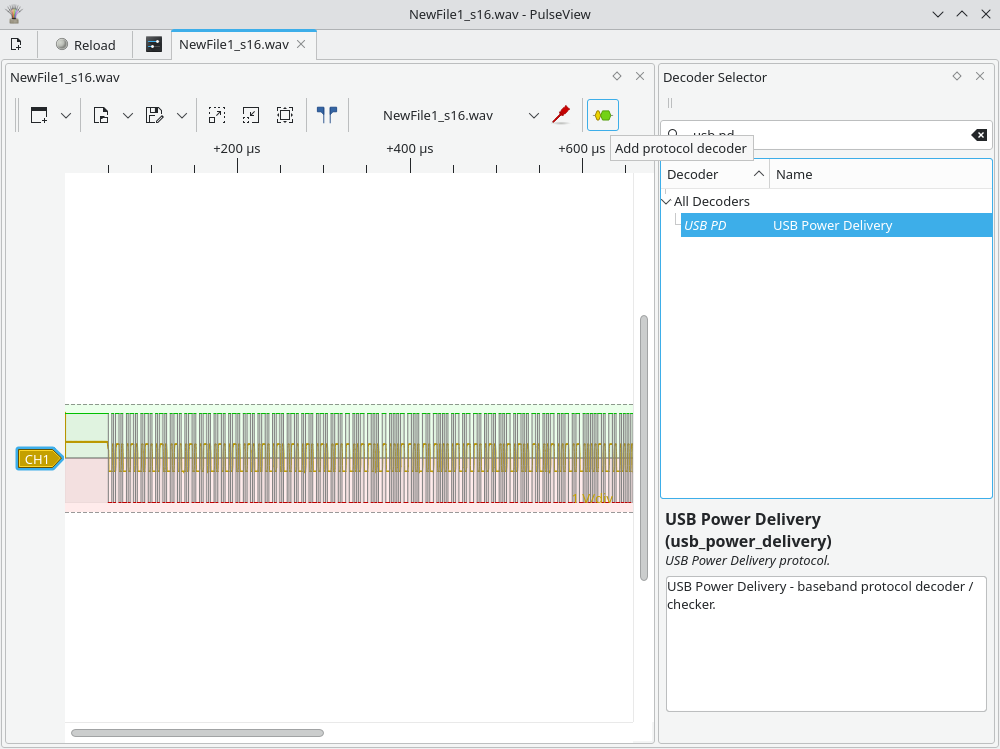
Next, we need to add the USB-PD decoder. Press the yellow/green button in the toolbar, search for “usb pd”, and double-click the “USB PD” item.
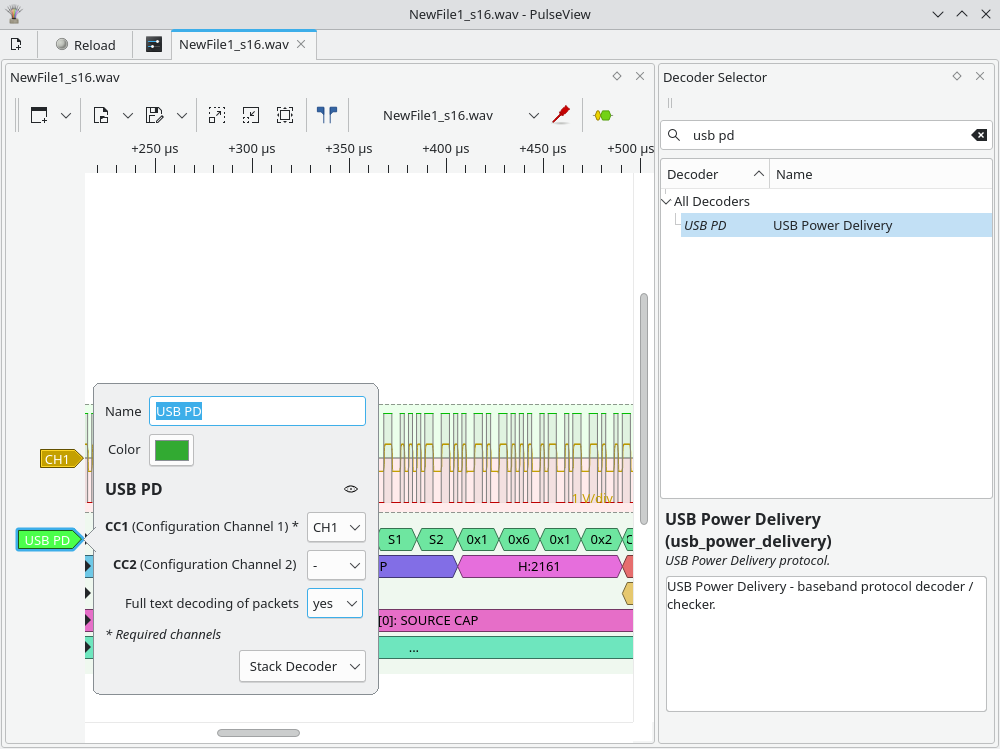
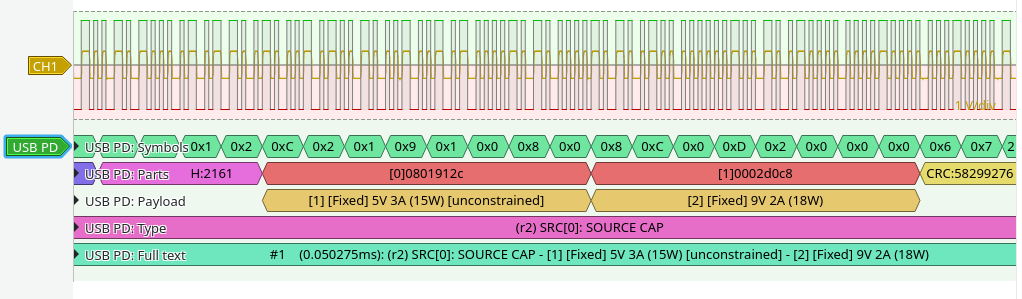
Next, press the “USB PD” arrow on the left side and set CC1 to be CH1, and optionally select “Full text decoding of packets”: yes.
Catch you next time!