Back in the days of the Apple II, you could apparently run off to Akihabara and get the same computer with possibly better components for less money. Or just the parts you needed.
I had a chance to look at such an Apple II Plus clone that wouldn’t boot into BASIC. It beeped and displayed “Apple ][” at the top, but didn’t go anywhere from there. Pressing Ctrl+Reset made it produce another beep, but nothing happened on the screen. Sometimes it beeped twice. Once in a blue moon it would enter the monitor. And as I found out through trial and error, it would also enter the monitor when I pressed Ctrl while turning on the power switch on the PSU.
Before I did that though, I checked the voltages, and they were pretty low, near 4.6V, even with all expansion cards removed! (I also checked for hot spots to make sure there were no almost-shorts.) Fortunately the PSU supplied in this computer has a potentiometer that allows users to adjust the voltage without even opening the computer!
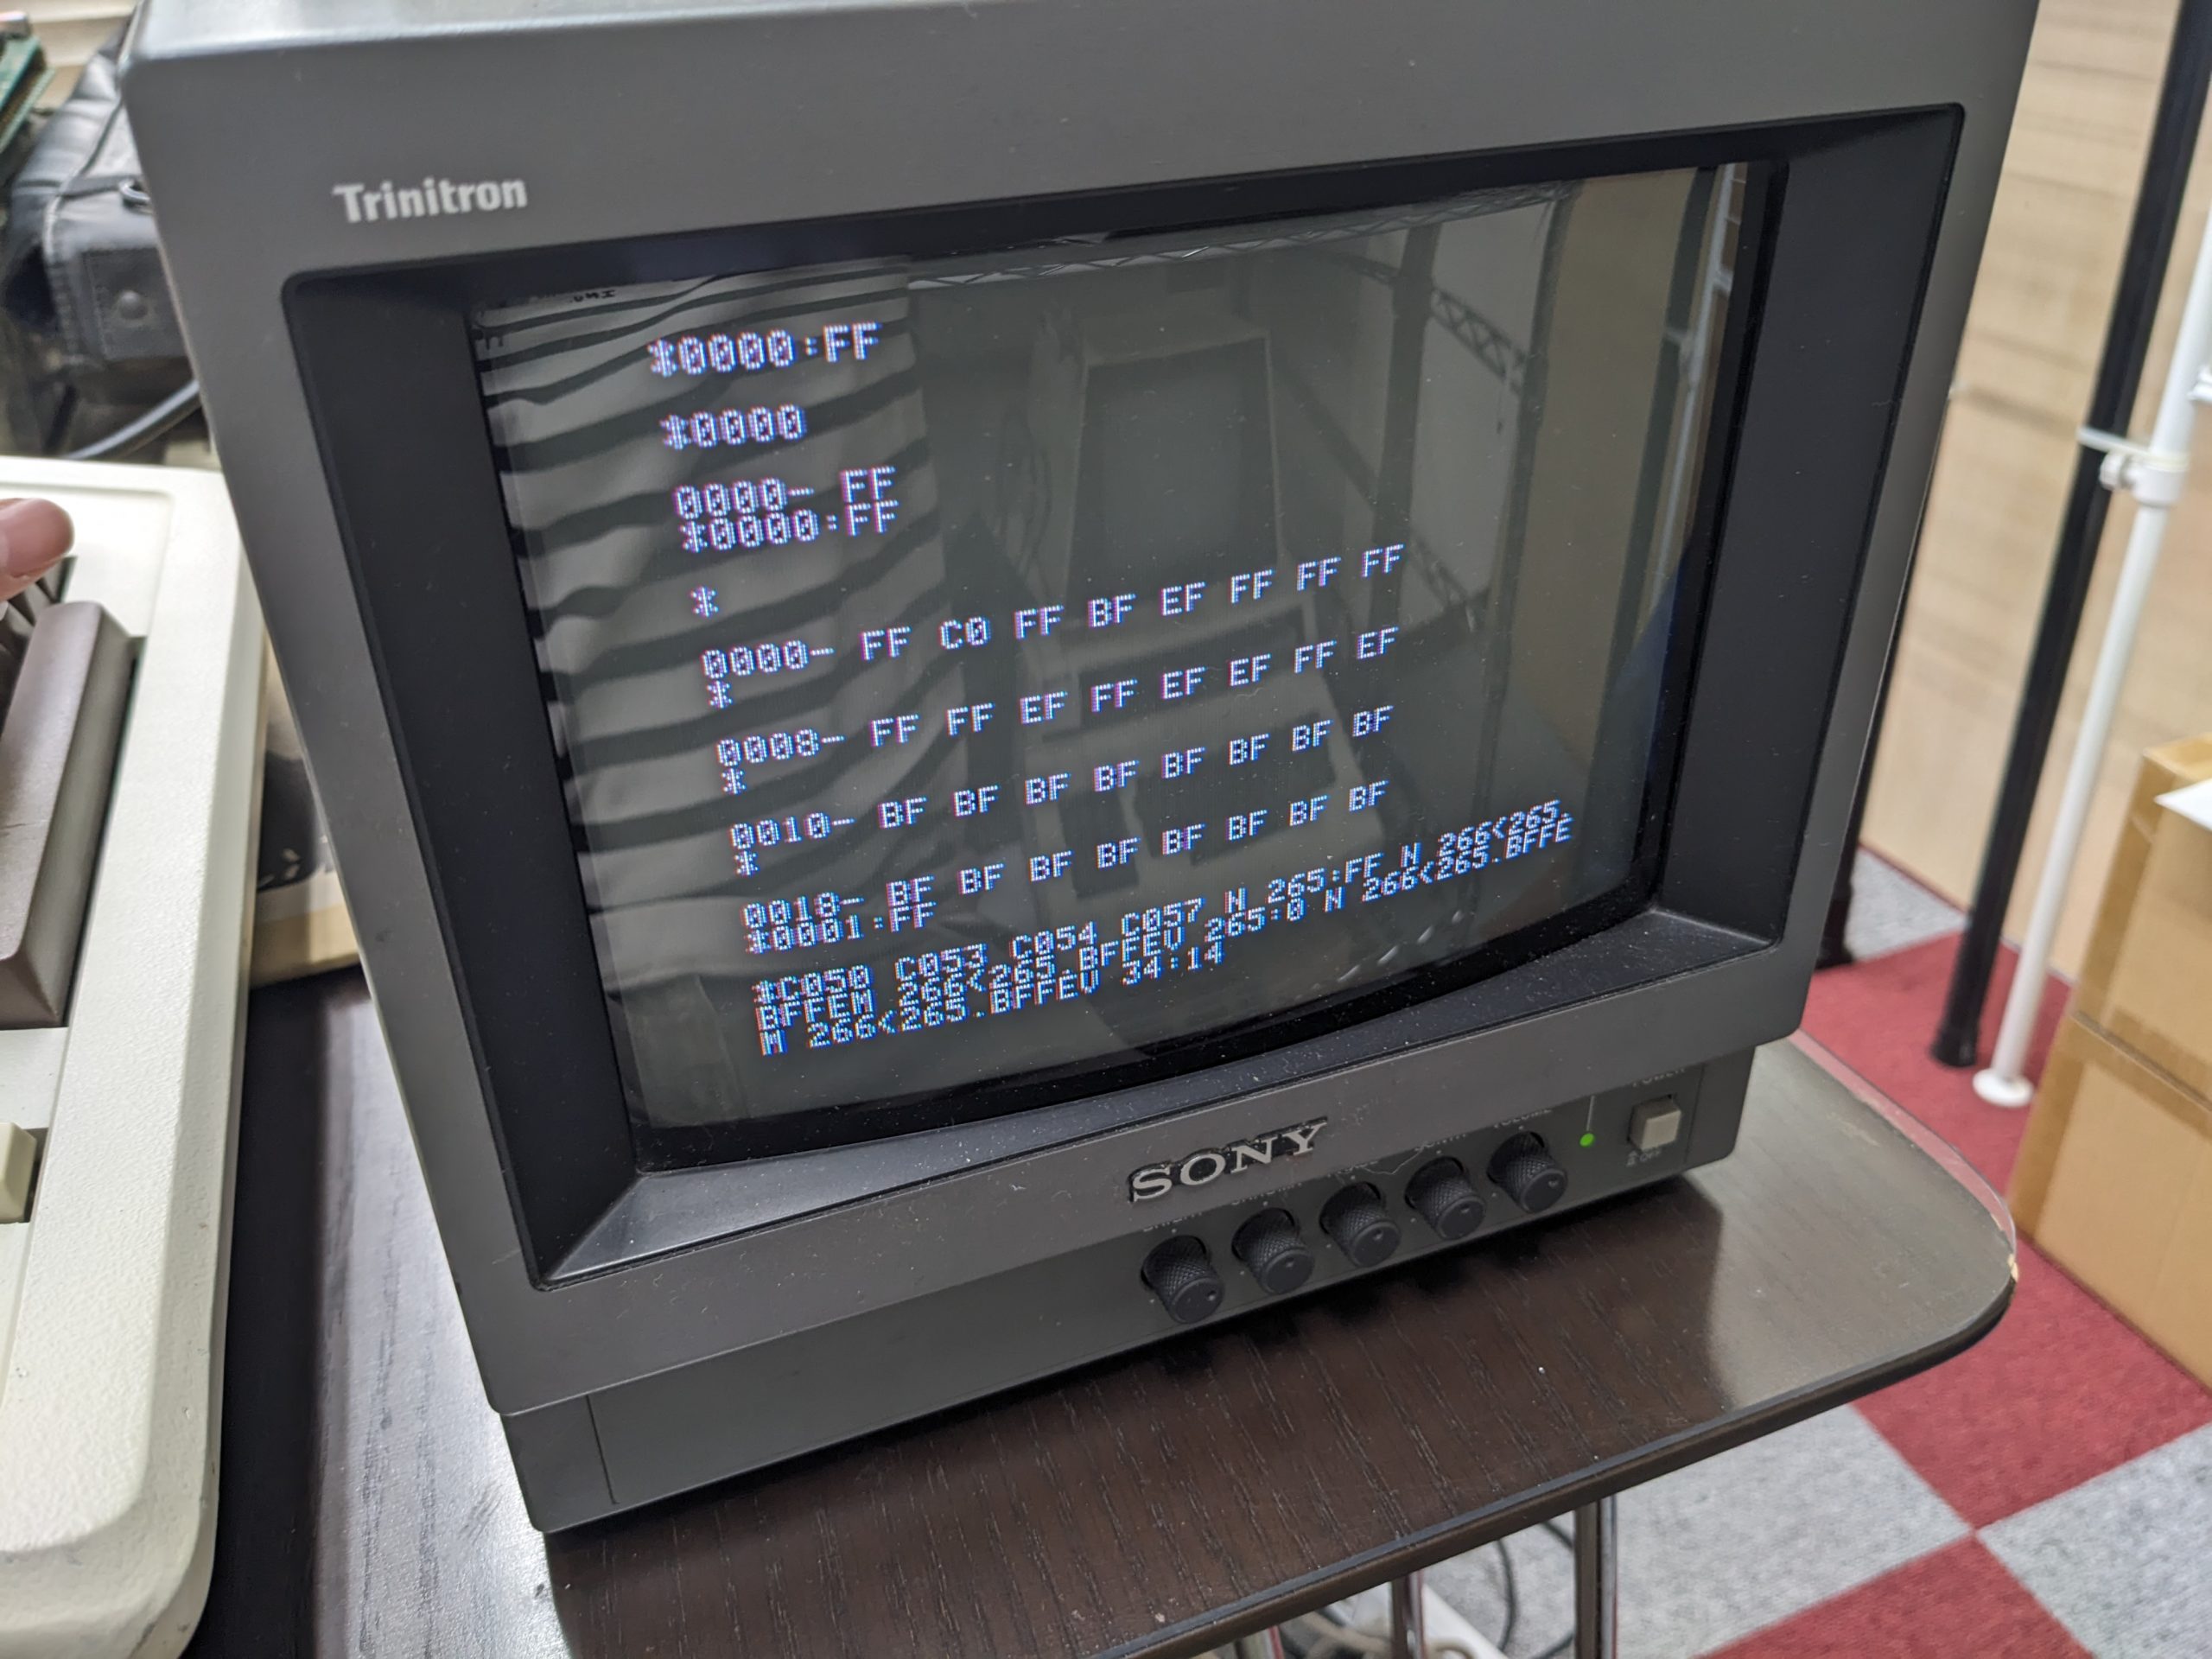
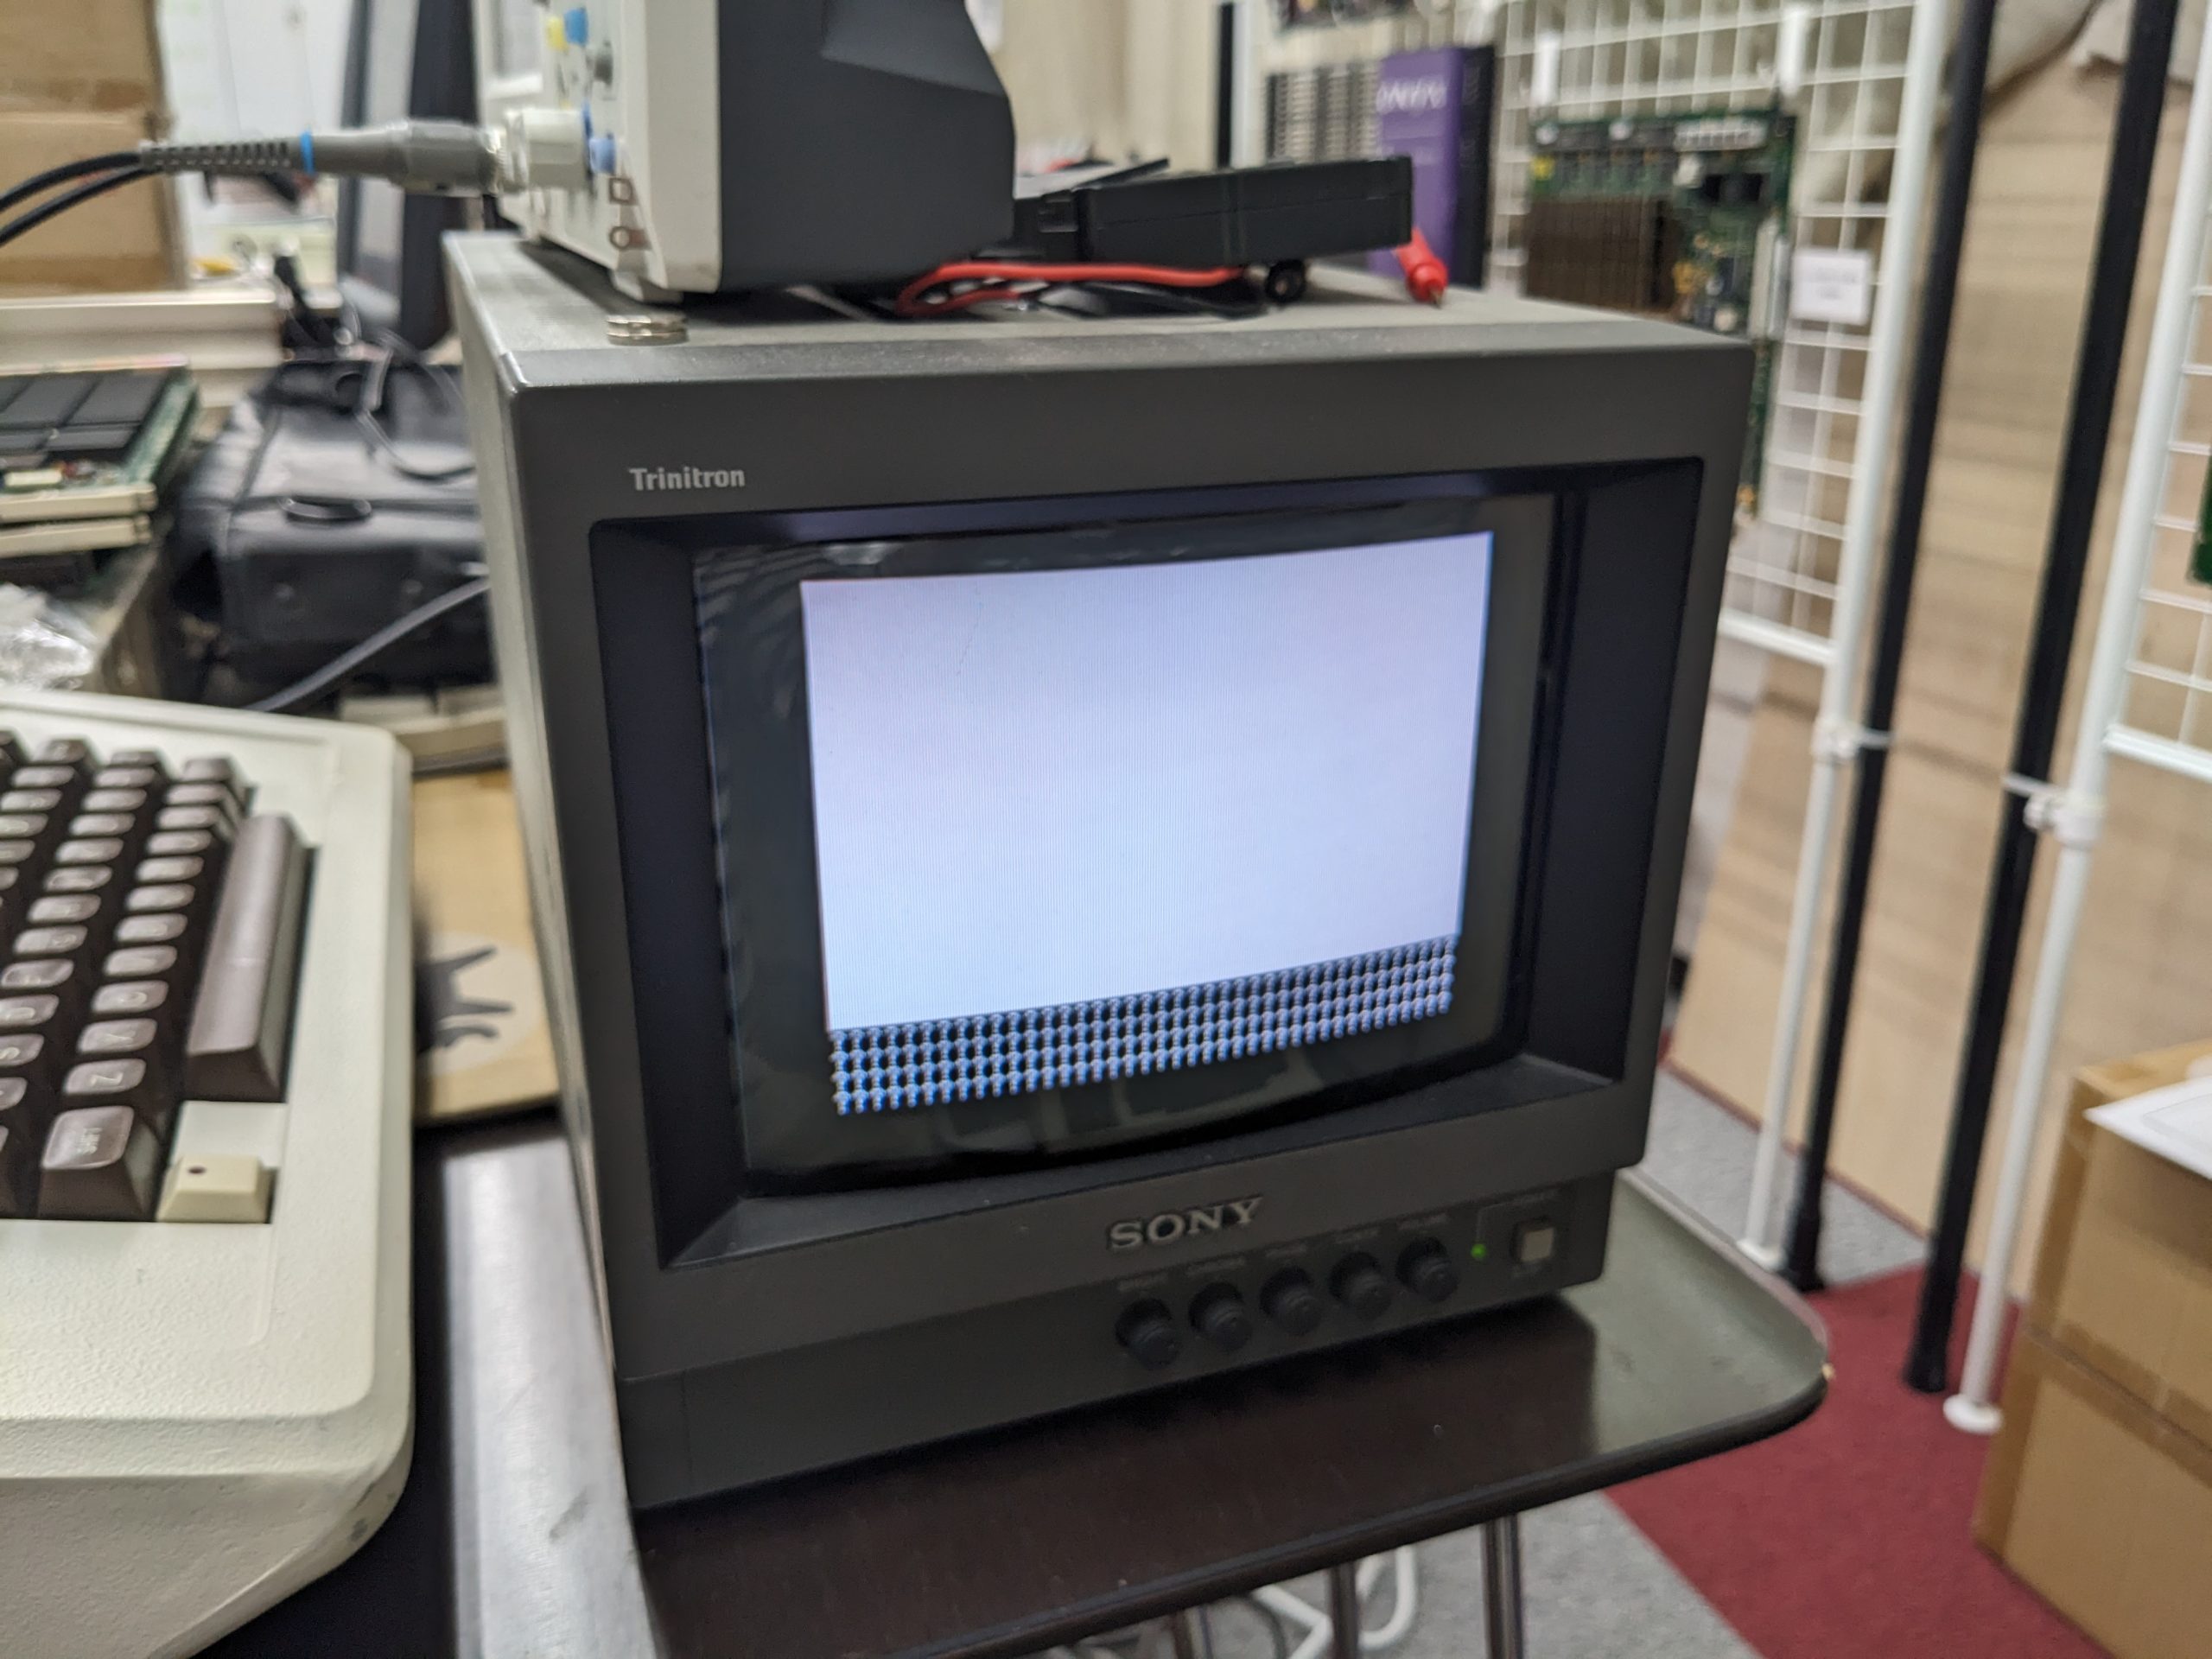
When you’re in the monitor you can check the memory, ROM, and do what you want! And since this is a popular system, you’re just one Google search away from getting some really cool incantations that you can paste^Wpeck in there.
For example, I found something that’ll perform a memory test! This test passed with flying monochrome colors.
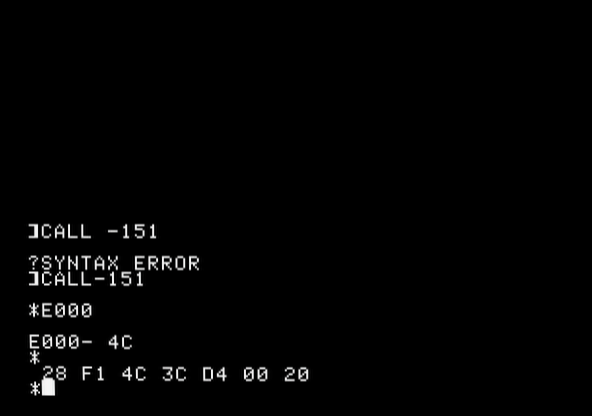
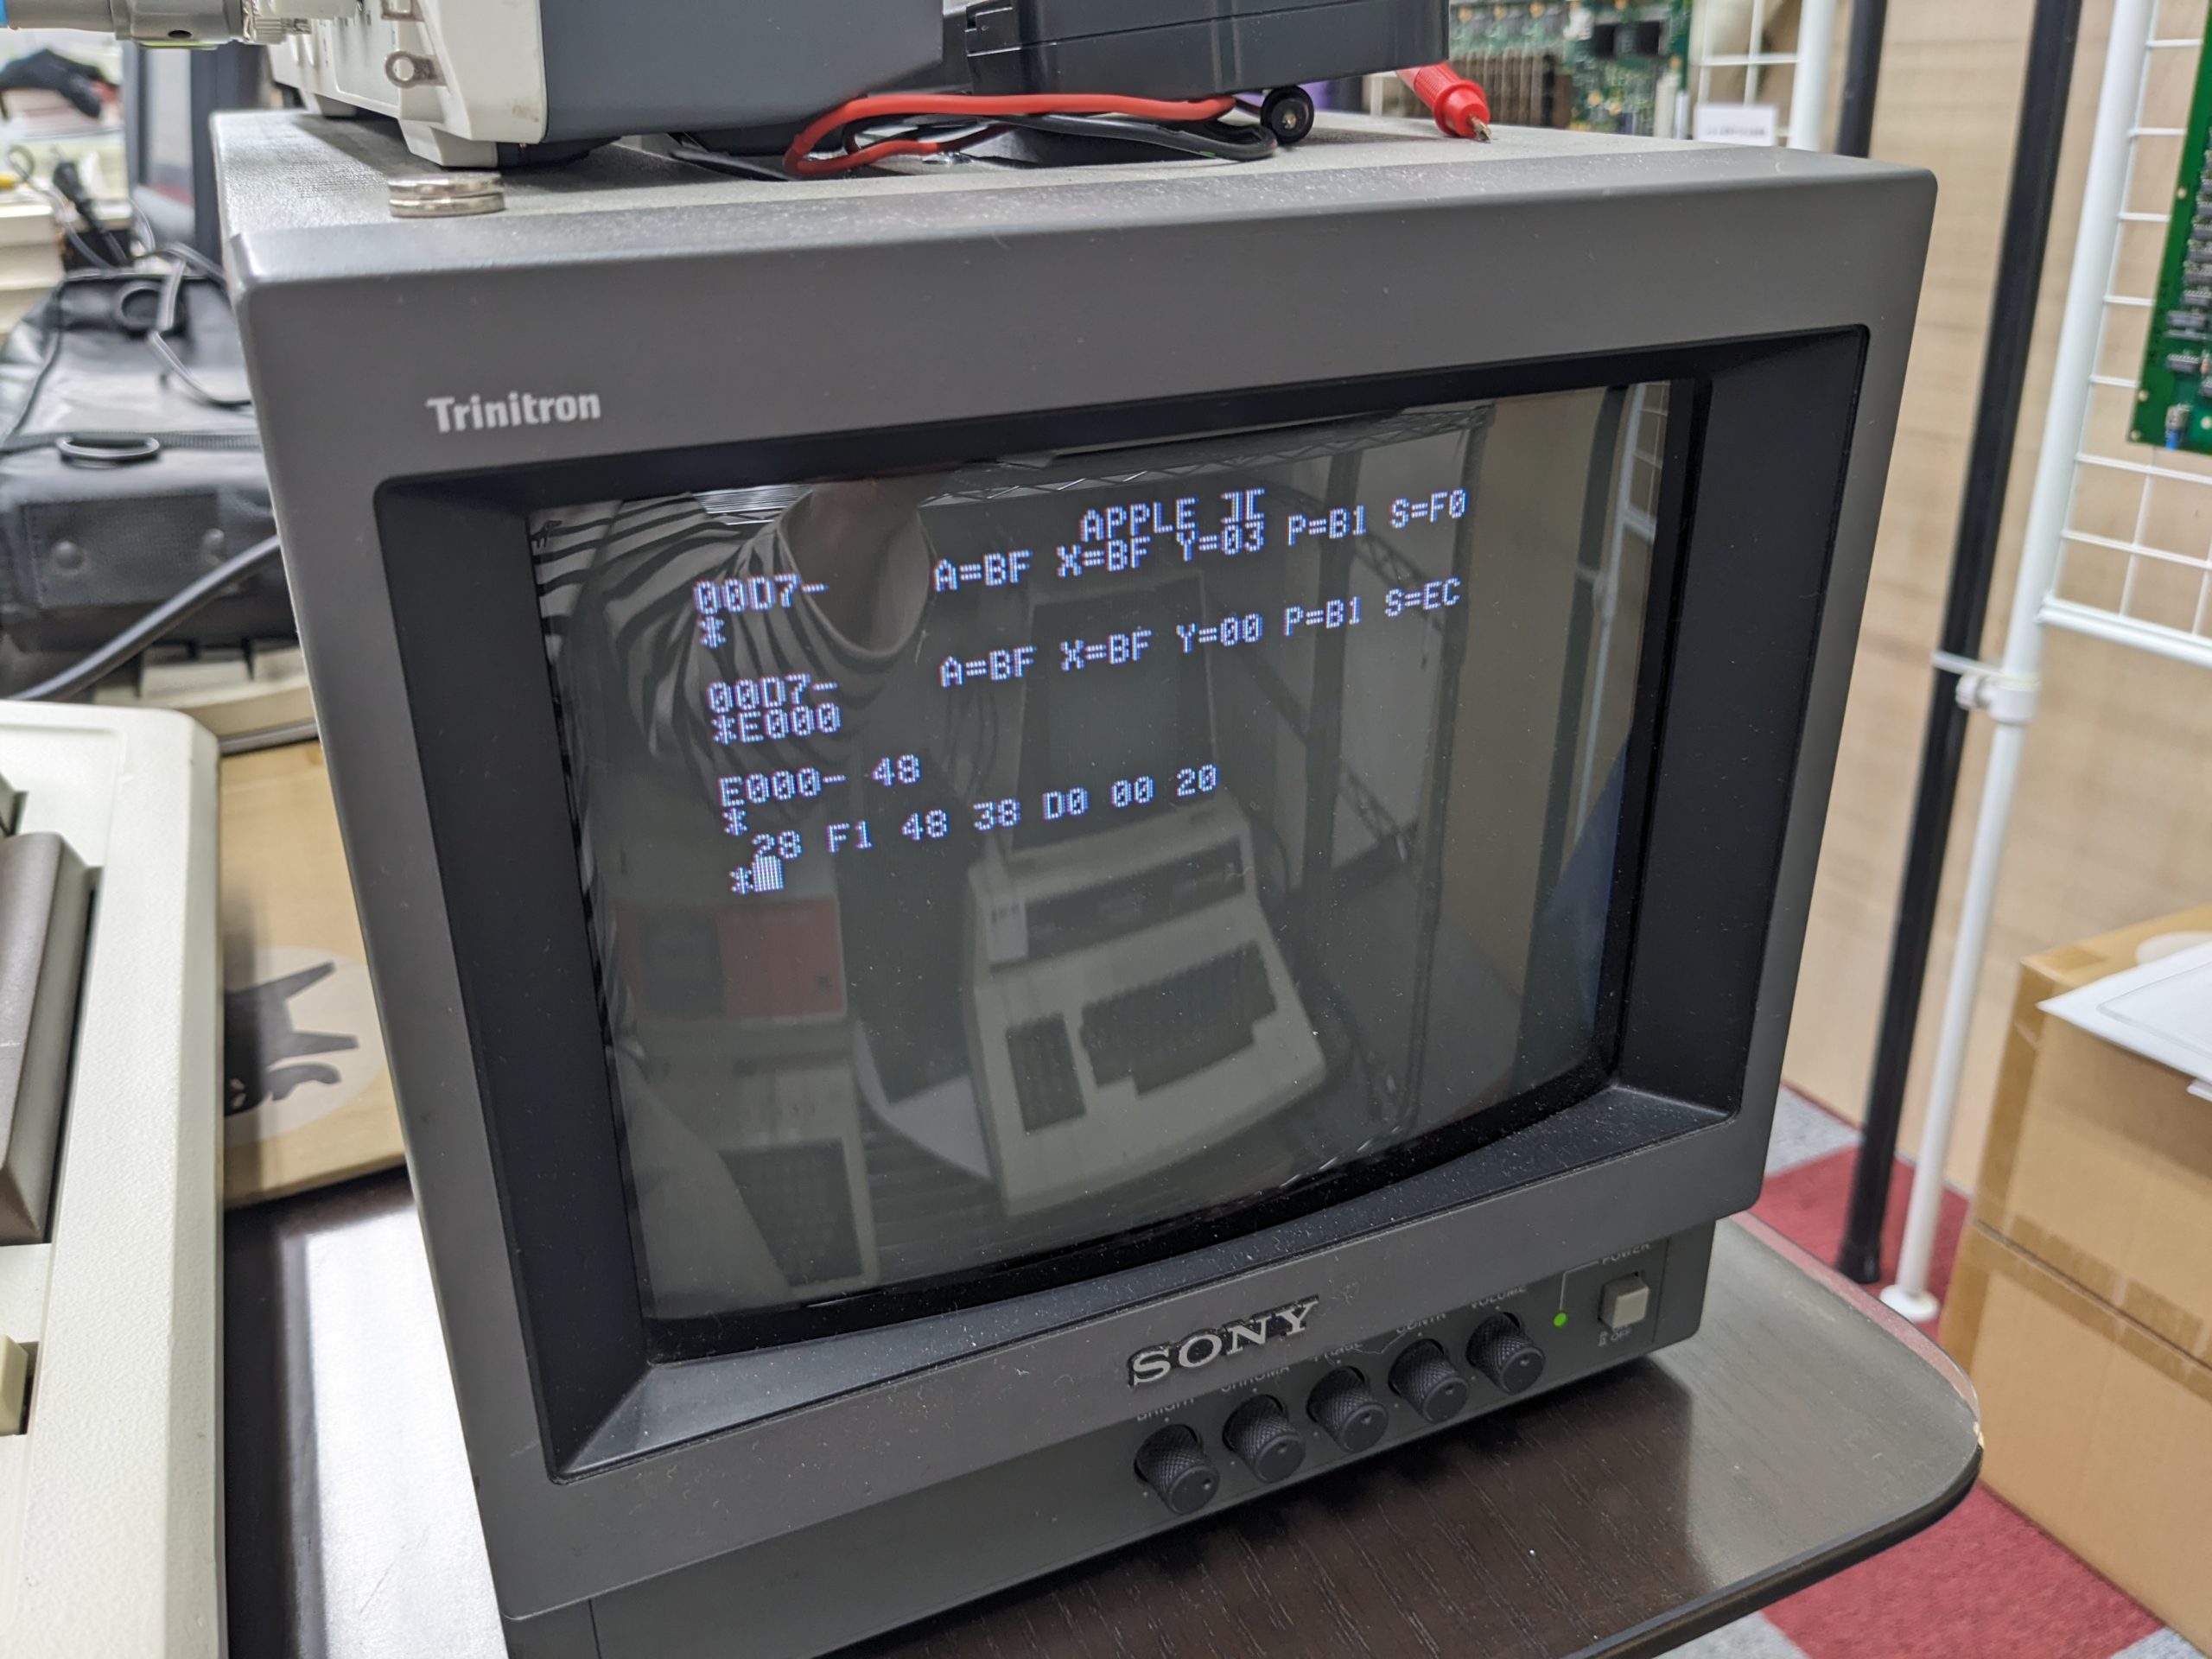
If the RAM is good, the ROM could be bad, or there might be a problem with a buffer chip, etc. So how do you test the ROM? Well, you go to https://www.scullinsteel.com/apple2/ on a computer (or phone), select the appropriate machine (][+ in this case) and enter the monitor by typing “CALL -151” (or “CALL-151”?). Then you type, e.g., “D000[return][return]”, and you’ll get the contents of the ROM at D000-D007. I had a look at the first 8 bytes of D000, D800, E000, E800, F000, F800. And guess what? E000-E007 were different!
Emulator On the real machine
E000 has 4C in the emulator, 48 on the real machine. E003 is the same. E004: 3C/38.
0x4C is 0b1001100. 0x48 is 0b1001000. 0x3C is 0b0111100. 0x38 is 0b0111000.
As we can see, it looks like one bit is refusing to come up.
I took out the ROM for E000-E7FF (which is conveniently labeled E0 on the PCB), cleaned the pins and the socket, and put it back in. And that’s all that was wrong with it! (I’ll replace at least one cap in the power supply at a later date. Unfortunately it’s one of those huge high-voltage high-micro-Farad ones that aren’t available in my parts cabinet.)
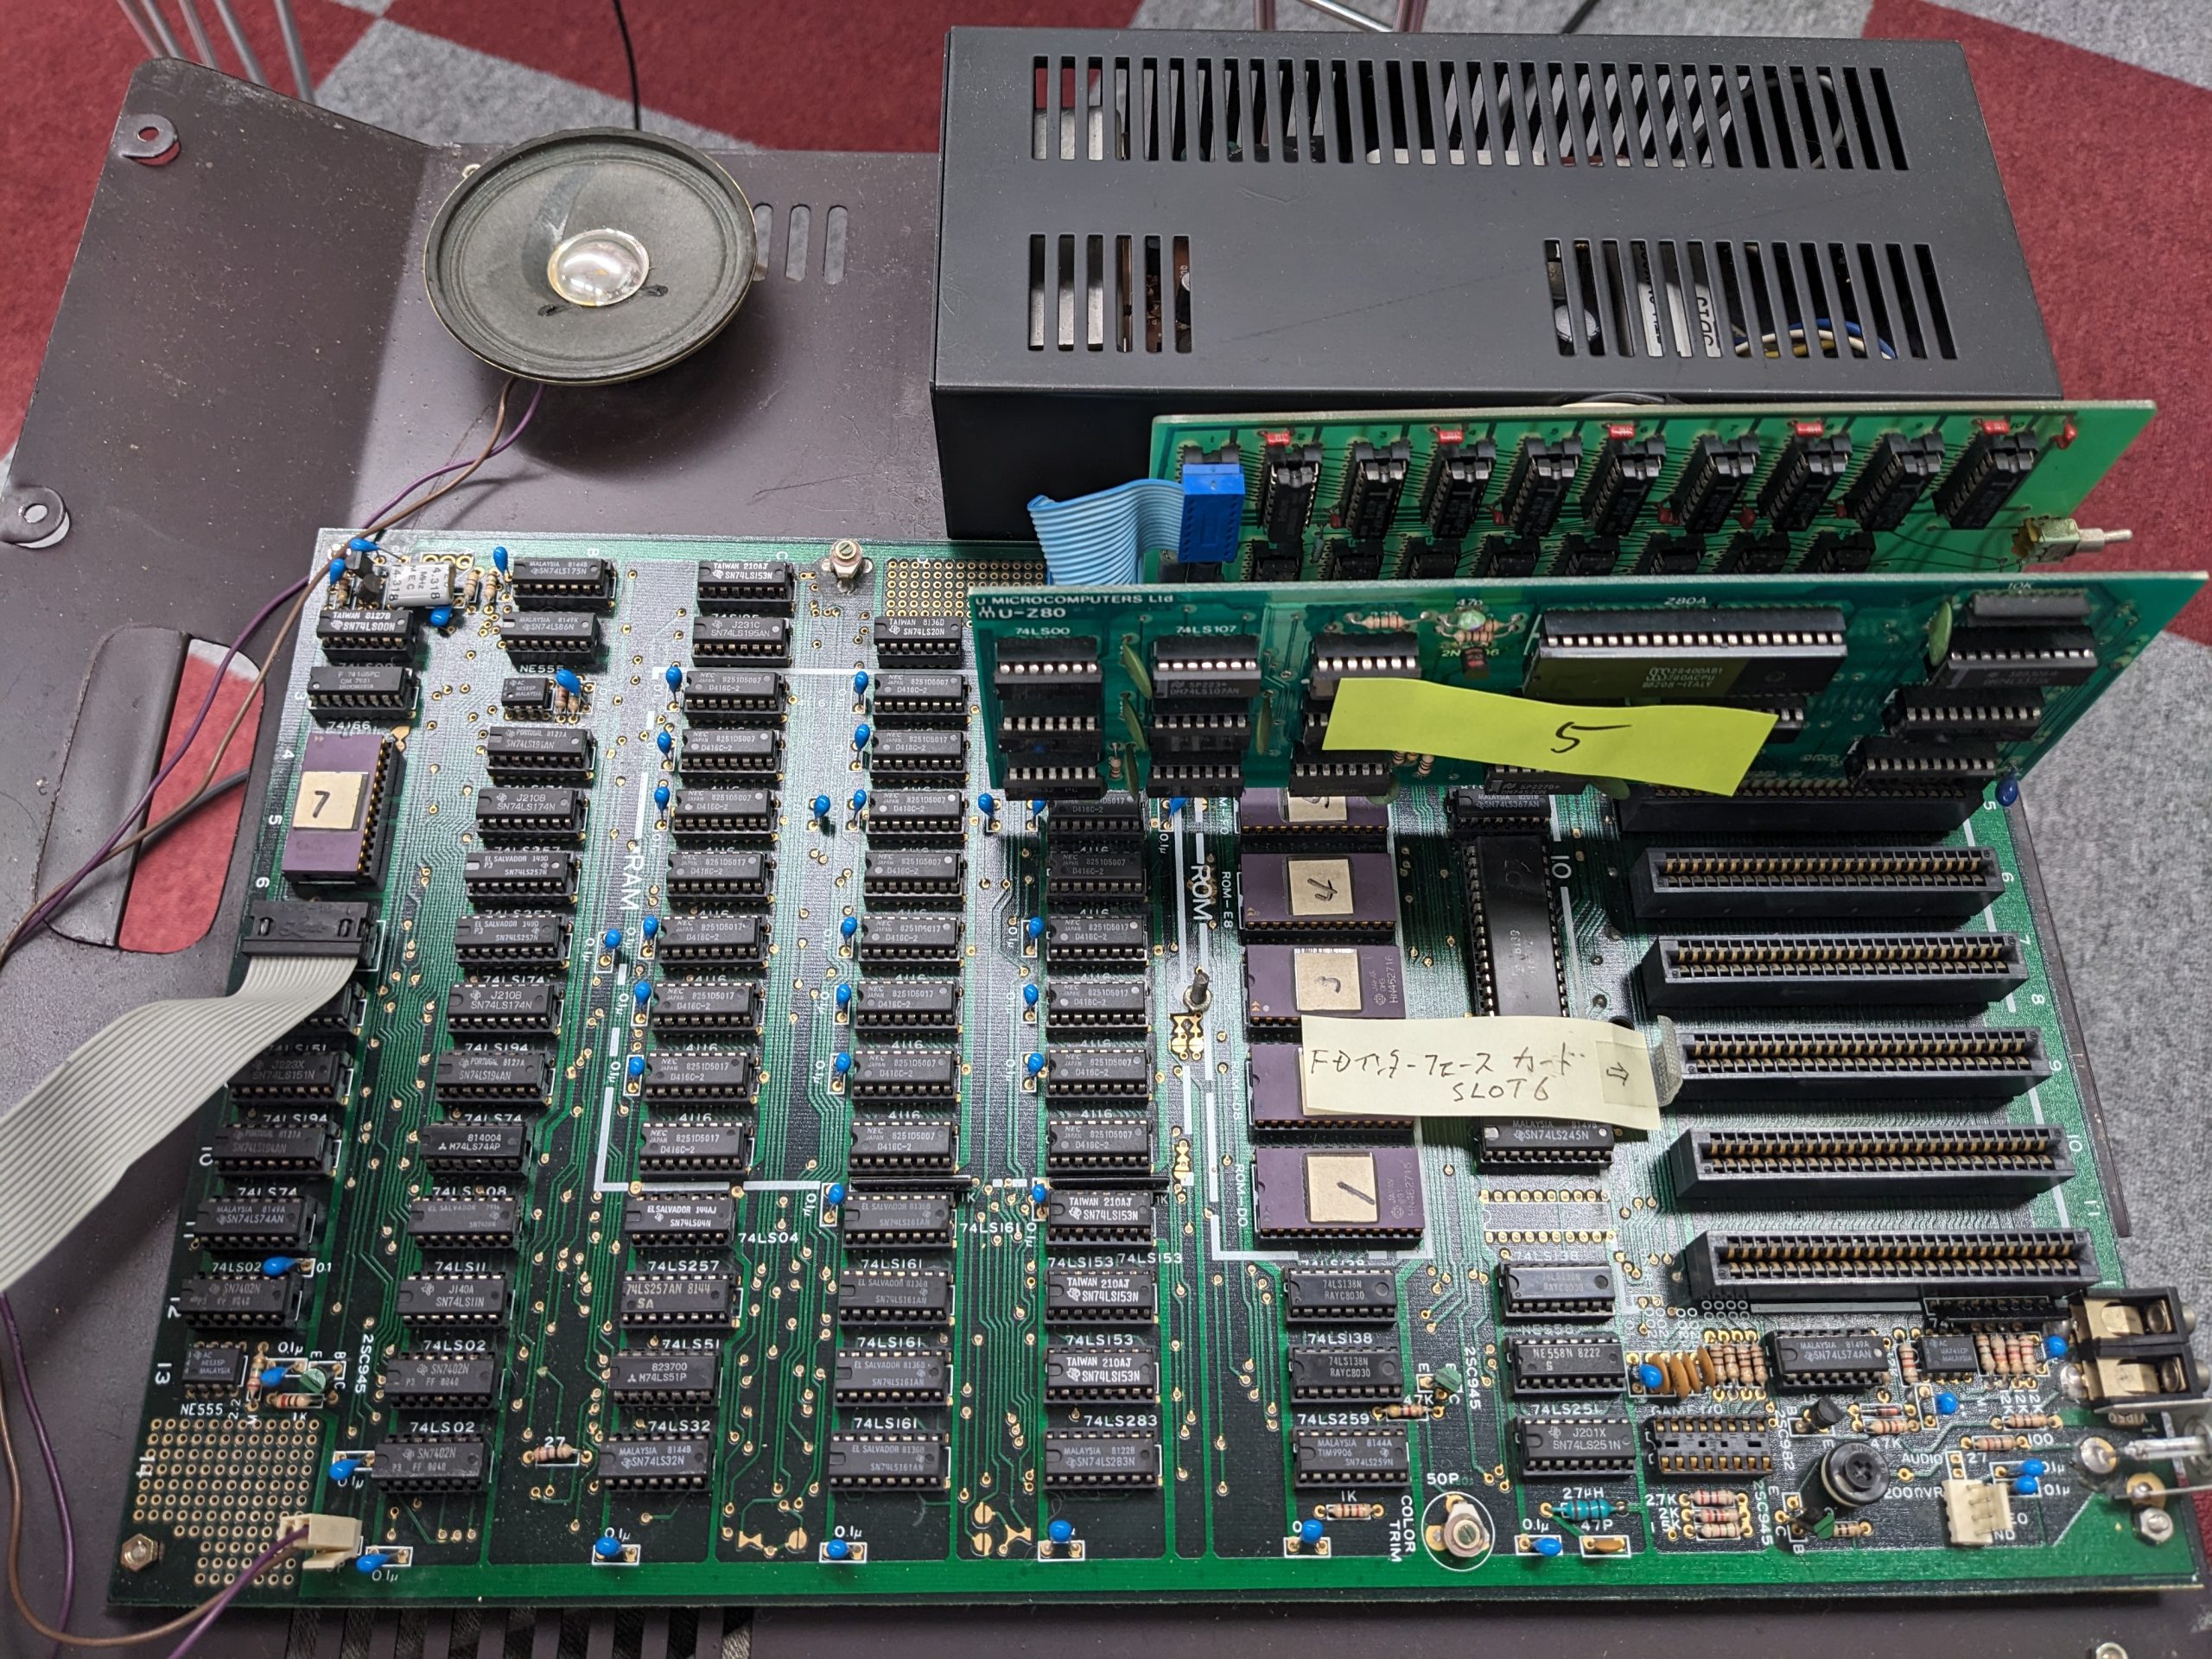
Mainboard. The ROM chips are regular 2716 chips, which is pretty useful compared to e.g. 2316 or 2516. Plus they have gold-plated pins! There was no crustiness at all.
I recently had a chance to look at a malfunctioning Commodore 3040 floppy drive.
Smoke coming out of drive
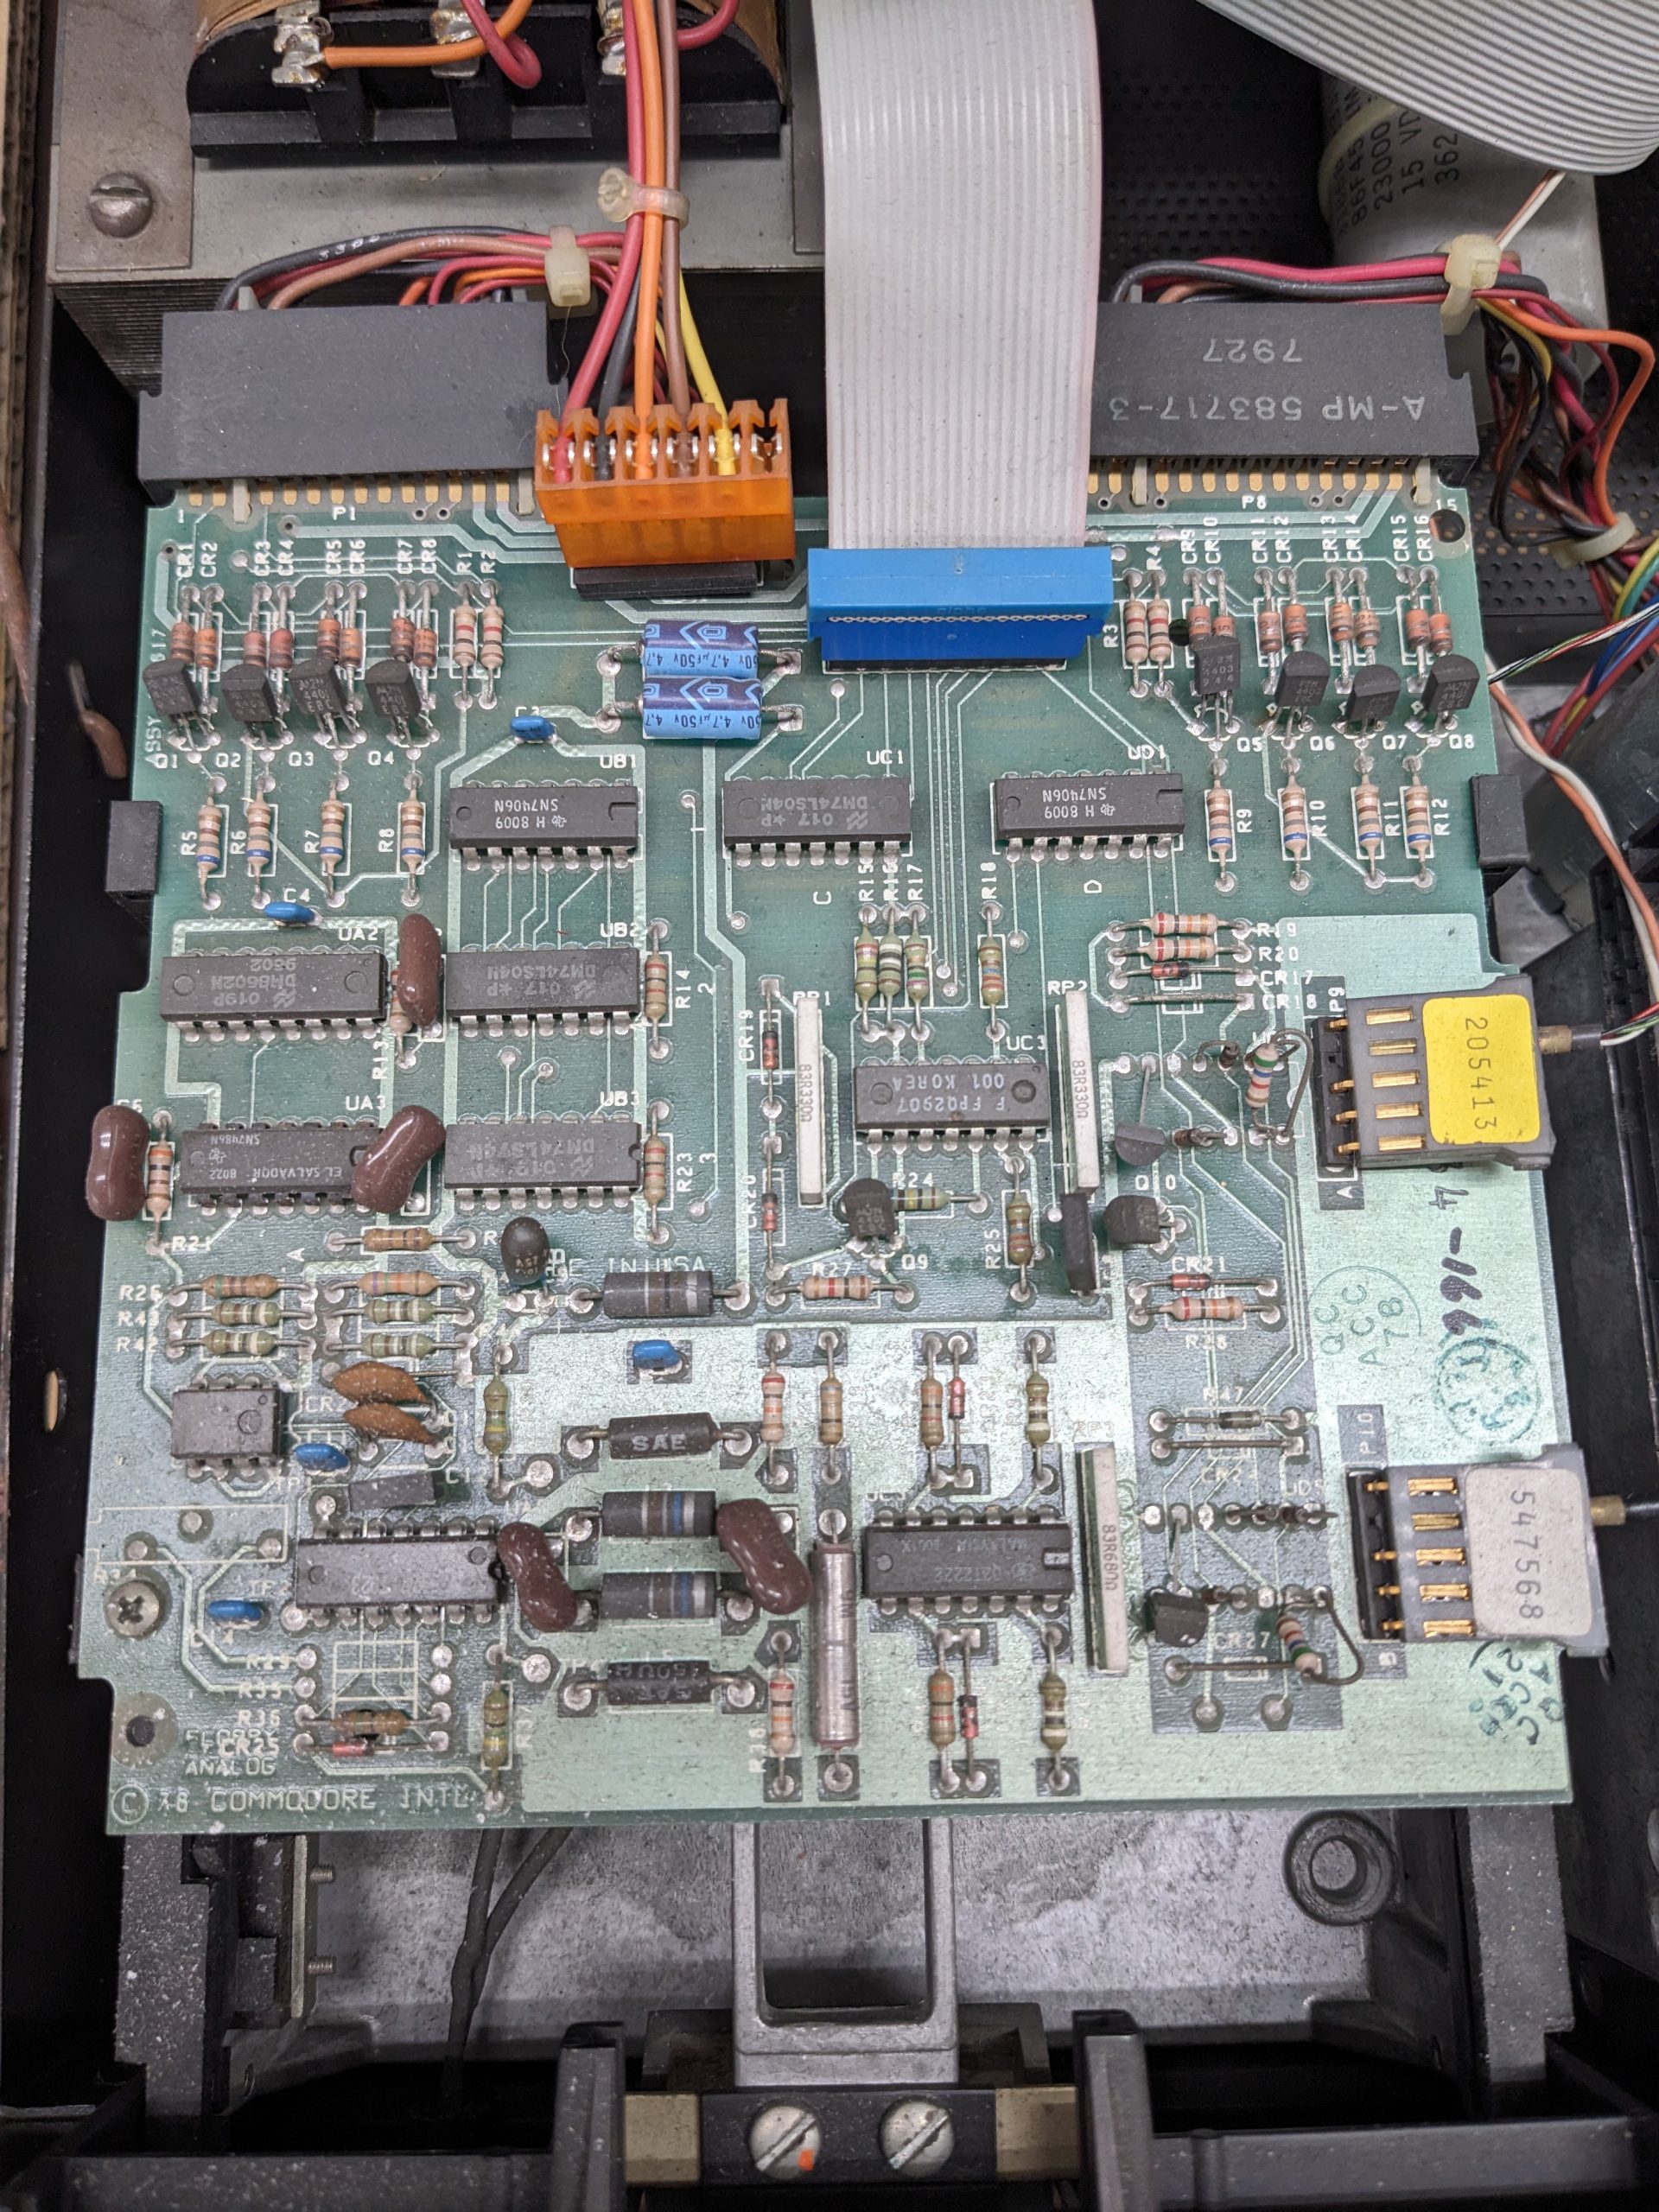
There is a real chance that yours too might emit magic smoke when you turn it on for the first time in decades. So before turning it on, be prepared to turn it off quickly, and then watch it like a hawk. Reacting quickly may prevent shorted tantalum capacitors from bursting. Check the schematics and BOM to see what kind of capacitor to use. (You’ll find all that at https://www.zimmers.net/anonftp/pub/cbm/schematics/drives/old/index.html)
The tantalum capacitor a little left to the center of the board (right over the “MADE” part of “MADE IN USA”) is all black, but hasn’t exploded.
Cleaning
Clean the heads. And if the drive looks really dirty on the inside (the case isn’t exactly dust-proof), do some general cleaning perhaps. It also makes it nicer to work on it!
Maybe move the head position manually a couple times, just to make sure the mechanism is not stuck.
It would probably be best to unplug all connectors and clean them. I did that for most. Before that, the drive would often just stop responding to commands.
PEBKAC #1
Being more accustomed to the Commodore 64’s 1541, I assumed you could just do LOAD “$”,8. Well, you can’t with early versions of BASIC and/or the DOS. You first have to make the drive read in the BAM. This is on the 18th track, first sector. And the drive currently doesn’t even know what track it’s on, so you must initialize it. So assuming that you want to talk to “drive 0”, (the 3040 has two drives, 0 and 1) the first command you execute (in BASIC’s normal interactive mode) is:
OPEN 1,8,15,”I0″ And then: CLOSE 1
(For drive 1 it’s OPEN 1,8,15,”I1″)
If you get an error light, which I did, you probably won’t succeed in getting a directory listing either. There’s an incantation you can use to get the drive’s error message, but it’ll likely just be “READ ERROR”:
10 OPEN 1,8,15 20 INPUT#1,A,B$,C,D 30 PRINT A;B$;C;D 40 CLOSE 1
Fixing the drive speed
The PET drives are belt-driven. The speed is controlled by a potentiometer on a small board attached to the drive. The belt is on the back side, and there is an indicator that helps determine if the drive is running at the right speed. This indicator works if you have lighting that goes on and off at 50 Hz (or 100 Hz or some other multiple) or 60 Hz (or 120, etc.). In the age of LED lighting, that will likely not be the case. If you want to know what frequency your light oscillates at, just use an infrared LED (a red or green LED will likely be fine too, or even other colors) and attach its pins to your oscilloscope probe’s GND and signal (it’s a floating device, so it doesn’t matter which way you connect it). If you hold the LED close to the light source, you should see an oscillating voltage and your oscilloscope will show it’s frequency.
Or… just attach an LED to a microcontroller and turn it on and off at the correct frequency.
Anyway, my drive speed was out of whack but in my case the potentiometer was just dirty perhaps. Moving it left and right a little bit fixed the issue.
Running drive diagnostics
Having logic diagnostics on a floppy isn’t very useful if the floppy drive doesn’t work, so let’s convert it to a wav file that we can play through the datassette drive with a 3.5mm to tape converter inside. Grab cbm_technician_disk.d80 from the aforementioned site, and use VICE’s c1541 program to run this:
Maybe VICE can do it too, but I use a program called prg2wav (https://wav-prg.sourceforge.io/) to convert this to a WAV file. I have some more explanations on how to use this program in this post. Just for my own notes, here’s the command I use to run the program:
If the test goes well, the floppy drive’s LEDs will blink in a random pattern.
Don’t have a datassette either? Well, the program is written in BASIC so you could copy it by hand. ;)
Since they were socketed, I decided to give the 2114 SRAM chips inside the floppy drive another separate test. I made a 2114 RAM tester a couple years ago, but reused the breadboard for something else. So I just took out the 2114 chips one by one and put them in the PET’s VRAM socket. I didn’t see any issues.
PEBKAC #2
I didn’t really know whether my media was good or not, so I put it in a working 1541 drive attached to a C64, formatted it, saved a small program, and took the floppy back to the 3040. This time, the initialize command worked! So I did LOAD “$”,8. The drive said it was loading, but never finished. (Also the LEDs were doing something weird?) After that, I tried formatting the disk again (on the 3040), and it finished without errors! However, LOAD “$”,8 still didn’t work.
At this point I decided to read up on how Commodore floppy drives actually worked. I found a book called “Inside Commodore DOS” and put it on my Kindle and read the first few chapters on the train on my way to work and other places: https://archive.org/details/Inside_Commodore_Dos_1984_Datamost_a
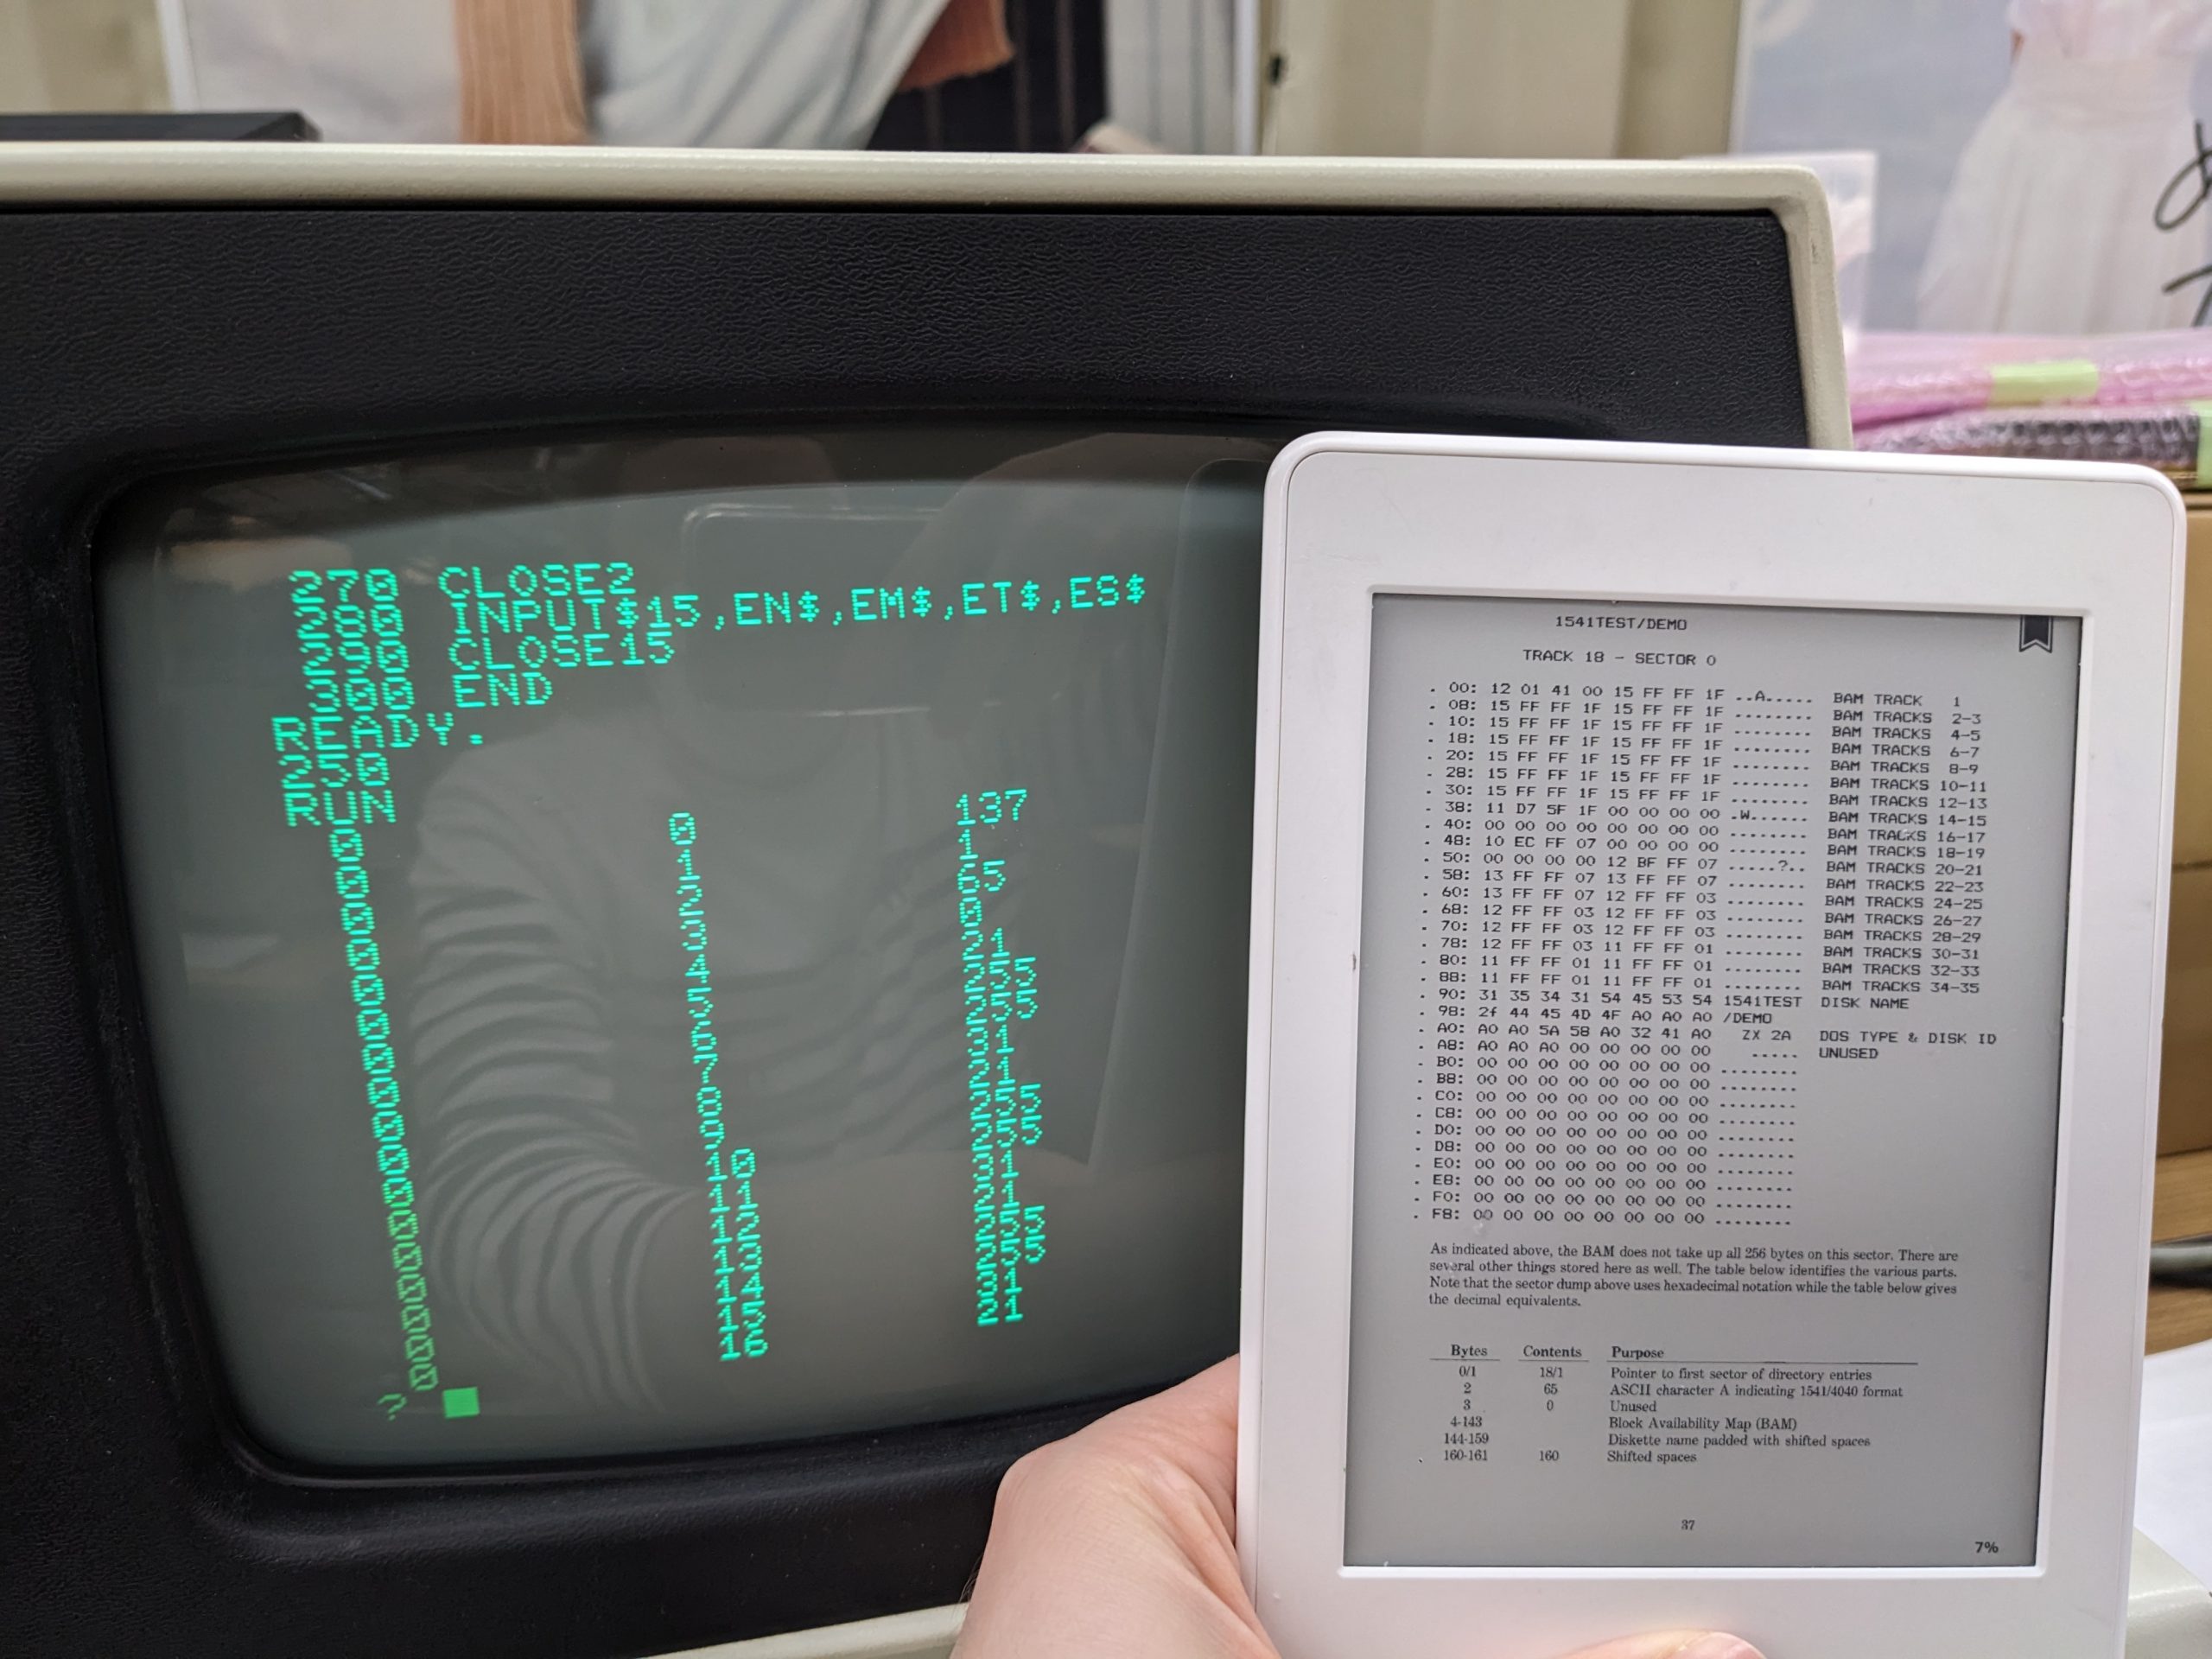
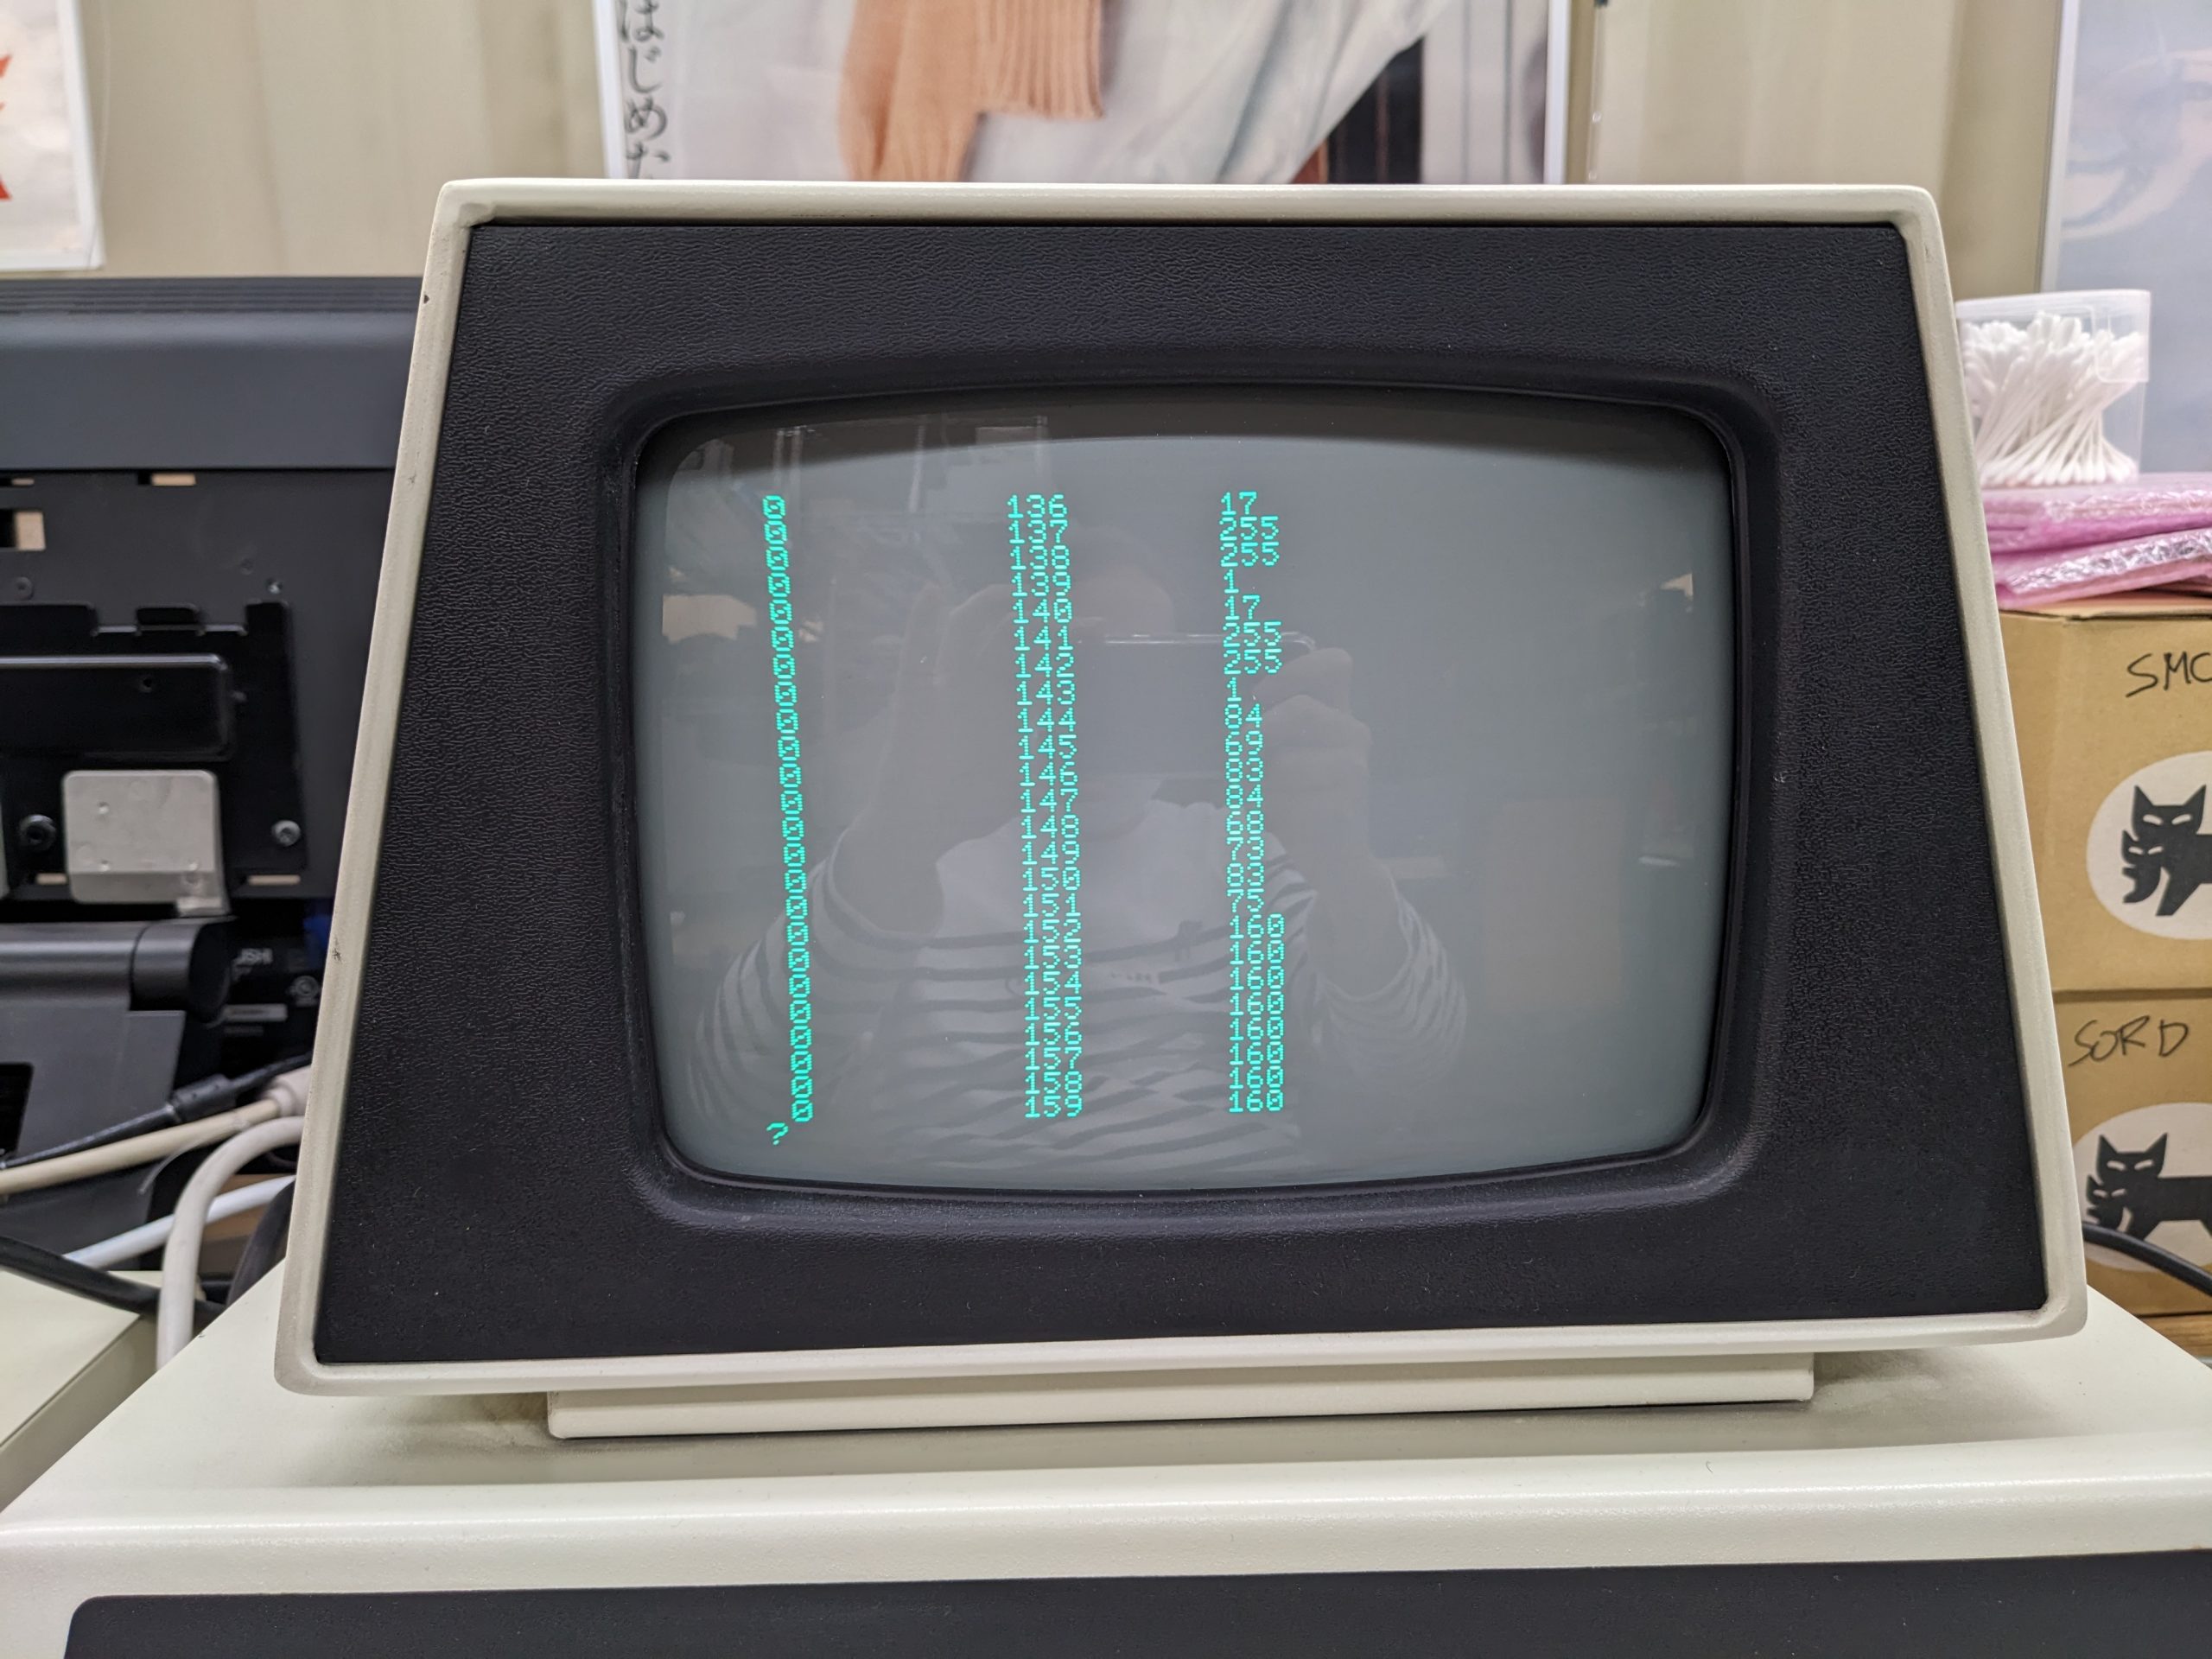
This book is mostly about the 1541, but most things didn’t change much, and it does mention some things specific to older drives as well. It explains how the BAM/filesystem works, and includes short example programs that do ~mid-level sector reads and print the result on the screen. I ran the program in chapter 5.3 (“Block-Read Command (U1)”) on page 74. And to my surprise, I got a decent result! The magic numbers looked plausible and the disk name (specified when formatting) too!
Verifying the first 16, er, 17 bytes. Note that the very first byte is different. But perhaps that’s just due to a DOS version difference? (Also you need to convert decimal to hex in your head.)Bytes 144-159 are the disk label specified when formatting. perl -e ‘printf “%c”, $_ for 84, 69, 83, 84, 68, 73, 83, 75’ => TESTDISK. Yay!
Next, I tried something that was mentioned earlier in the book… On the C64 you usually do LOAD “$”, 8, sure. But you can also do LOAD “$0”,8. The book said that this is a relic from earlier times when there were two drives per drive. And the 3040 obviously is from those earlier times! So the correct commands are…
LOAD “$0”,8 SAVE “0:FILENAME”,8 VERIFY “0:FILENAME”,8 LOAD “0:FILENAME”,8
And guess what, these commands fricking worked! Dammit.
Except the drive sometimes get stuck somehow, but that’s a topic for another day. (It seems like it’s in the communication part. I can turn the drive off and BASIC will return with a DRIVE NOT PRESENT error.)