Cooking Western-Style in Japan

If you’re finding yourself longing for some western dish that is generally not available in Japanese restaurants, perhaps something your mom made when you were child, your only option may be to cook the dish yourself. Maybe this article will help you find the necessary ingredients? If you don’t find your answer here, feel free to leave a comment.

Supermarkets

First of all, if you can’t find what you’re looking for, try a bigger supermarket. If you are in Tokyo, you may have some trouble finding a big one, so here’s a list of supermarket chains that tend to have bigger stores:

  • イトーヨーカドー (Ito Yokado)
  • マルエツ (Maruetsu)
  • ライフ (Life)
  • ダイエー (Daiei)
  • マックスバリュー (Max Value)

In addition, these two places have a strong selection of imported goods and are partially geared towards people buying in bulk:

  • 肉のハナマサ (Niku no Hanamasa)
  • 業務スーパー (Gyoumu Suupaa / Super / Supermarket)

Here are some well-equipped import stores:

  • 成城石井 (Seijou-Ishii)
  • Kaldi Coffee Farm (Weird name, but just a normal store)
  • Lapin (local chain in Matsue, Shimane) has a good selection of imported goods

Stocks

This is a very popular stock for western foods: Ajinomoto Consomme. According to the ingredients it includes both chicken and beef extracts. There are other stocks available, including chicken, beef, and vegetable stocks, but not all supermarkets have all of these. Beef stock feels a bit less common, and vegetable stock almost rare.

Milk products

Milk products are quite pricy in Japan. You can get milk, yoghurt, cream, sour cream, and various types of cheese at most supermarkets. Butter is available, but often sold out. (Reportedly, especially before February 14.) The types of cheese available at supermarkets are as follows:

  • Shredded cheese (practically everywhere — usually imported and consisting of cheddar, gouda, mozzarella) (unless you buy in bulk, expect to pay 100-200 JPY per 100 g)
  • Those wrapped square processed cheese slices (practically everywhere) (about 200 yen for a pack of ~10 slices)
  • Cream cheese:
    • Philadelphia (available at most supermarkets) (about 400 yen for a 200 g pack) (you’ll sometimes find a cheaper, very similar product by メグミルク (Meg-Milk))
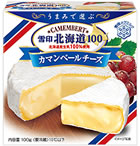
    • Camembert* (available at most supermarkets)
    • Cottage cheese (available at some supermarkets)
    • Mascarpone* (available at some supermarkets)
      * Not sure if these count as cream cheeses
  • Mozzarella (round balls) (available at many supermarkets, but about 300 JPY per 100 g)
  • Parmesan cheese (available at most supermarkets in powder form)
  • Cheese in tiny portions to be eaten as a tsumami (can be quite high-quality)
  • Cheese in small portions to be eaten as a snack (I recommend さけるチーズ (sakeru chiizu))

Bigger supermarkets may sell packets of non-sliced gouda and/or cheddar. For other kinds of cheese, you may have to try an import store or the basement floor of an expensive department store. (Note: you’ll pay about 1000 JPY per 100 g of cheese at the department store.)

By the way, here are the reasons butter is often hard to get (from what I’ve gathered):

  • Milk products are made according to a priority production system:
    milk, cream > cheese, yoghurt > butter
  • Low-fat milk isn’t very popular in Japan

Condiments

Ketchup, mayonnaise and mustard are available, but Japanese mayonnaise is made differently and tastes a bit different. You can get western-style mayonnaise at import shops like 成城石井 (Seijou-Ishii). There are three types of mustard that are widely available in Japan: Japanese mustard (からし, karashi), French Dijon mustard, American yellow mustard. Karashi is similar to wasabi or horseradish in pungency. Ketchup appears to be about the same as everywhere else.

As for vinegar, you will find at least wine vinegar (red and white) and balsamic vinegar. I’ve never seen malt vinegar in shops, but it appears to be available on Amazon.
The most common types of vinegar are 穀物酢 (kokumotsu-su, grain vinegar) and rice vinegar. Grain vinegar is pretty cheap, but I wouldn’t recommend buying it over the slightly more expensive rice vinegar if you intend to use it in food. (Of course, our mileage may vary.)

Oil

  • Olive oil is widely available
  • Vegetable oil is widely available (often rapeseed or sunflower)
  • Flaxseed oil (亜麻仁油) is usually available in bigger supermarkets (very pricy though)

Aromatic vegetables

Onions, scallions, leek, garlic, green peppers, and carrots are all widely available. Celery stalks and leaves are often available, but I’ve never seen celery root. Shallots are rare.

Other vegetables

  • Widely available: broccoli, spinach, cabbage (red cabbage isn’t that widely available), lettuce, tomatoes, eggplant, cucumbers, bell peppers, radish (daikon)
  • If you’re into pumpkins/squashes, Japan has kabocha: green outside, orange inside, both parts being edible. That’s the only type of squash that I’ve seen, but very widely available.
  • Slightly less common: cauliflower (expensive (300 JPY for a small head) in Tokyo, cheap (150+ JPY for a larger head) in Shimane), zucchini (usually not available in winter)
  • Usually not available in supermarkets: Brussels sprout, kale (I’ve seen both though)

Everything else may be difficult to find.

Canned vegetables

The Gyoumu Supermarket generally shines in the canned goods category.

  • Canned tomatoes are widely available, usually for less than 100 JPY
  • Canned corn is widely available (also the only item in this category that has a good chance of not being imported)
  • Canned/glass-jarred olives are often available at supermarkets. You can get them cheapest at the Gyoumu Supermarket.
  • Canned (white) asparagus is often available in supermarkets. Green asparagus is often available fresh, especially in spring. Fresh white asparagus is available sometimes, but a bit pricey
  • Canned/glass-jarred pickled cucumbers (gherkin) are available at many supermarkets, but pretty pricey. Try the Gyoumu Supermarket

Legumes (Beans)

The Gyoumu Supermarket shines here, too.

  • Canned kidney beans are available in most supermarkets. Some supermarkets may have dried beans. Definitely available at the Gyoumu Supermarket
  • Canned chickpeas are slightly less common than kidney beans, but still reasonably available. Definitely available at the Gyoumu Supermarket
  • Lentils are pretty rare. Try Seijou-Ishii and similar supermarkets. Not available at the Gyoumu Supermarket, as far as I know
  • Broad beans are sometimes used in Japanese cooking, and thus sometimes available fresh. Otherwise they may be available dried
  • Normal green beans (いんげん, the long ones) are available frozen at the Gyoumu Supermarket, and sometimes fresh
  • Regular peas are available frozen

Fresh herbs

Most supermarkets with a non-tiny vegetable section will have parsley. If it’s a bigger supermarket, they will probably have other fresh herbs. Basil is the most common. You’ll often find rosemary and sage.

  • Parsley (commonly available)
  • Basil (reasonably commonly available)
  • Mint (if basil is available, mint is probably available too)
  • Rosemary, sage, chervil (available in some stores)

Everything else may be difficult to find, but have a look at SB’s lineup of fresh herbs.

Non-fresh herbs and spices

Most herbs and spices that I’m familiar with are mostly available.
Here are some herbs that might be hard to find in stores: caraway, non-generic varieties of paprika, marjoram. (Try Amazon if you can’t find your favorite herb or spice in the stores.)
Most stores sell herbs and spices in tiny bottles containing 3-10 g of actual product. In the case of paprika, you’re likely to use up the entire bottle for a single meal. If you regularly use a certain herb or spice a lot, you may be better off buying in bulk from Amazon.
For curry mixes, you usually have two choices: Garam Masala and a typical mix that produces the flavor of Japanese curry.

Mushrooms

  • Common mushroom (commonly available, but expensive, though much cheaper here in Shimane)
  • Oyster mushroom (ヒラタケ, hiratake) (commonly available, and not quite as expensive) (also used in Japanese cooking) (never used it)
  • Hen-of-the-woods (舞茸, maitake) (commonly used in Japanese cooking and therefore commonly available and cheap; works well in many western dishes)
  • Porcini are only available in dried packs, and most supermarkets don’t seem to have them

Meat

  • Beef is expensive, and often imported from the US or Australia
  • Pork feels neither expensive nor cheap, and is usually Japanese produce
  • Chicken feels very cheap, and is usually Japanese produce

You can get minced meat of all of the above. Occasionally, you’ll find a supermarket that doesn’t have minced beef. (This seems to be a more common occurrence in Shimane.) The most common type of minced meat is a mix between beef and pork.
Most supermarkets will also sell steaks, but you’ll probably pay 1000 JPY or more for a decent-sized one.
Wiener sausages are available at virtually all supermarkets. Most supermarkets will have a small selection of non-wiener sausages. If you want to eat decent sausages, I recommend the こだわり生フランク (kodawari nama-furanku) from the Gyoumu Supermarket. I think these are probably among the best sausages you can buy in Japan.
Other types of meat may be hard to find, but some supermarkets have mutton now.

Fish

Lots of fish in Japan.
Smoked salmon, canned tuna and canned anchovy are available. Herring is available, but soused herring isn’t. (Justification for this factoid: I know a Japanese guy who loves soused herring.)

Nuts

All nuts that I’m familiar with, except hazelnuts, are available at most supermarkets, though (unless they’re peanuts) usually quite expensive.

Flour

Most supermarkets have only two types of flour: 薄力粉 (hakurikiko) and 強力粉 (kyourikiko). Hakurikiko is cheaper, and is usually used for cakes, cookies, okonomiyaki, and tenpura. Kyourikiko is used for bread. Both are non-whole-wheat. To get whole-wheat, rye, and other types of flour, go to Seijou-Ishii or similar import stores.

Carbs

  • Japanese rice works just fine in western dishes (including risotto)
  • Potatoes are expensive. They’re more used as a vegetable, rather than a source of carbs in Japanese cooking
  • Frozen french fries are available. You can get them much cheaper at the Gyoumu Supermarket than at most other places
  • Pasta is available, but I have a feeling that the cheap stuff tastes a bit odd. ~100 yen per 250 g seems to get you good quality. (I kind of have a feeling that low-quality pasta tends to get some unwanted flavor from its packaging.) Small supermarkets often only have spaghetti or fast-cooking pasta
  • Cornflakes are widely available
  • Oatmeal is starting to appear in store shelves
  • I’ve seen couscous at Kaldi Coffee Farm and Lapin in Matsue
  • Bread is explained in the next section

Bread

Perhaps we’ve come to the most disappointing part of this article. (Note that I’m not trying to be objective in this paragraph.)
White bread that you would toast before eating is ubiquitous. Other kinds of bread will be harder to find. Bread that contains a small percentage of rye is becoming more common these days, but bread with a significant ratio of rye, let alone pure rye bread, is exceedingly rare. There are bakeries in Japan, but if you go into one, you’ll often find that filled bread is way more common than “naked” bread. If you’re lucky, you’ll find something without any fillings, but most will be white bread: baguettes, croissants. Many bakeries will sell something called パン・ド・カンパーニュ (Pain de campagne), which may be quite passable. (It uses sourdough.) If you don’t have an obvious bakery in your vicinity, try some of the chains:

  • Anderson http://www.andersen.co.jp/ is quite okay.
  • Linde (http://www.lindtraud.com/) in Tokyo has pretty good bread.
  • The best bread I’ve had in Japan was from Maison Kayser in Sunshine City in Ikebukuro, Tokyo. However, when I went to check them out (on May 28, 2017), they didn’t have any dark bread for some reason. :(
  • High-quality supermarkets like Seijou-Ishii usually have decent bread too.

By the way, this raisin and walnut stone oven bread tastes very nice and is possibly available at many Aeon stores.

So what to put on your bread? Japan doesn’t have a large selection of spreads, but peanut butter, nutella, (at least) strawberry jam, cheese (see above), and some types of meat are available at most supermarkets. In supermarkets, you’ll often see small Real salami is pretty expensive. Seijou-Ishii and the Gyoumu Supermarket usually sell bruschetta spreads.

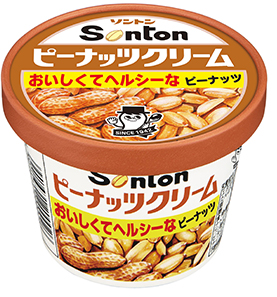
You’ll often see peanut butter and strawberry jam being sold in small containers for about 120 JPY that look like in the image pictured here on the right. This stuff, especially the peanut butter, tastes pretty bad, in my opinion. The cheap price may entice you to buy this, but don’t say I didn’t warn you. :p

CVE (Description) Generator / CVEジェネレーター

https://blog.qiqitori.com/cve_generator/ ← Newest CVE Generator version
https://github.com/qiqitori/cve-generator ← GitHub

I’ve been thinking of creating a small tool that is capable of creating CVE descriptions. The benefit of having such a tool would be:

  • Generating perfect descriptions in other languages without translating manually
  • Predictable (==theoretically, parseable) descriptions
  • High-quality output for people submitting a vulnerability description for the first time

CVE descriptions usually look like this:

Heap-based buffer overflow in the jpc_dec_decodepkt function in jpc_t2dec.c in JasPer 2.0.10 allows remote attackers to have unspecified impact via a crafted image.

This has the following pieces of information:

  • Locality (function and file name) (jpc_t2dec.c, jpc_dec_decodepkt())
  • Software name (JasPer)
  • Software version (2.0.10)
  • Attacker type (remote)
  • Impact (unspecified)
  • Using what? (specially crafted image)

Most CVE descriptions appear to contain no more and no less information than this.

One picture is worth a thousand words, so here’s a screenshot to give you an idea of how this could work:

screenshot_v1

The whole thing works entirely in JavaScript and doesn’t send any data anywhere. The code is currently pretty easy to grok, and probably anything but over-engineered.

To add a language, one would copy one of the existing .js files to create a base. The file name scheme is: cve_generator_VERSION_LANGUAGECODE.js. In these files, you have a large dictionary to translate option values to actual text, which looks like this:

 var tl = {
     "generic_vulnerability": "脆弱性",
     "generic_vulnerabilities": "複数の脆弱性",
     "memory_leak": "メモリリーク",
...

Then you have a couple of functions that are each responsible for creating a small sentence fragment, and one function that adds all these fragments together. These functions differ a bit depending on the grammar of the language in question.

Anyway, this thing probably lacks a lot of features. If you need anything, feel free to leave a comment here or on GitHub, or even send a pull request.

(License: GPLv3, but feel free to copy and paste the base and/or any minor bits for use in entirely unrelated projects (without any restrictions and under any license of your choosing)


以下同じ内容を日本語で書きます。

https://blog.qiqitori.com/cve_generator/ ← 最新のバージョン
https://github.com/qiqitori/cve-generator ← GitHub
スクリーンショットは上記の英文に貼ってあります。

CVE の説明文を「生成」してくれるツールみたいなのほしいと思って、何もあまり考えないで早速作ってみました。
ツール化するメリット:

  • 英語版と日本語版を一気に作れる。もちろん、他の言語も(未実現ですが)
  • 微妙な違いはないため、理論上パースもできるはず
  • 初めて CVE 文章を作る人の役に立つ

さて、CVE の説明文は大体みんなこんな感じです:

Heap-based buffer overflow in the jpc_dec_decodepkt function in jpc_t2dec.c in JasPer 2.0.10 allows remote attackers to have unspecified impact via a crafted image.

この文章に含まれている情報は以下の通りです:

  • ソフトウェア名 (JasPer)
  • ソフトウェアバージョン (2.0.10)
  • 攻撃者の種類 (リモート)
  • 影響 (不特定)
  • 入力方法など (巧妙に細工された画像ファイル)

作成したツールのコードは JavaScript で書かれていて、実行環境はブラウザーで、外部ネットワークアクセスは発生しません。まだ、オーバースペックから程遠いコードだと思います。笑

現在は、新しい言語を追加するのには、既存の .js ファイルを丸ごとコピーして要編集のところを編集するというイメージです。ファイル名は適当に cve_generator_VERSION_言語コード.js に決まっています。これらのファイルの中に、以下のようなオブジェクトを使って翻訳を入れます。

var tl = {
    "generic_vulnerability": "脆弱性",
    "generic_vulnerabilities": "複数の脆弱性",
    "memory_leak": "メモリリーク",
...

そのほかに、小さい文断片を返してくれる短い関数と、これらの関数が返す文断片をつないでちゃんとした文章を作る関数があります。言語によってやるべきことが違っていて、関数の構造もみんな微妙に違うので、あまりにも膨大化しすぎたら管理しづらくなりそうですが、まぁそのかわり開発時間は数時間で済みました。笑

とにかく機能はまだあまりありません。何か欲しいロジックなどありましたらご連絡ください~

ライセンスは、一応 GPLv3 ですが、ぜんぜん違うソフトを作るのに役に立ちそうなものがあったら、ぜひ GPLv3 と関係なく、著作権がないと考えて好きなように摘み取ってください。

松江で無料英会話

こんにちは~!
島根県松江市(または松江の近く)に住んでいない方はこの投稿を読んでも、あまり得することはないかと思います。超ローカルな話で、すみません。(´・ω・`)

さて、今年の2月から松江に住んでいて、引っ越してきてもう3ヶ月くらい経っていますが、友だちはまだ一人もできていないから、軽い英会話とかをしてみたいと思っている方を募集しています!

ちなみに私は28歳の男性です。
趣味は、プログラミング、料理作り、ピアノ、サイクリングなどです。
タバコ恐怖症なので、喫煙者は、申し訳ありません。。。
(禁煙の)喫茶店とかでできたら、いいなぁと思います。

日本語は結構できますので、文法がわからない時など、日本語で説明するのも可能だと思います!

無償なので、時間などについては、ご希望に沿えない場合があります。。。

興味のある方はコメントをください!コメントは、私が読んで承認してからでないと公開されませんので、もし公開してほしくない場合、コメントの中にその旨を書いてくださいね~!

一応ジモティーにも載せてみます。。。

どうぞよろしくお願いいたします!^^

Living in Matsue (And/Or: Living in the Japanese Countryside, Living at Leopalace, Moving in Japan on the Cheap)

About 2.5 months ago, I moved away from Tokyo (Kawasaki actually). I now live in Matsue, Shimane prefecture. Matsue is the prefecture capital of Shimane, and is known for being the city that Matsumoto Yukihiro (the creator of the Ruby programming language) lives in, and for the sunset on Lake Shinjiko (宍道湖).

Update 2017-05-11: Matsumoto Yukihiro published an article on Medium (Japanese) shortly after I posted this one explaining his reasons for moving here.

Leopalace

Back in Kawasaki, I lived in a shared house. Now, I live in a Leopalace apartment. Leopalace apartments are (usually?) furnished and almost ready to live in. There’s an AC, a fridge, microwave, small desk, various closets (I like the one under my bed, real room saver). You will still need a futon, kitchenware, clothes, towels, toilet paper.

In Kawasaki, my rent was about 63,000 JPY per month. Now it’s around 53,000 JPY, and I have a lot more space, plus my own kitchen and bathroom. (I also have to pay for electricity, water, and gas however.) Leopalace in Matsue has much cheaper places too, but I prefer newer buildings with heat insulation and soundproofing. (Also, if you do not necessarily need a furnished apartment, you can find much cheaper places.) My building is from 2002, and seems to have pretty decent insulation. (I haven’t had to use my air conditioner in over a month.) You may have heard that Leopalace buildings have poor soundproofing, but that’s not really the case for my apartment at least. I can sort of hear my upstairs neighbor’s washing machine and (sometimes) phone vibrations, but no music or talking.

Working in Shimane

So how do you get a job in Shimane? Well, it turns out that Shimane has a lot of IT companies, and the prefectural government is pretty proactive about recruiting new people. I went to this event: GO島根!ITエンジニア転職フェア (held in Tokyo), talked to a dozen companies, and ended up applying at a handful, getting offered a job at two, and (obviously) taking only one. The event organizers use the label “UI-turn” (presumably from “UI” and “U-turn”) for the act of going (back in many cases) from Tokyo to Shimane for work. (Update 2017-06-20: it doesn’t appear to have anything to do with “UI” as in “user interface”. It’s just U-turn and inbound? turn.)

There’s a small problem with these companies: they’re mostly headquartered in Tokyo, so it’ll often feel like working remotely and you’ll probably be talking to people you’ve (almost) never met before, every day. Remember: communication can be pretty tough at the office, even when nobody’s working remotely. Having remote workers makes communication even more challenging. As with all things in life: don’t expect anyone to be an expert at handling remote workers, even if they seem like they should have a lot of experience.

Cycling around Matsue

I really like climbing mountains and riding bikes, and Matsue is pretty good for that. There’s a train line (Ichibata Line) here that allows you to bring your bicycle on the train without taking it apart and packing it in a bag, like you have to do at other train lines. Let me just quickly go off on a tangent: if you need a cheap bicycle that performs pretty well, I recommend giving ドンキホーテ (Don Quijote) a… shot. (Originally no pun intended.) Mine weighs about 12 kg and I bought it at Don Quijote for about 35,000 JPY. (Also the most expensive (non-electric) bicycle they had on offer.) Perhaps you don’t get super-high-quality components, but nothing too shabby, either. I had to replace my brake pads a bit sooner than expected, and my rear tire after about two years (which may be a bit out of the ordinary), but everything else is holding up pretty well. Note: I weigh about 65 kg, so your mileage (originally no pun intended) may vary.

Anyway, I take the bicycle to work, and my commute is about 2.2 km, and there’s an altitude difference of about 60 m. And that’s still a hundred times nicer than taking a Tokyo train during rush-hour. :P

Moving from Kawasaki to Matsue

When moving, your bicycle could cost you a lot. However, if you go to a local bike shop, ask if they have any boxes left that might fit your bicycle, and then pay them (I paid 1,000 yen) to take your bicycle apart and put it in the box (they just had to take off the front wheel in my case), you will probably save money. You’ll be able to send it using ヤマト便 (Yamato-bin), and it probably won’t cost a lot. I had several boxes, plus the boxed bicycle, and a boxed Clavinova digital piano (two boxes), and paid just a bit more than 20,000 JPY in total, which isn’t much for a distance over 800 km. (Note: The prefectural government is likely to reimburse your relocation costs, up to (currently) 100,000 JPY.)

Some friends at the shared house helped me pack the Clavinova. Separating the actual piano from the stand wasn’t that hard actually. Packing involved building two huge boxes out of smaller boxes to fit in the piano and the stand, and putting in a lot of cushioning. (We put my futon in there, and several blankets.) Don’t let anything poke out, such as the pedals, the feet, or the headphone holder. Take everything off and put these things in a separate bag. Putting the thing back together alone is pretty tough, so I contacted a local 便利屋 (benriya), and had a guy come over for a bit more than an hour for about 4,000 JPY. These things don’t have fixed prices, so if you like negotiating you can probably get a better deal. Make sure you put your screws in separate (labeled) plastic bags! Put effort into remembering how you disassembled everything.

Living in Matsue

Matsue has great soba (Izumo is right next to Matsue, and is famous for Izumo soba). Matsue also has Shimane University, and university towns generally, including Matsue, have lots of places to eat and karaoke. (I’ll probably post an article about the restaurants I’ve sampled here sometime in the near future.)

The only thing that doesn’t work out so well is the fact that it’s pretty lonely. There are only four people at my company’s Matsue office, and I’m perhaps a bit too old to have fun with university students, and there don’t really seem to be a lot of people my age (28). There seem to be Ruby-themed events, so maybe I’ll try joining one of those at some point. Also, Osaka and especially Hiroshima are a lot closer than from Tokyo. Unfortunately there is no Shinkansen, and the train system is a bit… useless? (Think one train per hour. Also Hiroshima is just ~180 km away, but the direct train takes about seven hours. Going to Okayama and then taking the Shinkansen is a lot faster but much more expensive.) All this means that people take cars and/or highway buses. From Matsue to Hiroshima the bus is about 3800 JPY, and takes only about three hours. I’ve even taken the highway bus to Tokyo a couple of times. (The normal way to get to Tokyo would involve taking a plane from the nearby airports (Izumo or Yonago).)

Izumo has a very famous shrine, the 出雲大社 (Izumo Taisha), and the neighboring prefecture (Tottori; the border is about 20 km to the east of Matsue), has several interesting spots worth visiting too: a port that harbors a lot of fishing vessels and even a regular connection to Korea and Russia: 境港 (Sakaiminato), the Tottori sand dunes (鳥取砂丘, Tottori Sakyuu), and a famous mountain called 大山 (Daisen). (Japan has a lot of mountains called 大山. The one in Kanagawa is a nice day trip from Tokyo, but the kanji reading is Ooyama.)

Tシャツをデザインしてみました

昔からTシャツが好きですが、最近、自分でデザインしてみてもいいのでは?と思うようになっ(てしまいまし?)た。
第一成果物はこちらです: ハッカーのおそれあり

ハッカーのおそれあり

第二成果物も出しました: マジレス乙

I’ve decided to start creating t-shirts. They’ll mostly be in Japanese though, and it seems like this site doesn’t do international deliveries. :< I wonder if it would be worth it to sell Japanese t-shirts on e.g. American services…

Blog (and other Qiqitori sites) now accessible via HTTPS

Thanks to Let’s Encrypt, this blog and other sites under the Qiqitori domain are now accessible via HTTPS.

I used to have HTTPS accessibility a couple years ago, but had to open up port 443 for other purposes (circumventing a work firewall). I’ve long left that workplace and since Let’s Encrypt SSL certificates are free, things are back in place now. I’m about one year late to jump on the Let’s Encrypt bandwagon, but that’s mostly because I try to avoid being an early adopter sometimes.

Getting this to work was a whole lot easier than assumed:

nano /etc/apt/sources.list
# insert:
deb http://ftp.debian.org/debian jessie-backports main
# save and exit editor
apt-get update
apt-get install python-certbot-apache -t jessie-backports

# easy option; probably doesn't require manual config editing if your config is straightforward:
certbot --apache
 
# or below command is for people who are familiar with the process (perhaps after having added the first two subdomains):
certbot --apache certonly --domains subdomain.qiqitori.com # requires manual config editing

Don’t worry, the only thing (as far as I can tell) that certbot is doing to your config is change the paths to the SSL certiticate files. You’ll also be asked which file to edit. So maybe just backup your config file, try the automatic command first and then inspect.

One more thing: this blog is running on WordPress, and apparently image tags (with their src attribute) seem to be hard-linked in the database. I don’t have a lot of articles with images, so I thought I’d just try to fix them manually:

select id from wp_posts where post_status='publish' and post_content like '%src="http://blog.%';

This yielded only four IDs, which I then fixed in the normal post editor (change from the “Visual” tab to the “Text” tab) in the admin interface. If you have internal links:

select id from wp_posts where post_status='publish' and post_content like '%href="http://blog.%';

Rather than changing ‘http://’ to ‘https://’, you might want to use ‘//’, which is protocol-agnostic and chooses whatever the current page was loaded over.

Hands-free Scrolling Of Sheet Music With Makey Makey And The Piano’s Middle Pedal

It’s always been a bit awkward for me to play from sheet music that is being displayed on a laptop on top of the piano. I’ve been doing this for a long time, but advancing to the next page is pretty inconvenient. The other day however, I put two and two together and came up with a solution.

DSC02034sFor Christmas last year, I got something called “Makey Makey”, a small printed circuit board that acts as a (USB) keyboard (or mouse). You attach two cables to the board, one to ground and the other to a “pin” on the circuit board. When you create a circuit by e.g. letting the other ends of these cables touch one another, a key stroke or click (depending on the selected pin) is sent to the computer. The board has left, right, up, and down, as well as space and click, though if I remember correctly, you can get it to output other key codes too. The idea is that you can use anything to complete the circuit: bananas, Play-Doh, water, or your own body.

Maybe check out this video to get a better idea:

DSC02035sDSC02039sSo when playing the piano, your feet, especially your left foot, aren’t very busy. You may have three pedals, but only need one all the time. So can we maybe use the middle pedal to advance our score? Yes, we can! My Clavinova has pedals that are made of metal. (This probably contributed to my idea a bit.) All you have to do is attach one cable from ground on the circuit board to your body (my belt buckle is made of metal and touches my skin). The other cable is attached to the middle pedal. (The cables that come with the kit have alligator clips, which makes this very easy.) Now just take off your left sock (or wear a sock with a hole in it :p). Awesome, by touching the middle pedal, you can scroll down. If you’re lucky, that’s the end of it. But in my case, the other pedals scrolled down too! Apparently my piano’s pedals are all connected to another. Hrm.

DSC02037sDSC02038sAnd that’s where you do not give up, but see how you might be able to MacGyver the situation. If you e.g. have sticky tape and a coin, that would work. I didn’t have any tape, but I had plastic wrap and aluminum foil. I first wrapped the pedal with the plastic wrap for electrical insulation, and wrapped the result with the aluminum foil. Then I attached the alligator clip to the aluminum foil, and everything works as planned. Make sure to make a thick bulb of aluminum foil to attach the alligator clip to. Otherwise the alligator clip will just cut through the foil.

There are times when you would also like to be able to scroll back up. I haven’t implemented that yet, but it wouldn’t be hard to divide the middle pedal into an up button and a down button depending on where it was touched.

Using Rails Routes Right After Startup

In a new Rails application I am developing at the moment, I have a background job that kicks in every few minutes that may need to send emails to users. This background job is started off in config/initializers/start_something.rb. I had multiple problems with this, but the main one is described in the title of this blog post.

First of all, I originally used FooMailer.foo_email(foo, bar).deliver_later. This would just silently do nothing. Mails just didn’t work. Nothing in /var/mail/maillog either. Drop the _later, and you get a stack trace and finally know why emails aren’t being sent: there is a problem rendering the template, in my case, link_to and url_for weren’t working.

The second problem is the main problem. You get a long stack trace like this:

from /home/.../.rvm/gems/ruby-2.3.0/gems/actionpack-5.0.0.1/lib/action_dispatch/routing/route_set.rb:629:in `generate'
from /home/.../.rvm/gems/ruby-2.3.0/gems/actionpack-5.0.0.1/lib/action_dispatch/routing/route_set.rb:660:in `generate'
from /home/.../.rvm/gems/ruby-2.3.0/gems/actionpack-5.0.0.1/lib/action_dispatch/routing/route_set.rb:707:in `url_for'
from /home/.../.rvm/gems/ruby-2.3.0/gems/actionpack-5.0.0.1/lib/action_dispatch/routing/url_for.rb:172:in `url_for'
from /home/.../.rvm/gems/ruby-2.3.0/gems/actionview-5.0.0.1/lib/action_view/routing_url_for.rb:90:in `url_for'
from /home/.../.rvm/gems/ruby-2.3.0/gems/actionview-5.0.0.1/lib/action_view/helpers/url_helper.rb:196:in `link_to'
from /home/.../kifu-kun/kifukun/app/views/..._mailer/..._email.html.erb:16:in `_app_views_..._mailer_..._html_erb__3955141667319229348_25724800'

And if you place <% byebug %> right before that line 16 in the template, and copy and paste the link_to line into the debugger, you get something like:

*** ActionController::UrlGenerationError Exception: No route matches {:action=>"...", :controller=>"...", :id=>...}

What? After you double and triple-checked the syntax and names of everything, you maybe decide to check the output of Rails.application.routes.routes:

#<ActionDispatch::Journey::Routes:0x00000004a5d940 @routes=[], @ast=nil, @anchored_routes=[], @custom_routes=[], @simulator=nil>

Um, that looks very empty! No routes? (Normally you get a couple screenfuls of stuff.) As stated earlier, we’re using a config/initializers/start….rb file, and I suspected that the routes just aren’t available yet at this point.

Rails.application.config.after_initialize do
  if defined?(Rails::Server) # don't perform job when running rails c
    FooJob.perform_now
  end
end

Sorry, tangent: this job is running every two minutes, so it performs itself later at the end of the perform method:

FooJob.set(wait: 2.minutes).perform_later # why does self. not work?

Yeah, self.set(…).perform_later doesn’t seem to work, so just use the full class name. (There are cron gems around, but I opted to skip those to cut down on dependencies. And that’s what got me into this mess. :p)

And we’re back to our after_initialize thing. I found this page titled “Rails initialization and configuration order” and thought stuff run here would be able to take advantage of most or all of Rails’ capabilities. Well, it turns out that routes are special in that regard. Here’s something I found after searching for a while: “Rails initializer that runs *after* routes are loaded?” So the answer to my problem is:

Rails.application.config.after_initialize do
  if defined?(Rails::Server) # don't perform job when running rails c
    Rails.application.reload_routes!
    FooJob.perform_now
  end
end

The third problem is really simple. This is the message:

*** ArgumentError Exception: Missing host to link to! Please provide the :host parameter, set default_url_options[:host], or set :only_path to true

That’s a pretty clear message. In other words, you just have to add (e.g.) host: ‘example.com’ (or something from the config) to the (perhaps implicit) options hash ({controller: ‘…’, action: ‘…’}) and you’re set.

Getting a Driver’s License in Japan With 合宿免許 (Gasshuku Menkyo)

I’ve often felt a bit silly for not having a driver’s license, and since I don’t really have much to do at the moment, I decided to get one. In Japan, they have something called 合宿免許, which meansLawson 運転免許 something like “boarding school for driver’s license” or maybe “driver’s license camp”. Long story short, I decided to go to one of these. You can find schools just by googling for 合宿免許, or by going to a convenience store (at least Lawson or Family Mart) and picking up a free brochure (pictured). There is a lot of choice… Some websites show you the ratio between female and male students, some schools offer free onsen (mine had this) or sightseeing trips, some ban alcohol and smoking on the premises, etc.

Some schools maybe don’t have their housing directly on the premises. I would recommend against staying at a hotel or anywhere too far from the actual school, or else you might either be commuting a lot or be trapped at the school between lessons. (I sometimes had three hours between lessons.)

You should also check if the school will make you pay more if for whatever reason you do not manage to graduate within the standard time frame of ~two weeks. My school guaranteed no extra charges for a maximum of five days. Most people manage to get by with zero or one extra day, but one of us used six days, who then had to pay about 12,000 JPY (IIRC) for one extra day. There may also be an age limit (30 or so), after which you do not get any free extra days.

Driving courseI ended up going to the 柿崎自動車学校 (Kakizaki Jidousha Gakkou / Kakizaki Driving School) in Jouetsu, Niigata prefecture, mostly based on the fact that it was the cheapest and that my first choice (in Tottori prefecture) didn’t have any availability on the day I wanted to enrol and also only pays for the night-time bus (rather than the train) for students fruntenmenkyo_no_tabiom Tokyo. The train wouldn’t get you there by 11 am anyway, which appears to be the time enrolment usually starts. (All schools that I looked at “pay” for your traveling expenses.) By the way, I booked this whole thing only two days before my enrolment day. During peak months, this might be a bit difficult, but it worked for me in November. (Payment was via convenience store.)

Here is an important bit: You do not get your license from the school. After graduation, you have to take a theoretical exam at your local 免許センター (menkyo center / licensing center), and this costs ~1,750 JPY for the exam itself and another ~2,050 JPY to get your license issued if you pass the exam. (If you do not pass the exam right away, you have to pay the 1,750 JPY multiple times. Also: ドンマイ!)

The price depends on the season. I went from November 7 to November 22, which is in the cheapest season as far as I know. During peak seasons, the total price could be 50% more expensive. There are a lot of students doing this in the summer and winter vacation weeks/months. I paid 226,800 JPY for an MT license program, single room, three (delicious) meals included every day (two meals on the first and last days). The only thing not included was the examination fee for the 仮免許 (karimenkyo / learner’s permit), but that was maybe 2,000 JPY. There is no fee for the practical exam that you have to take to graduate from the driving school. Also, you shouldn’t attempt to do this if you don’t speak and understand written and spoken Japanese pretty well.

kakizaki_practice_carsThe room included a shower and bath tub, a toilet, a desk, a TV, a fridge, and a well-performing air conditioner. Hair driers were available, but maybe not enough for everyone during the peak seasons. Internet access was via wireless LAN, which got a bit wonky at one point (for everyone). (They fixed it when I reported this at the reception.) Here are a few problems with the room:

  • Cigarette smoke from the neighboring room may enter your room from underneath the connecting door. If this happens, get some tape from the staff and tape it off.
  • Similarly, the connecting door isn’t very sound-proof, so better bring headphones if you want to listen to music
  • The pillow is really thick, hard, and heavy. I’d guess it weighs about 2 kg or so? I doubt it’s very good for you. I ended up using an unused section of my blanket as my pillow.

Textbooks were included in the price. There were four books: one explaining all the rules of driving, one explaining how to actually drive, a short booklet explaining CPR and how to use AEDs, and a booklet with lots of practice exam questions. By the way, all the books (and the exam at the 免許センター) had furigana. (They don’t use particularly complicated language though.) The practice cars were Toyota Corollas.

SchedulesThe learning program is split into two sections: the one before you get the 仮免許 and the one after. Both are about the same length, one week. Both sections have theoretical lessons and practical driving lessons. However, without the 仮免許, you are not allowed on the streets, so you will be practicing on the driving course. My second week was much busier than the first week. If you want to do sightseeing, the first week might be better, but I guess this might depend on the school.

The 仮免許 exam consists of a driving part and a written test. The driving part will be done on the driving course. You’ll just be driving around the course, following directions to turn here and there, going over a (fake, of course) railroad crossing, stop near the top of a slope, and drive over a narrow, S-shaped road. The written test has fifty true-or-false questions. You are allowed to make five mistakes. You are forced to take a few practice exams in the lead-up to this, so you’ll likely be fine. If you don’t manage on the first attempt: ドンマイ!

Most instructors are nice, but some can sometimes be a bit scary when they point out your mistakes. At least at my school, it felt like I got a different instructor every time in the first week, with a few repeats in the second week. There were two instructors who I thought were a bit scary, and the scarier of these two (despite the fact that I only had him once, sometime in the first week) ended up being the examiner on my last day. And he was totally fine during the exam and even praised me a bit.

Side note: I’d managed to lift his (and others’) spirits a bit by wearing this shirt. (Edit: looks like it’s no longer available. It had 仮免ライダー printed on it.) Expensive for something that can only be worn a couple times, but worth it. :D I wore it at the 免許センター as well, but it actually snowed on that November 24, in Yokohama! So it was pretty cold and I couldn’t show it off much.

Most people in the program were in their twenties, but there were some 17/18-year-olds and some over-30s and some over-40s. Many aren’t from Tokyo, but I managed to add some new people to my LINE contacts list. The whole experience is also very 寂しい in some ways: You get to like someone, they graduate before you, and you’re left all alone. :(

I don’t want to spoil too much in case you are planning on doing this, so I’m going to leave it at this for now. But if you have any questions, feel free to post a comment and I’ll get back to you.

If you decide to go to the 柿崎自動車学校, I could in theory hand you a “referral” card that would get both of us? (IIRC) 5,000 JPY, but 5,000 JPY is a pretty small sum compared to the cost of this kind of thing. If you live in or near Tokyo, you might want to consider it though!

One more thing: when you pass the test at the 免許センター, you and the others will probably be ushered into a hall and be asked if you want to support your prefecture’s 交通安全協会 (kōtsū anzen kyōkai / traffic safety association) for a fee of 1,500 JPY (or was it 2,500 JPY?) (your 会員証 will have the same validity as your license for that amount, so no yearly fees). I would have liked to know this beforehand, because you don’t really have much time to decide. (I decided to join in the last moment.) However, it seems that this is a rather inefficient organization, with only 20% of the money being used to actually promote traffic safety, and the rest to pay employees’ salaries, according to this article. There are some other merits beside helping them set up traffic safety booths (this is what I’m imagining anyway):

  • Child safety seat rentals (don’t know how that works)
  • If you get into an accident and have to stay hospitalized for longer than 30 days, you will be paid 300,000 JPY (IIRC)

By the way, I managed the whole thing without owning an 印鑑 (inkan / signature stamp). The written instructions say that you will need a stamp, but on the phone they said that a signature will do. I was a bit worried about that when I arrived at the driving school without a stamp, but it turned out all right.